Table of Contents
-
Presets
- Prey 2017
- Dishonored 2
- The Division
- Dark Souls III
- Spec Ops The Line
- Tomb Raider 2013
- Rise of The Tomb Raider
- Hellblade Senua’s Sacrifice
- BioShock/BioShock Remastered
- Wiki Meta Talk Space
Installing and Running Reshade
-
First go to https://reshade.me/
-
Then click download.
-
Run Reshade Setup Exe
-
Click Select Game. Find the Game .exe file that you want to install ReShade for.
-
Your game will likely use Direct x11. So select Direct3d 10+
-
Select the Shaders you want to install. I recommend installing only the following for starting off:
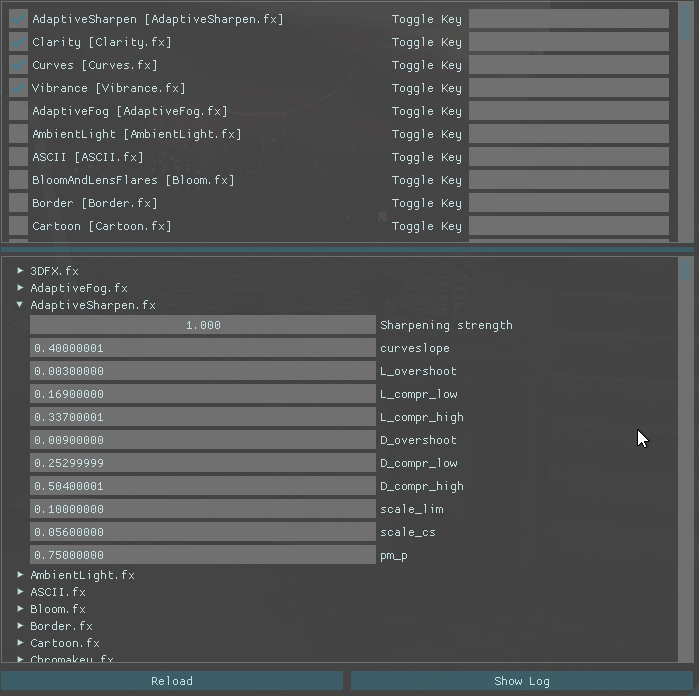
AdaptiveSharpen
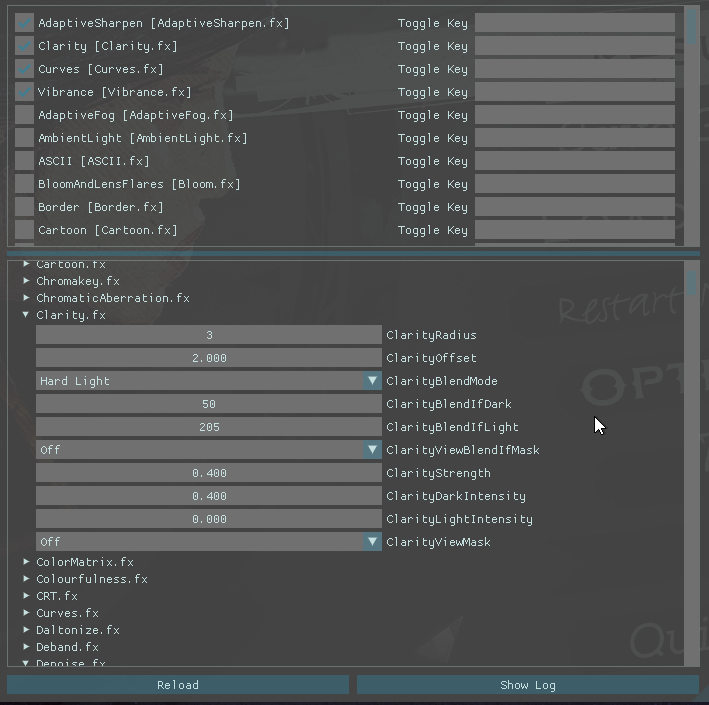
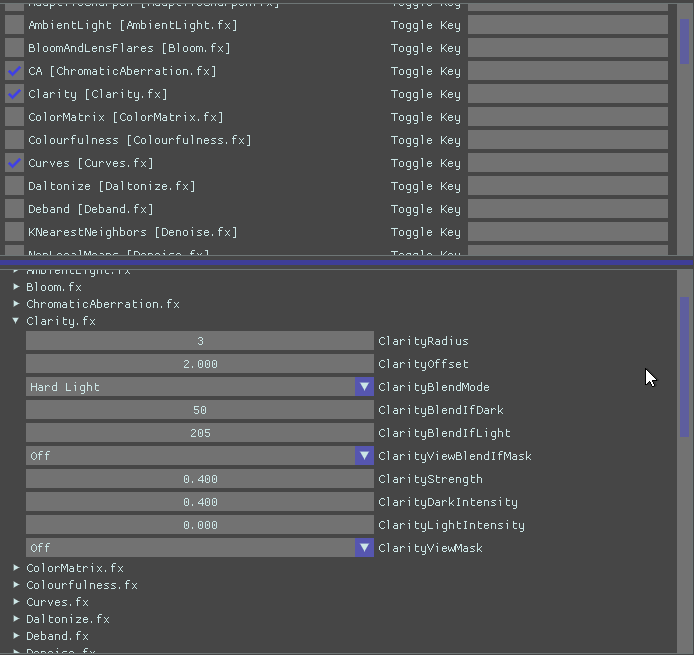
Clarity
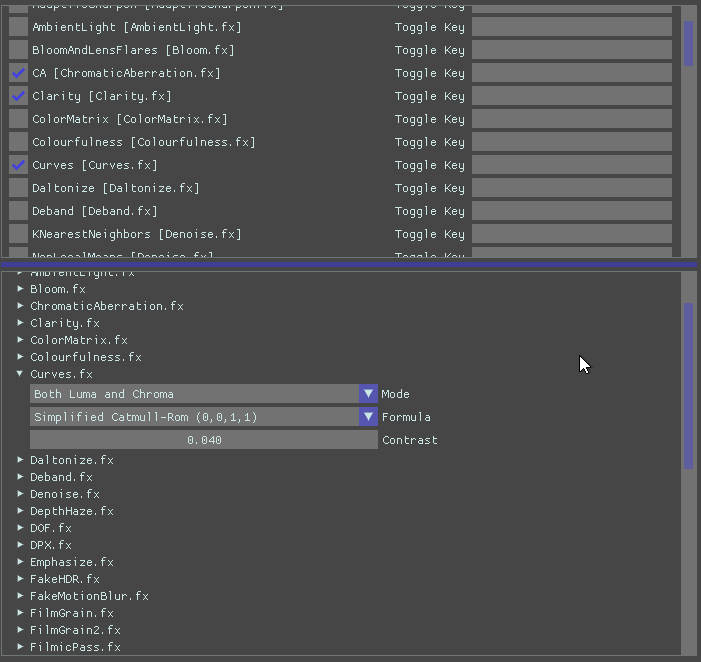
Curves
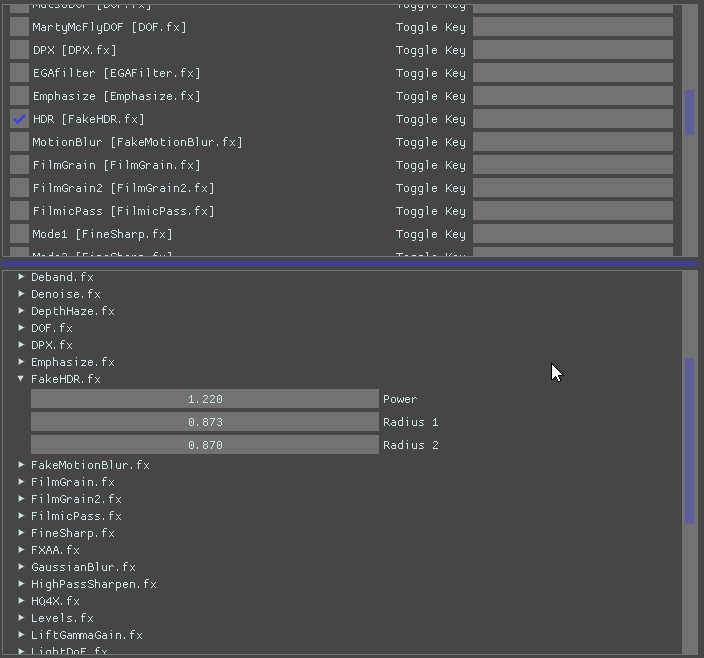
FakeHDR
HighPassSharpen
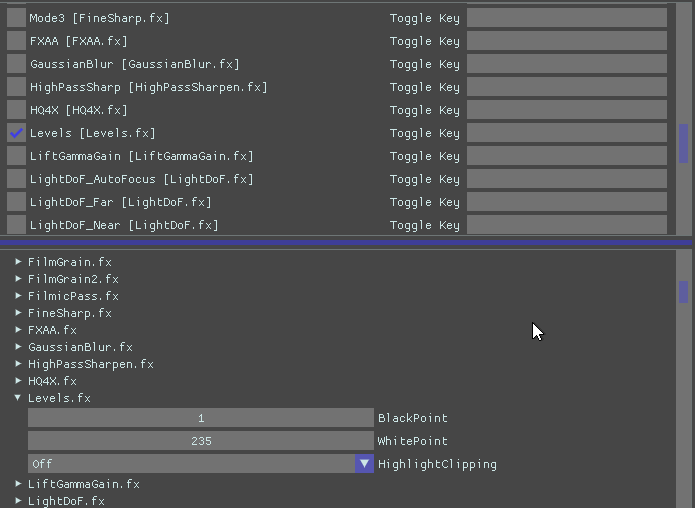
Levels
LumaSharpen
Click ok.
Launch the game.
Get into the actually game.
Press Shift+F2
Press the plus sign
Name the ReShade Preset
Click the boxes of the Shaders you want to apply
Click Apply
Then adjust.
Adjusting the numbers you click and drag with the mouse left to decrease, right to increase.
The Rules for sharing and Posting in the Wiki
Here is the deal with the way presets made by users will be shared on this thread, if you want to use them you’ll need to have ReShade 3.1 at least and install it for the game.
Must have installed or made the preset.
Must post screenshot of before and after reshade with the preset.
Instructions on how to share presets you make with 3.1 [writing it out]
List what shaders you activated for the preset
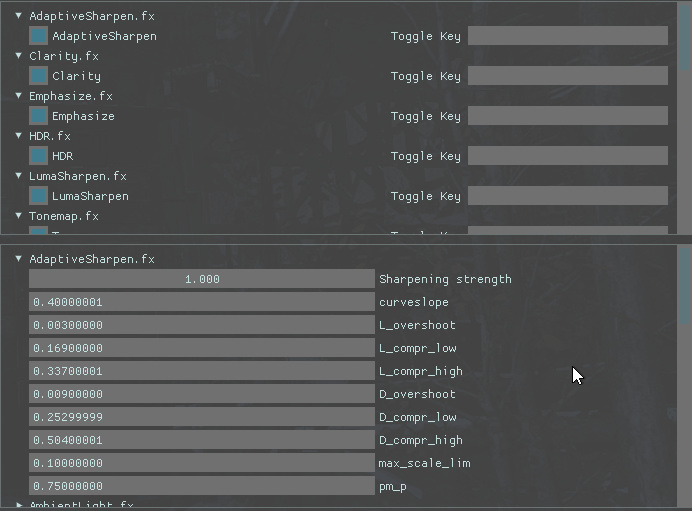
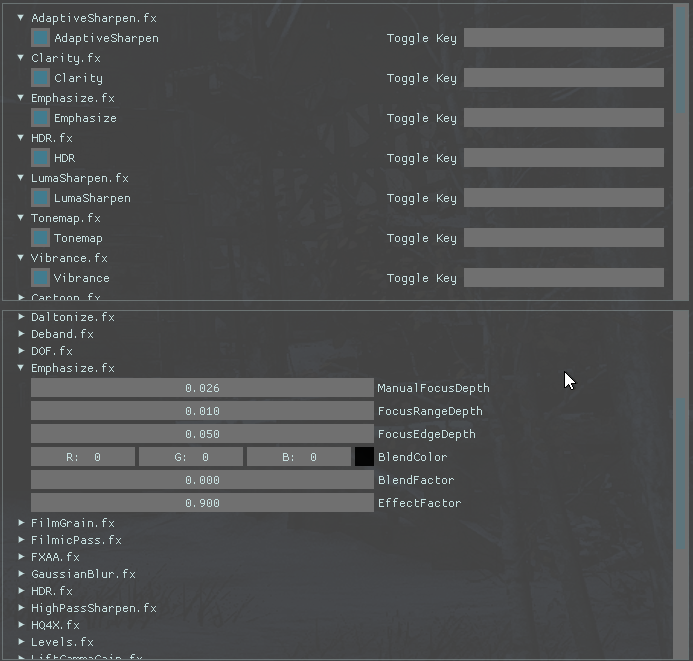
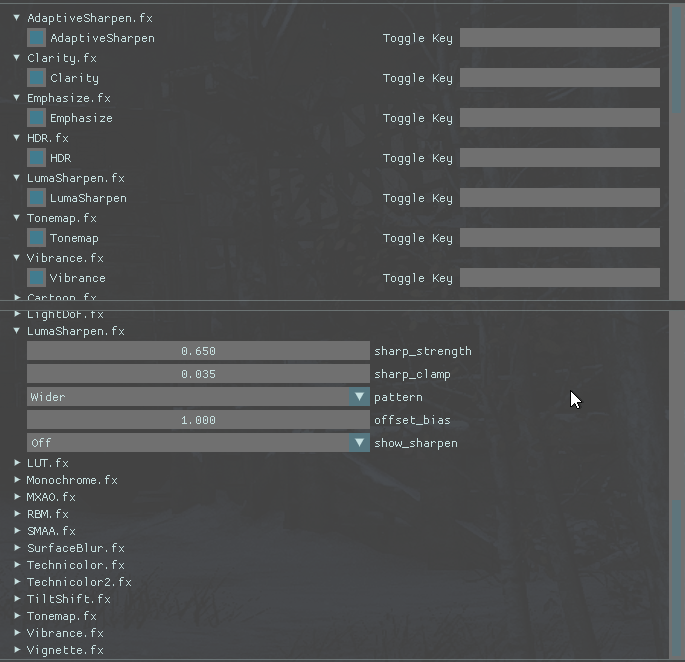
Post screenshot of your preset settings
And put your name under the title of the game you made the preset for.
Prey 2017
wolfleben-
Curves
-
FakeHDR
-
Levels
-
Sepia
Before ReShade
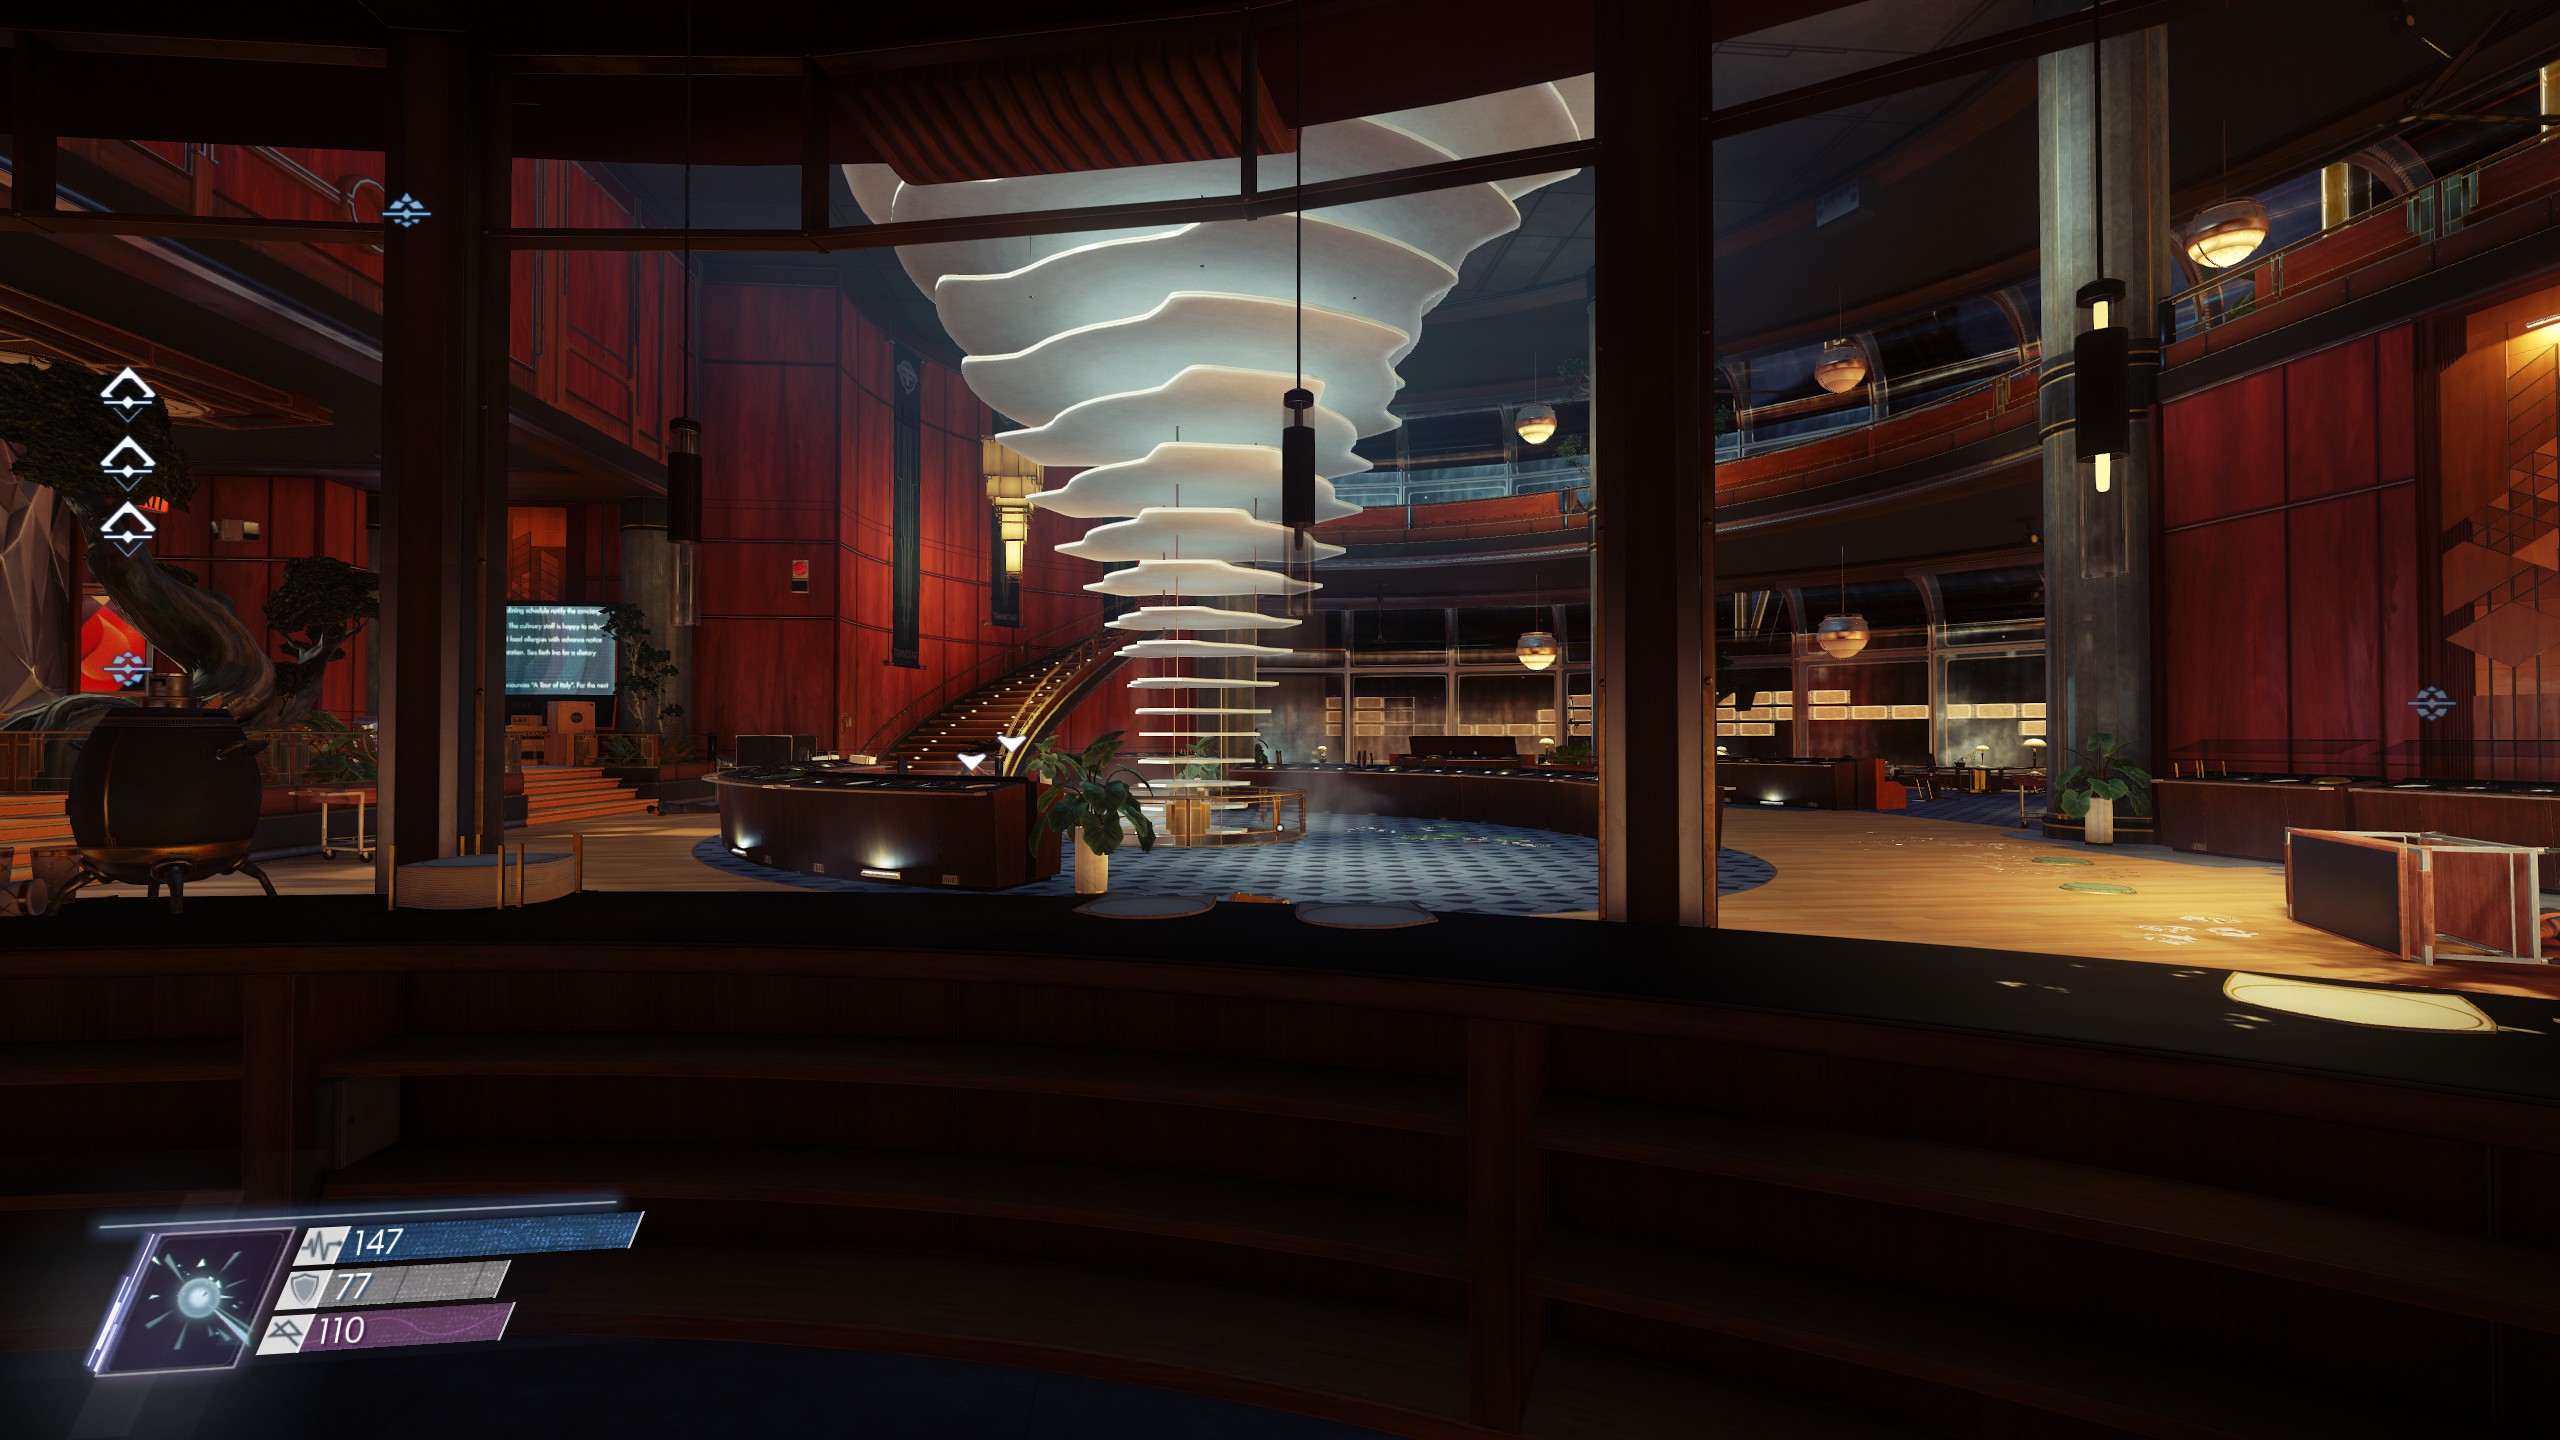
After ReShade

Dishonored 2
wolfleben-
Adaptive Sharpen
-
Clarity
-
Curves
-
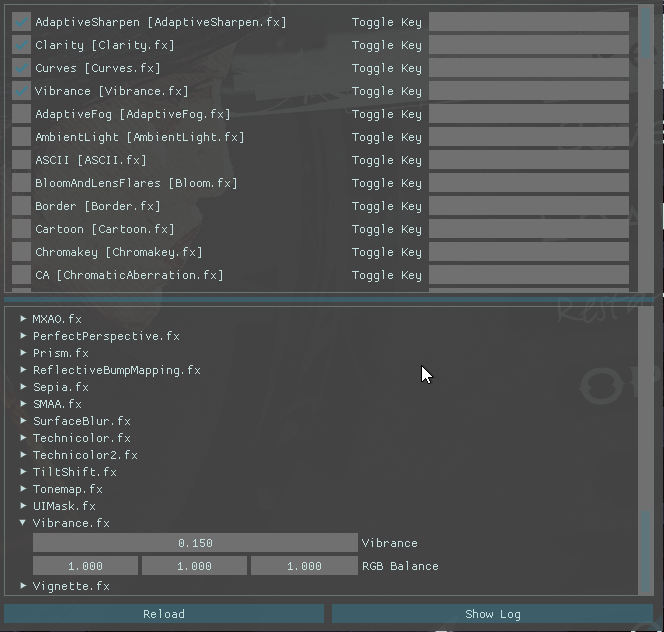
Vibrance

Before ReShade:
After ReShade
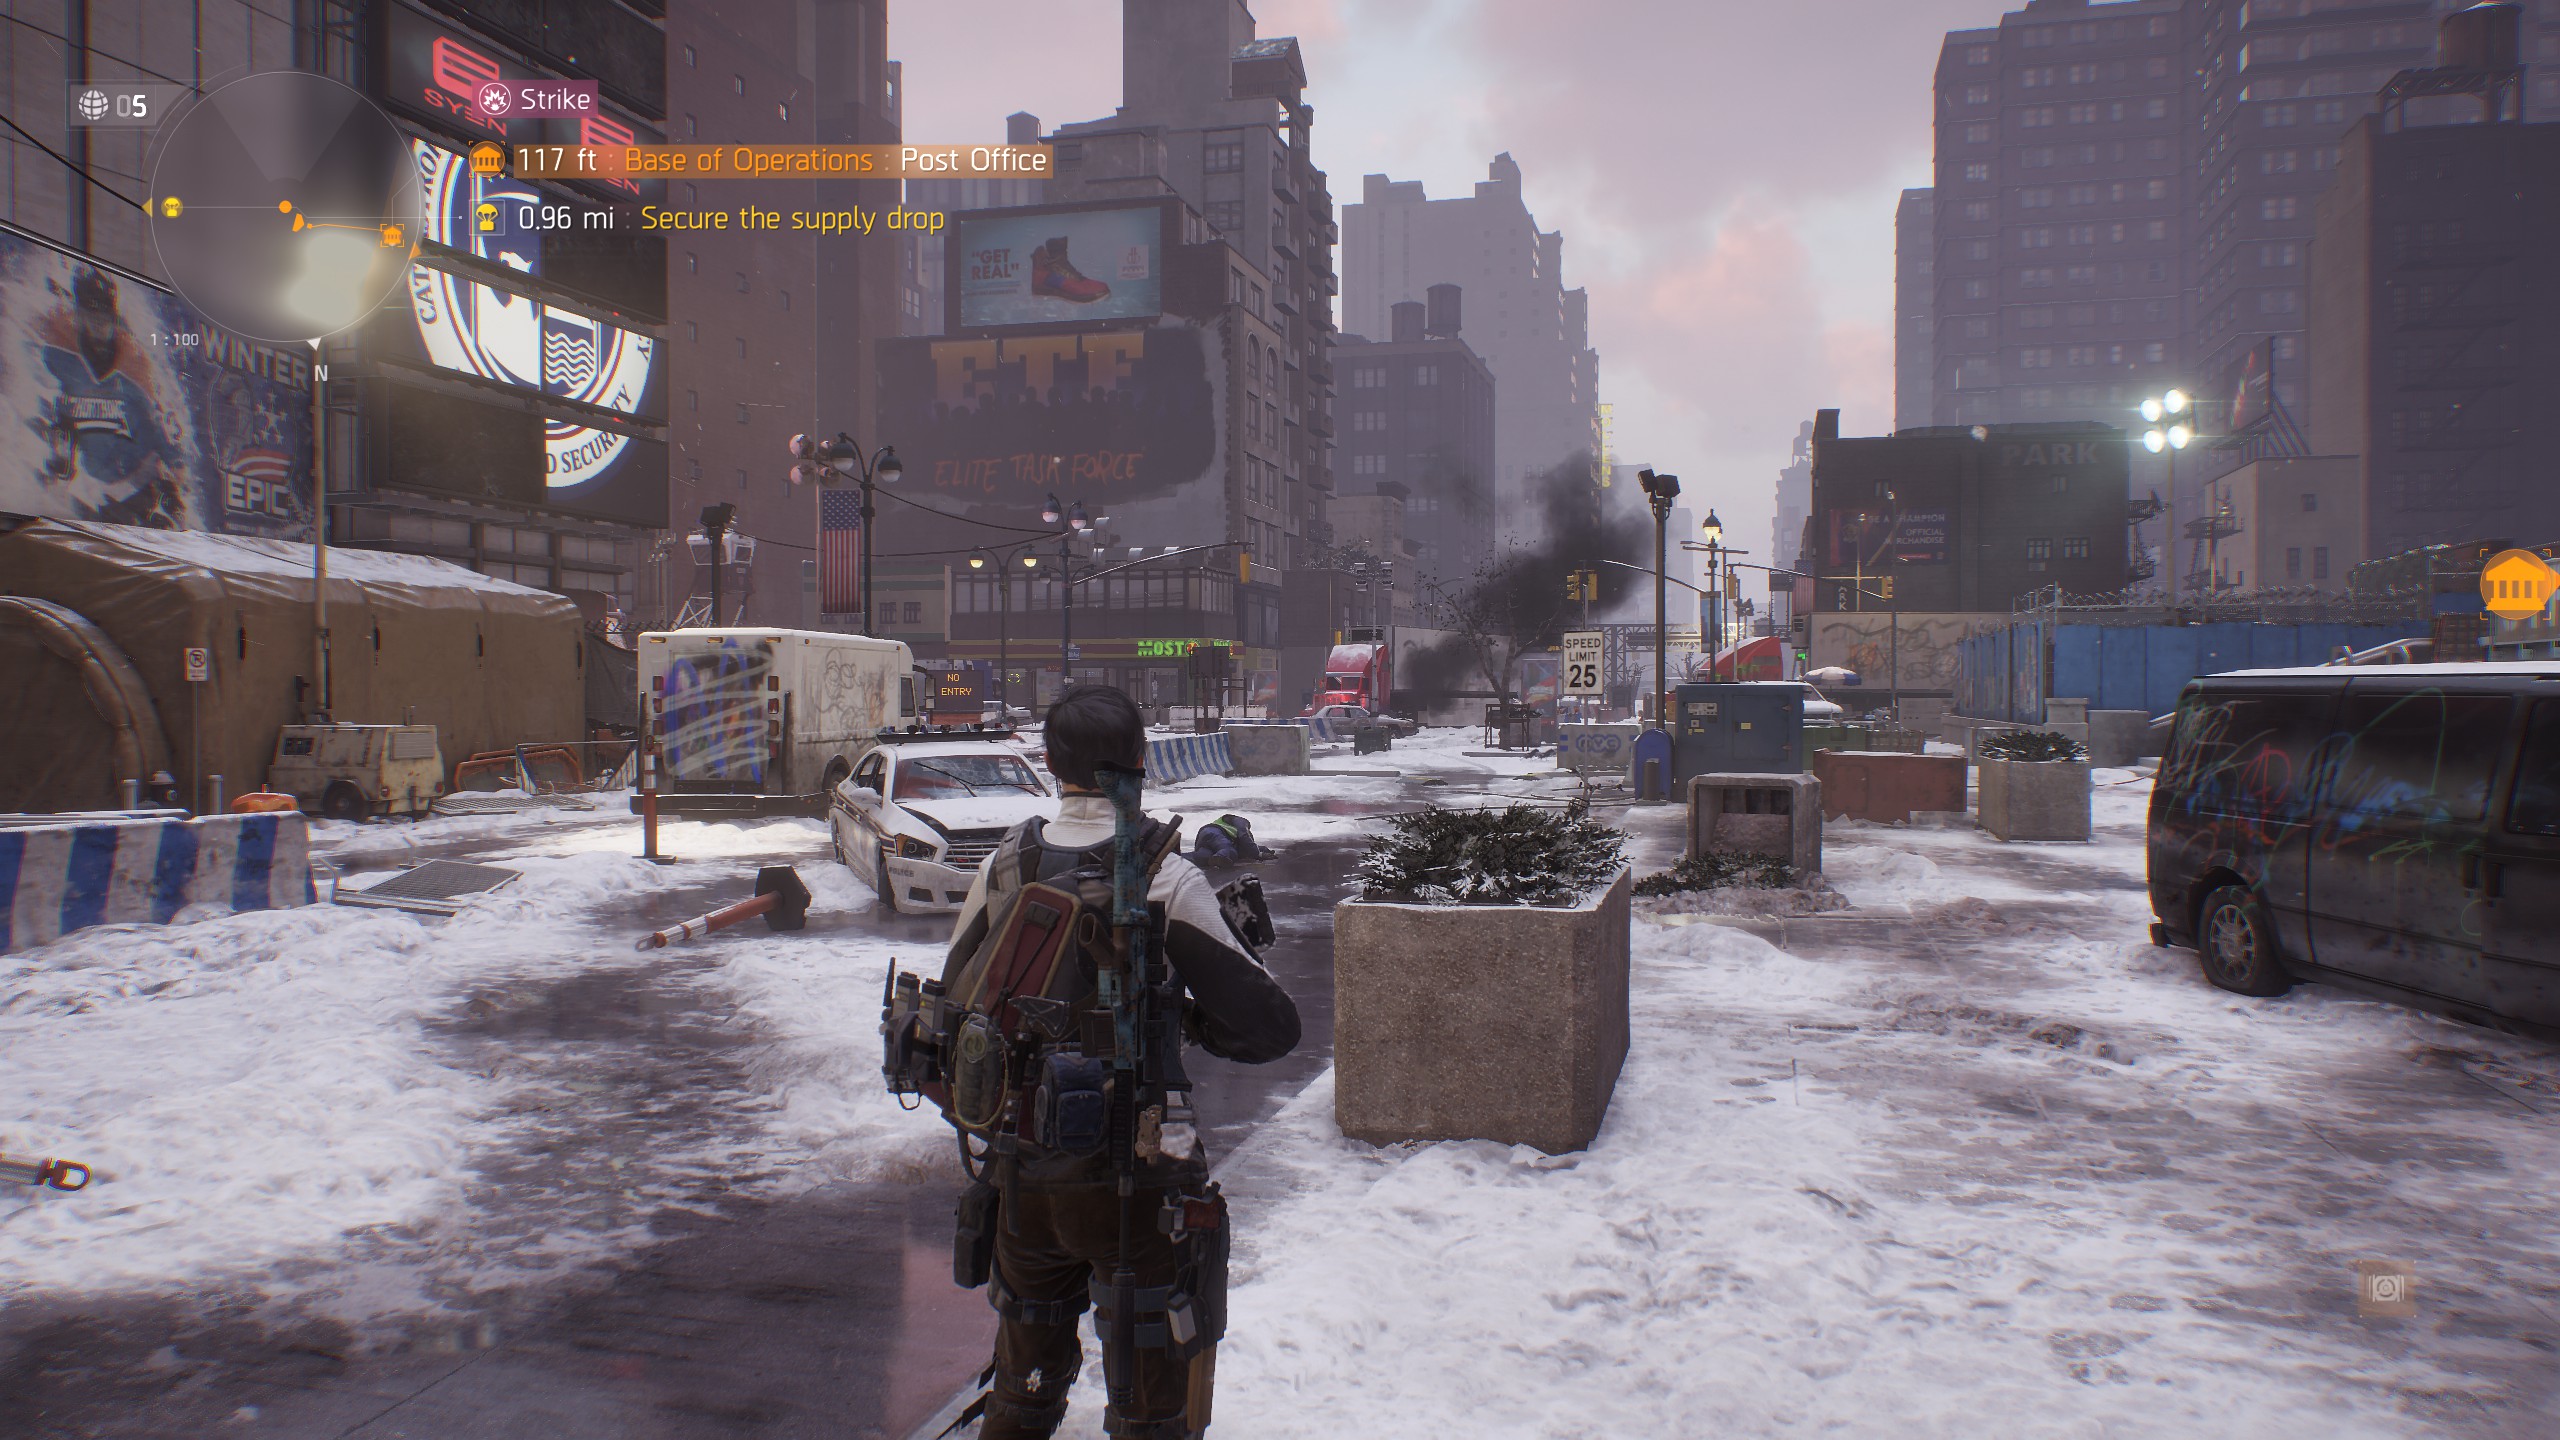
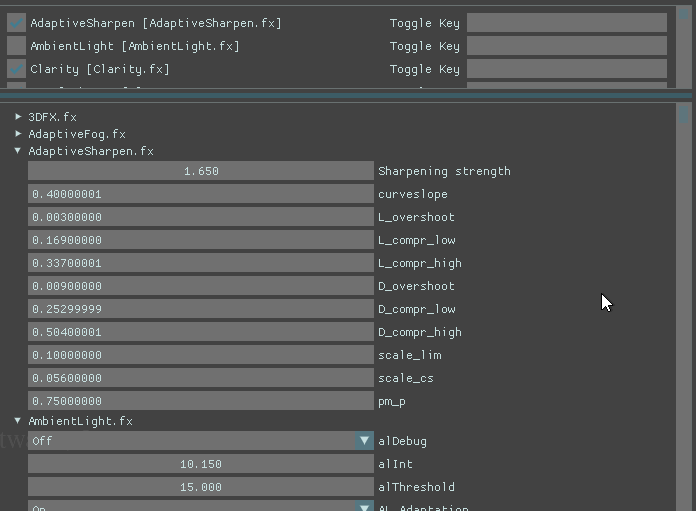
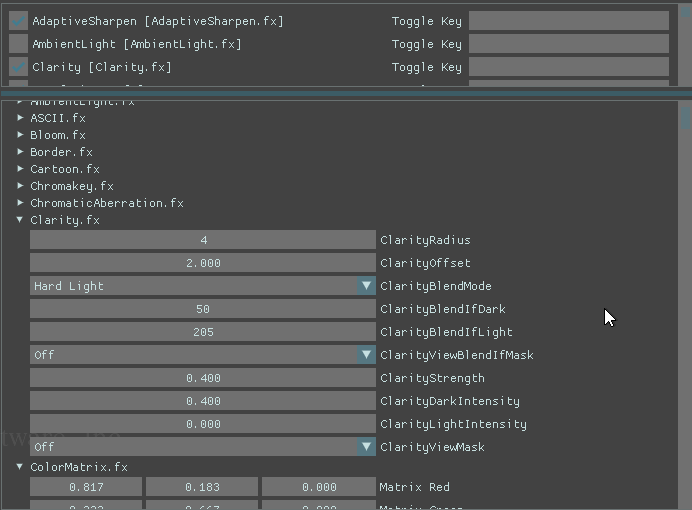
The Division
wolflebenNote - Change the setting for bringing up ReShade to Shift+F3. Cause Shift+F2 The Default for ReShade will bring up Uplay.
Curves:
Levels:
Before ReShade:
After ReShade:
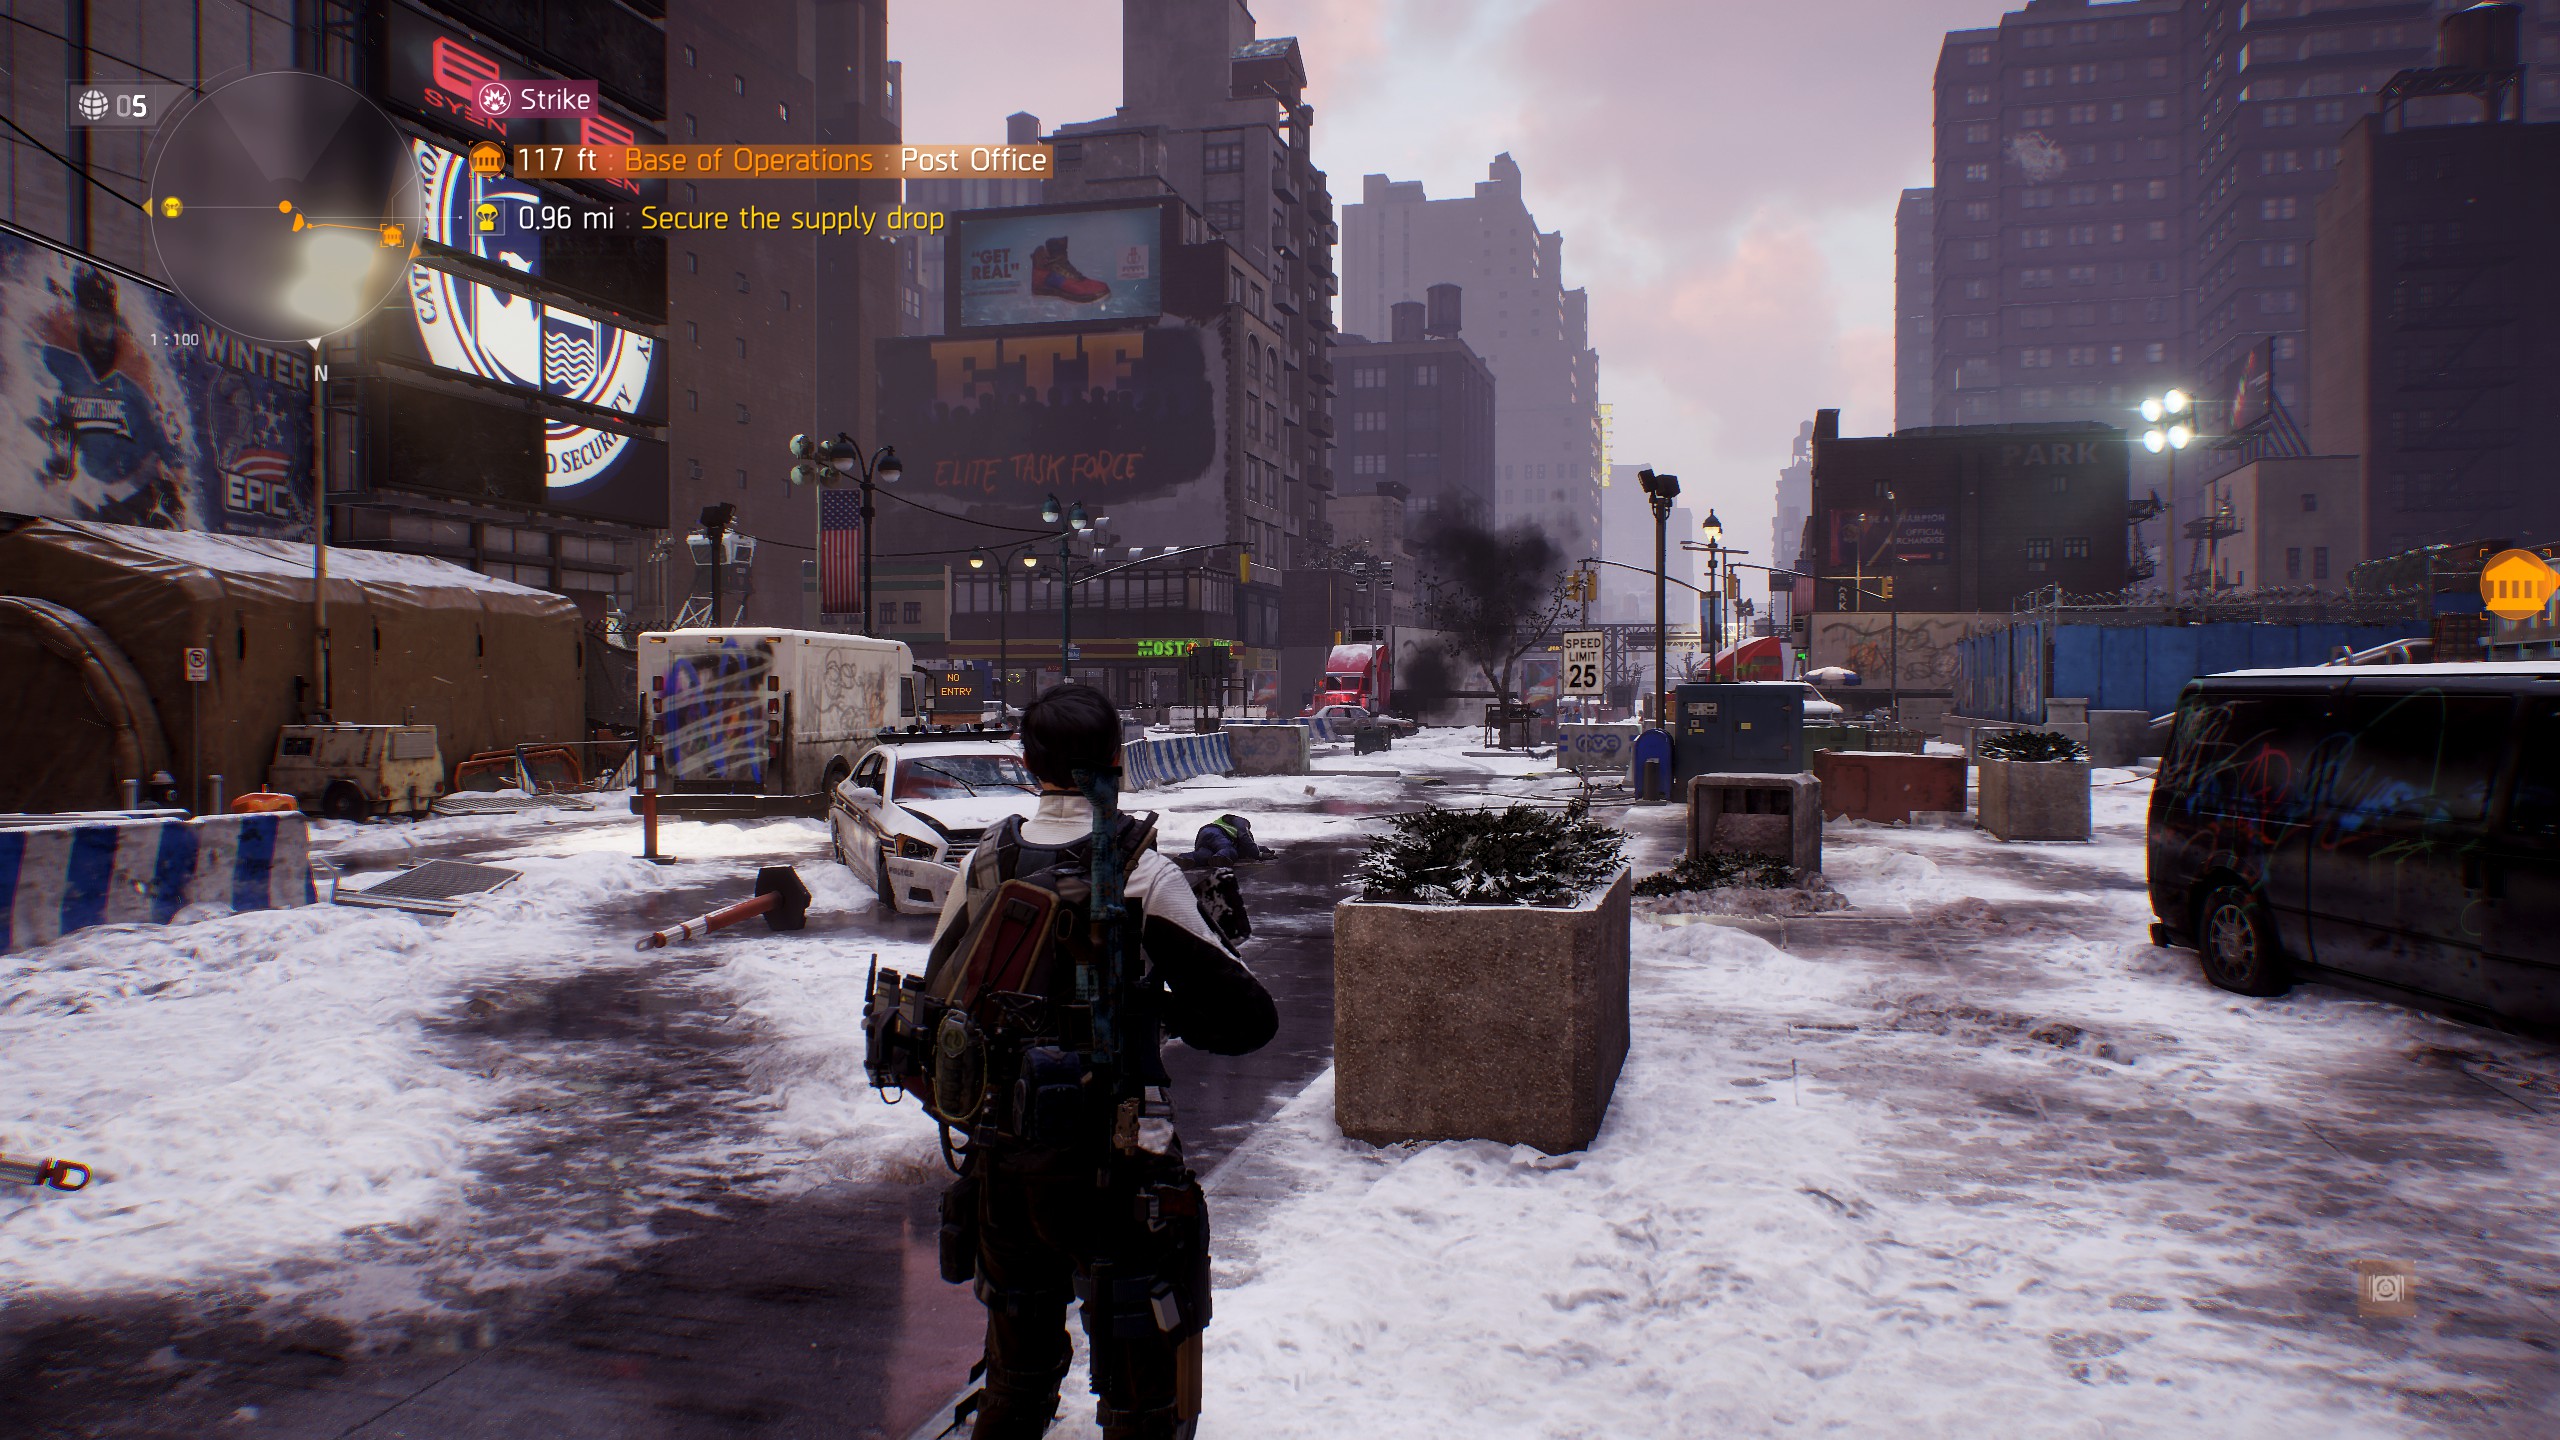
The Division is one of my more minimal ReShade Presets but it does make the game look better than base.
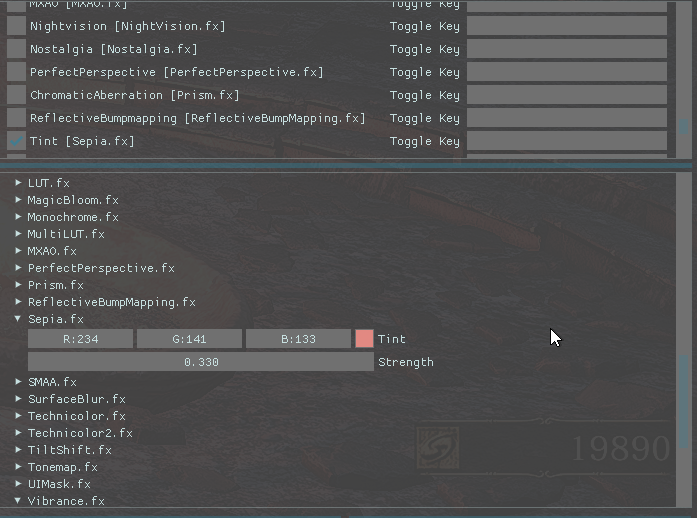
Dark Souls III
wolflebenAdaptive Sharpen:
Clarity
Curves:
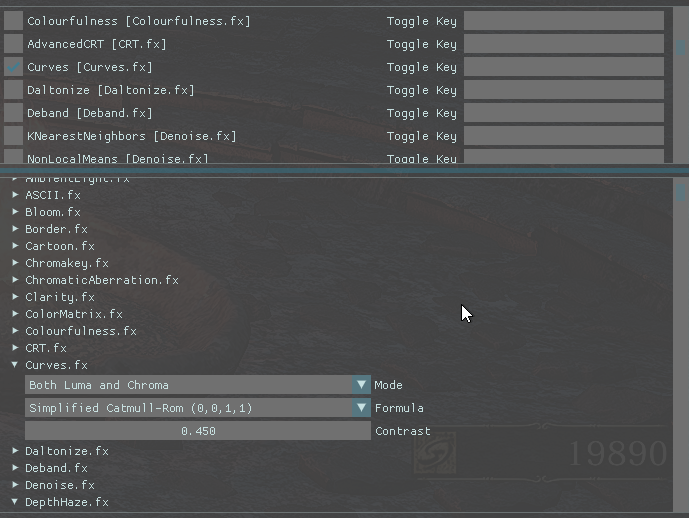
Fake HDR:

Levels:
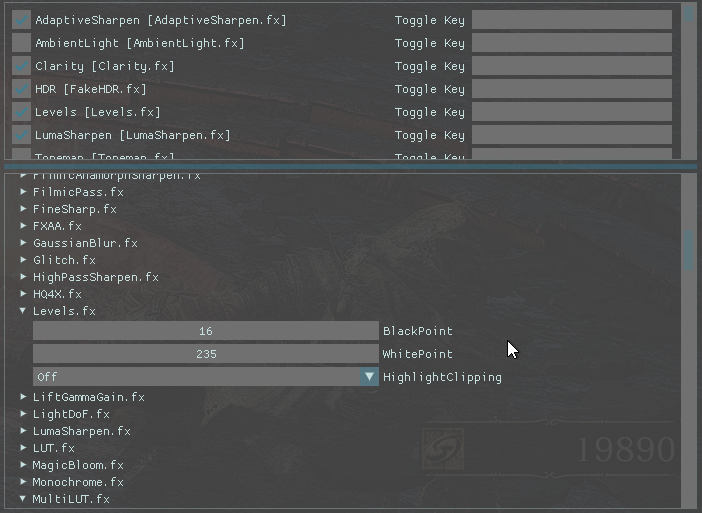
LumaSharpen:

Tint/Sepia:
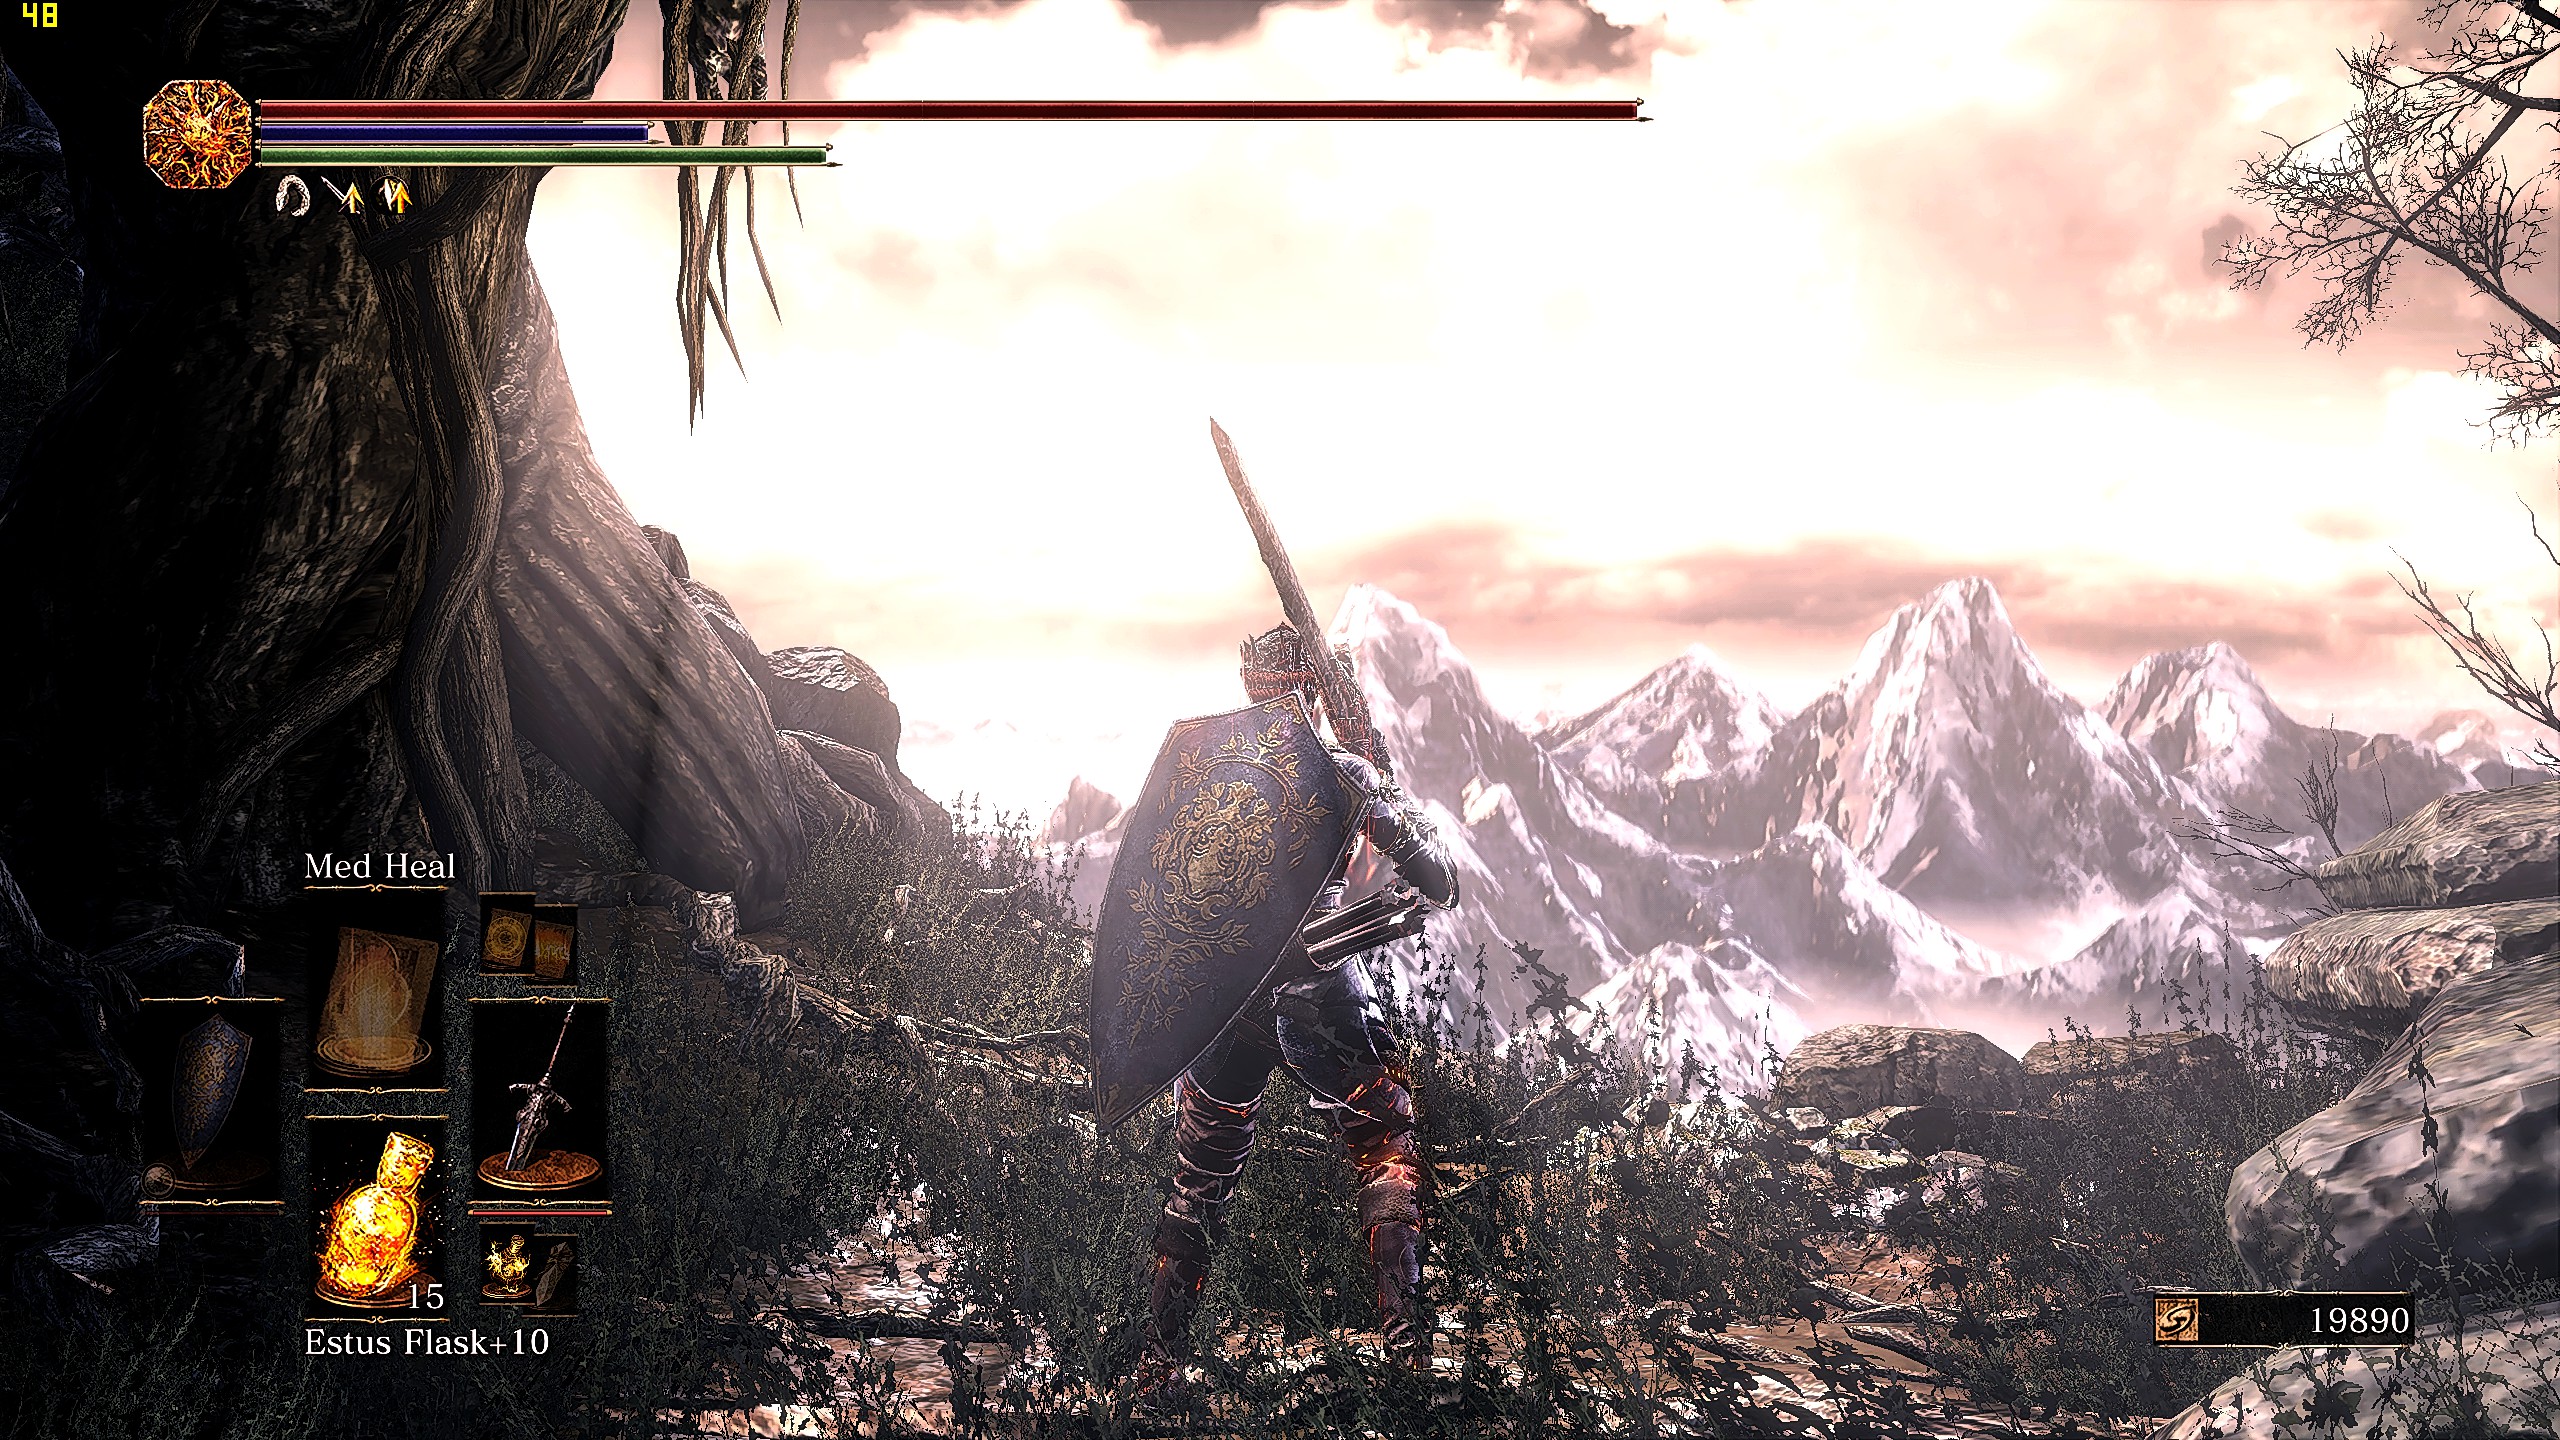
Before:

After:
Spec Ops The Line
wolflebenThis is a Black and White ReShade Preset
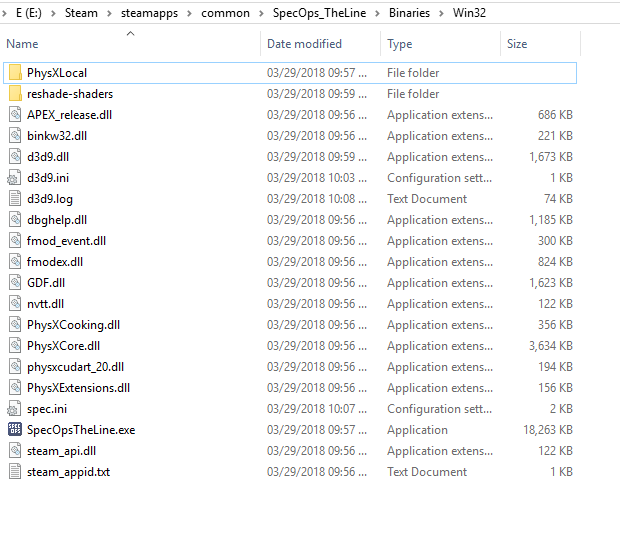
Note 1 Spec Ops The Line EXE is found in the binaries folder in Win32:
Note 2 Select the Direct X 9 API for ReShade when you install it to Spec Ops the Line.
-
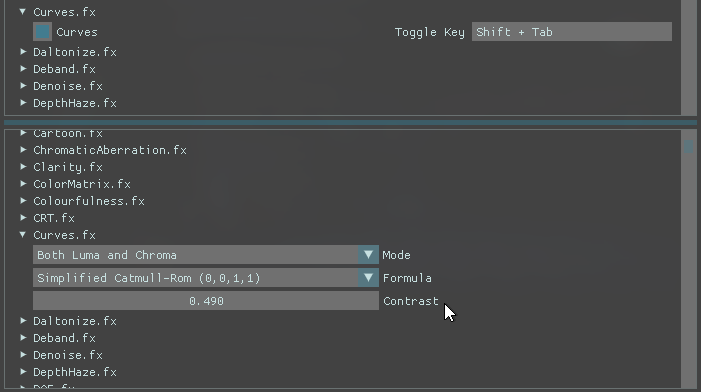
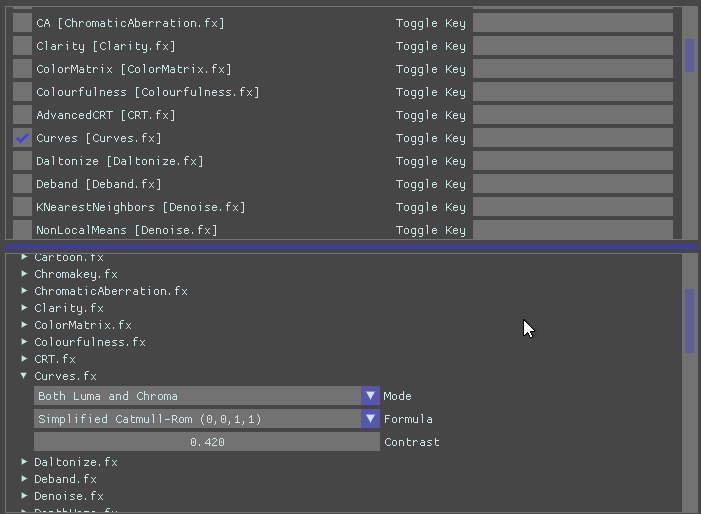
Curves
-
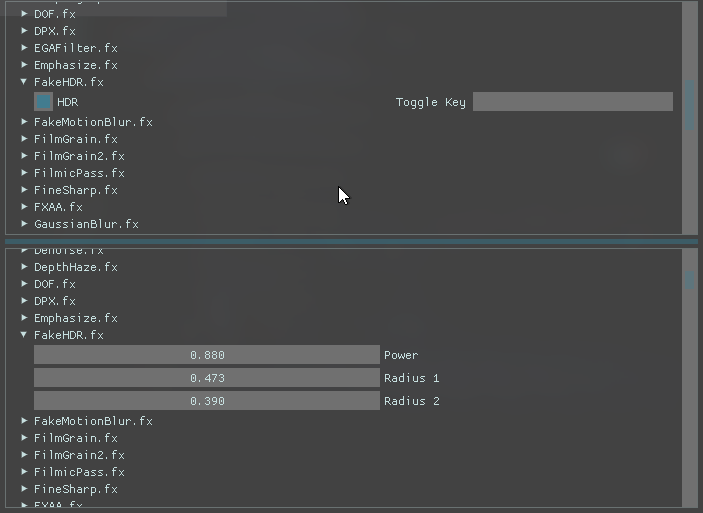
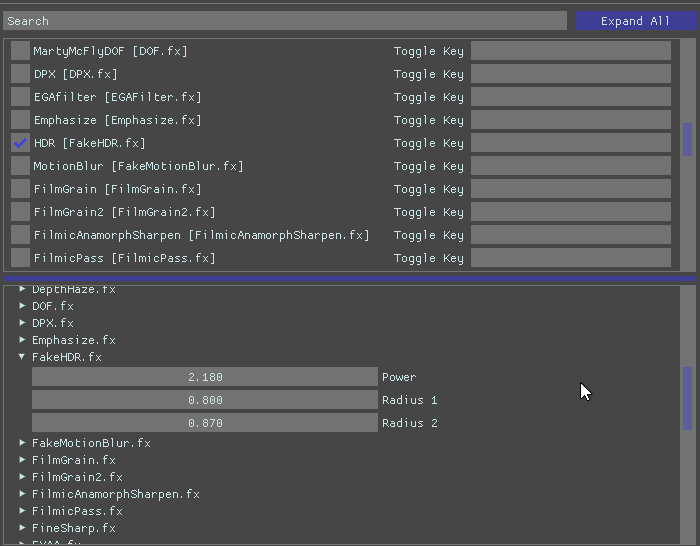
FakeHDR
-
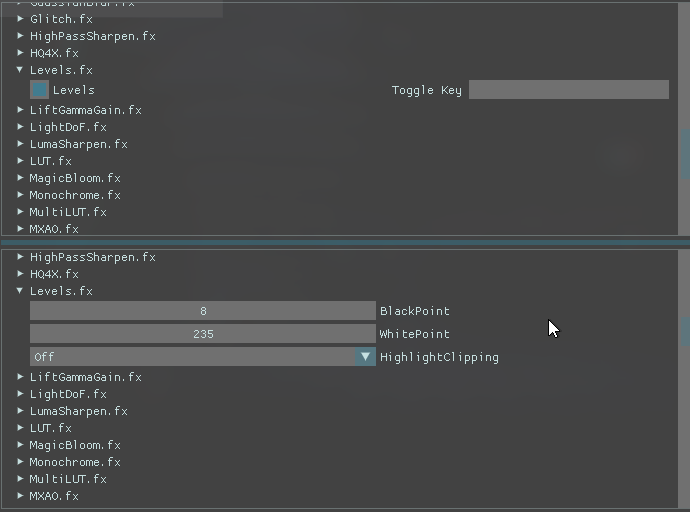
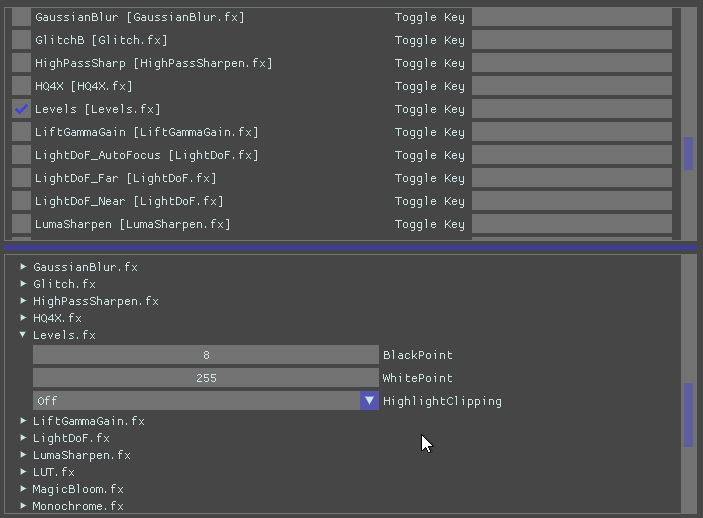
Levels
-
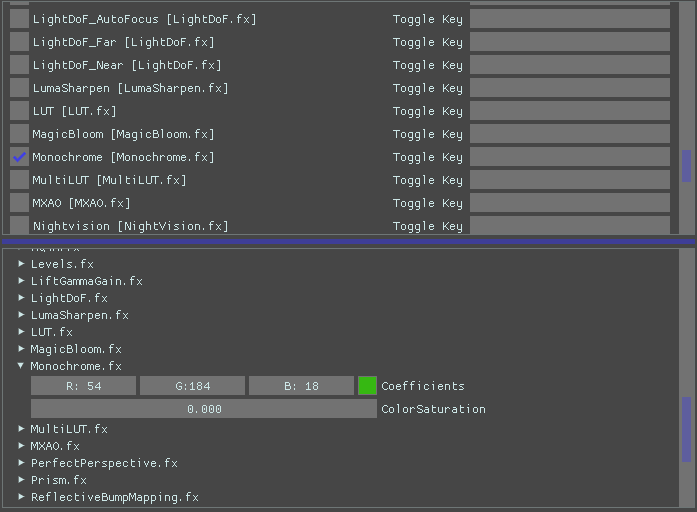
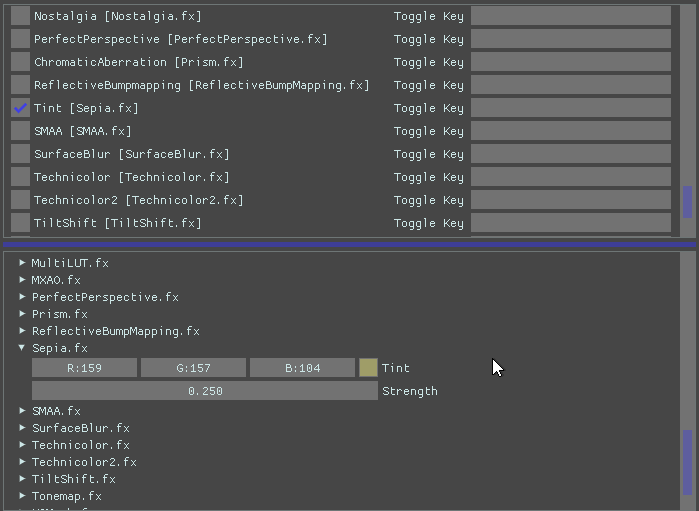
Monochrome
-
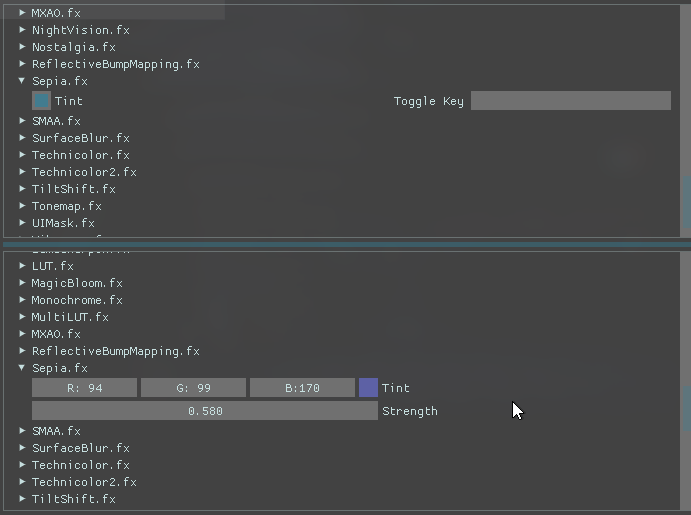
Tint/Sepia
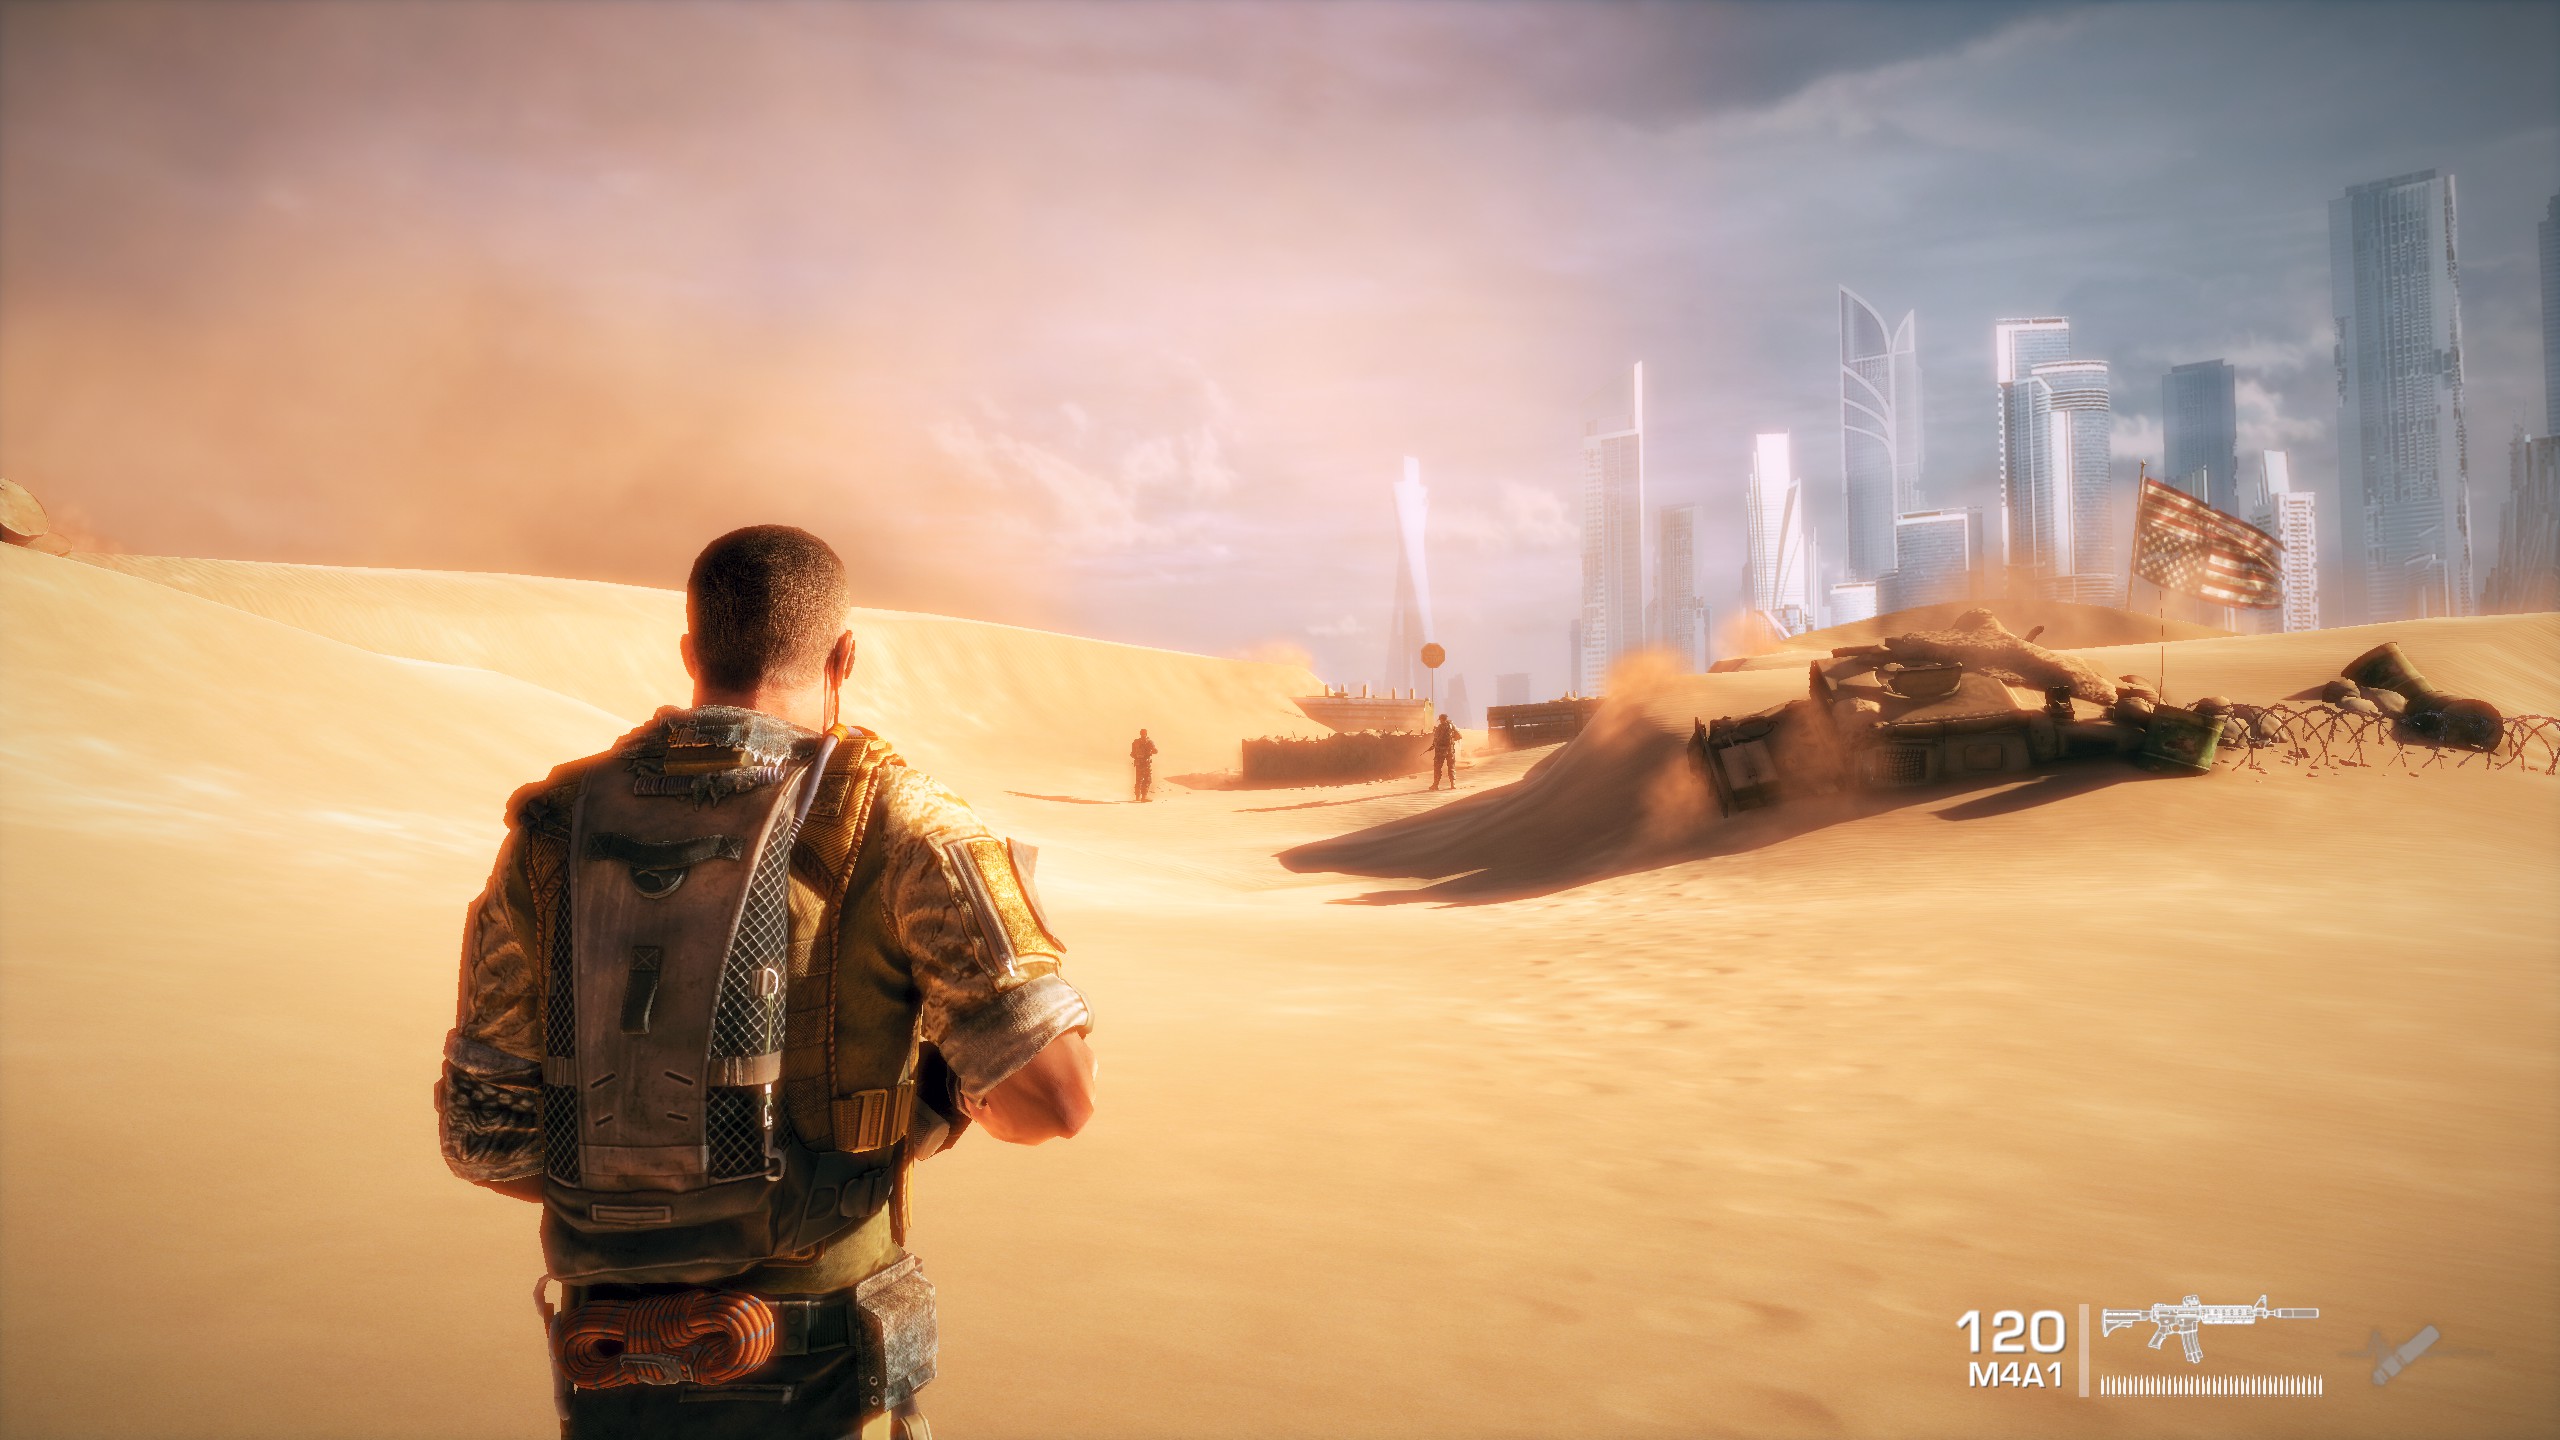
Before ReShade:

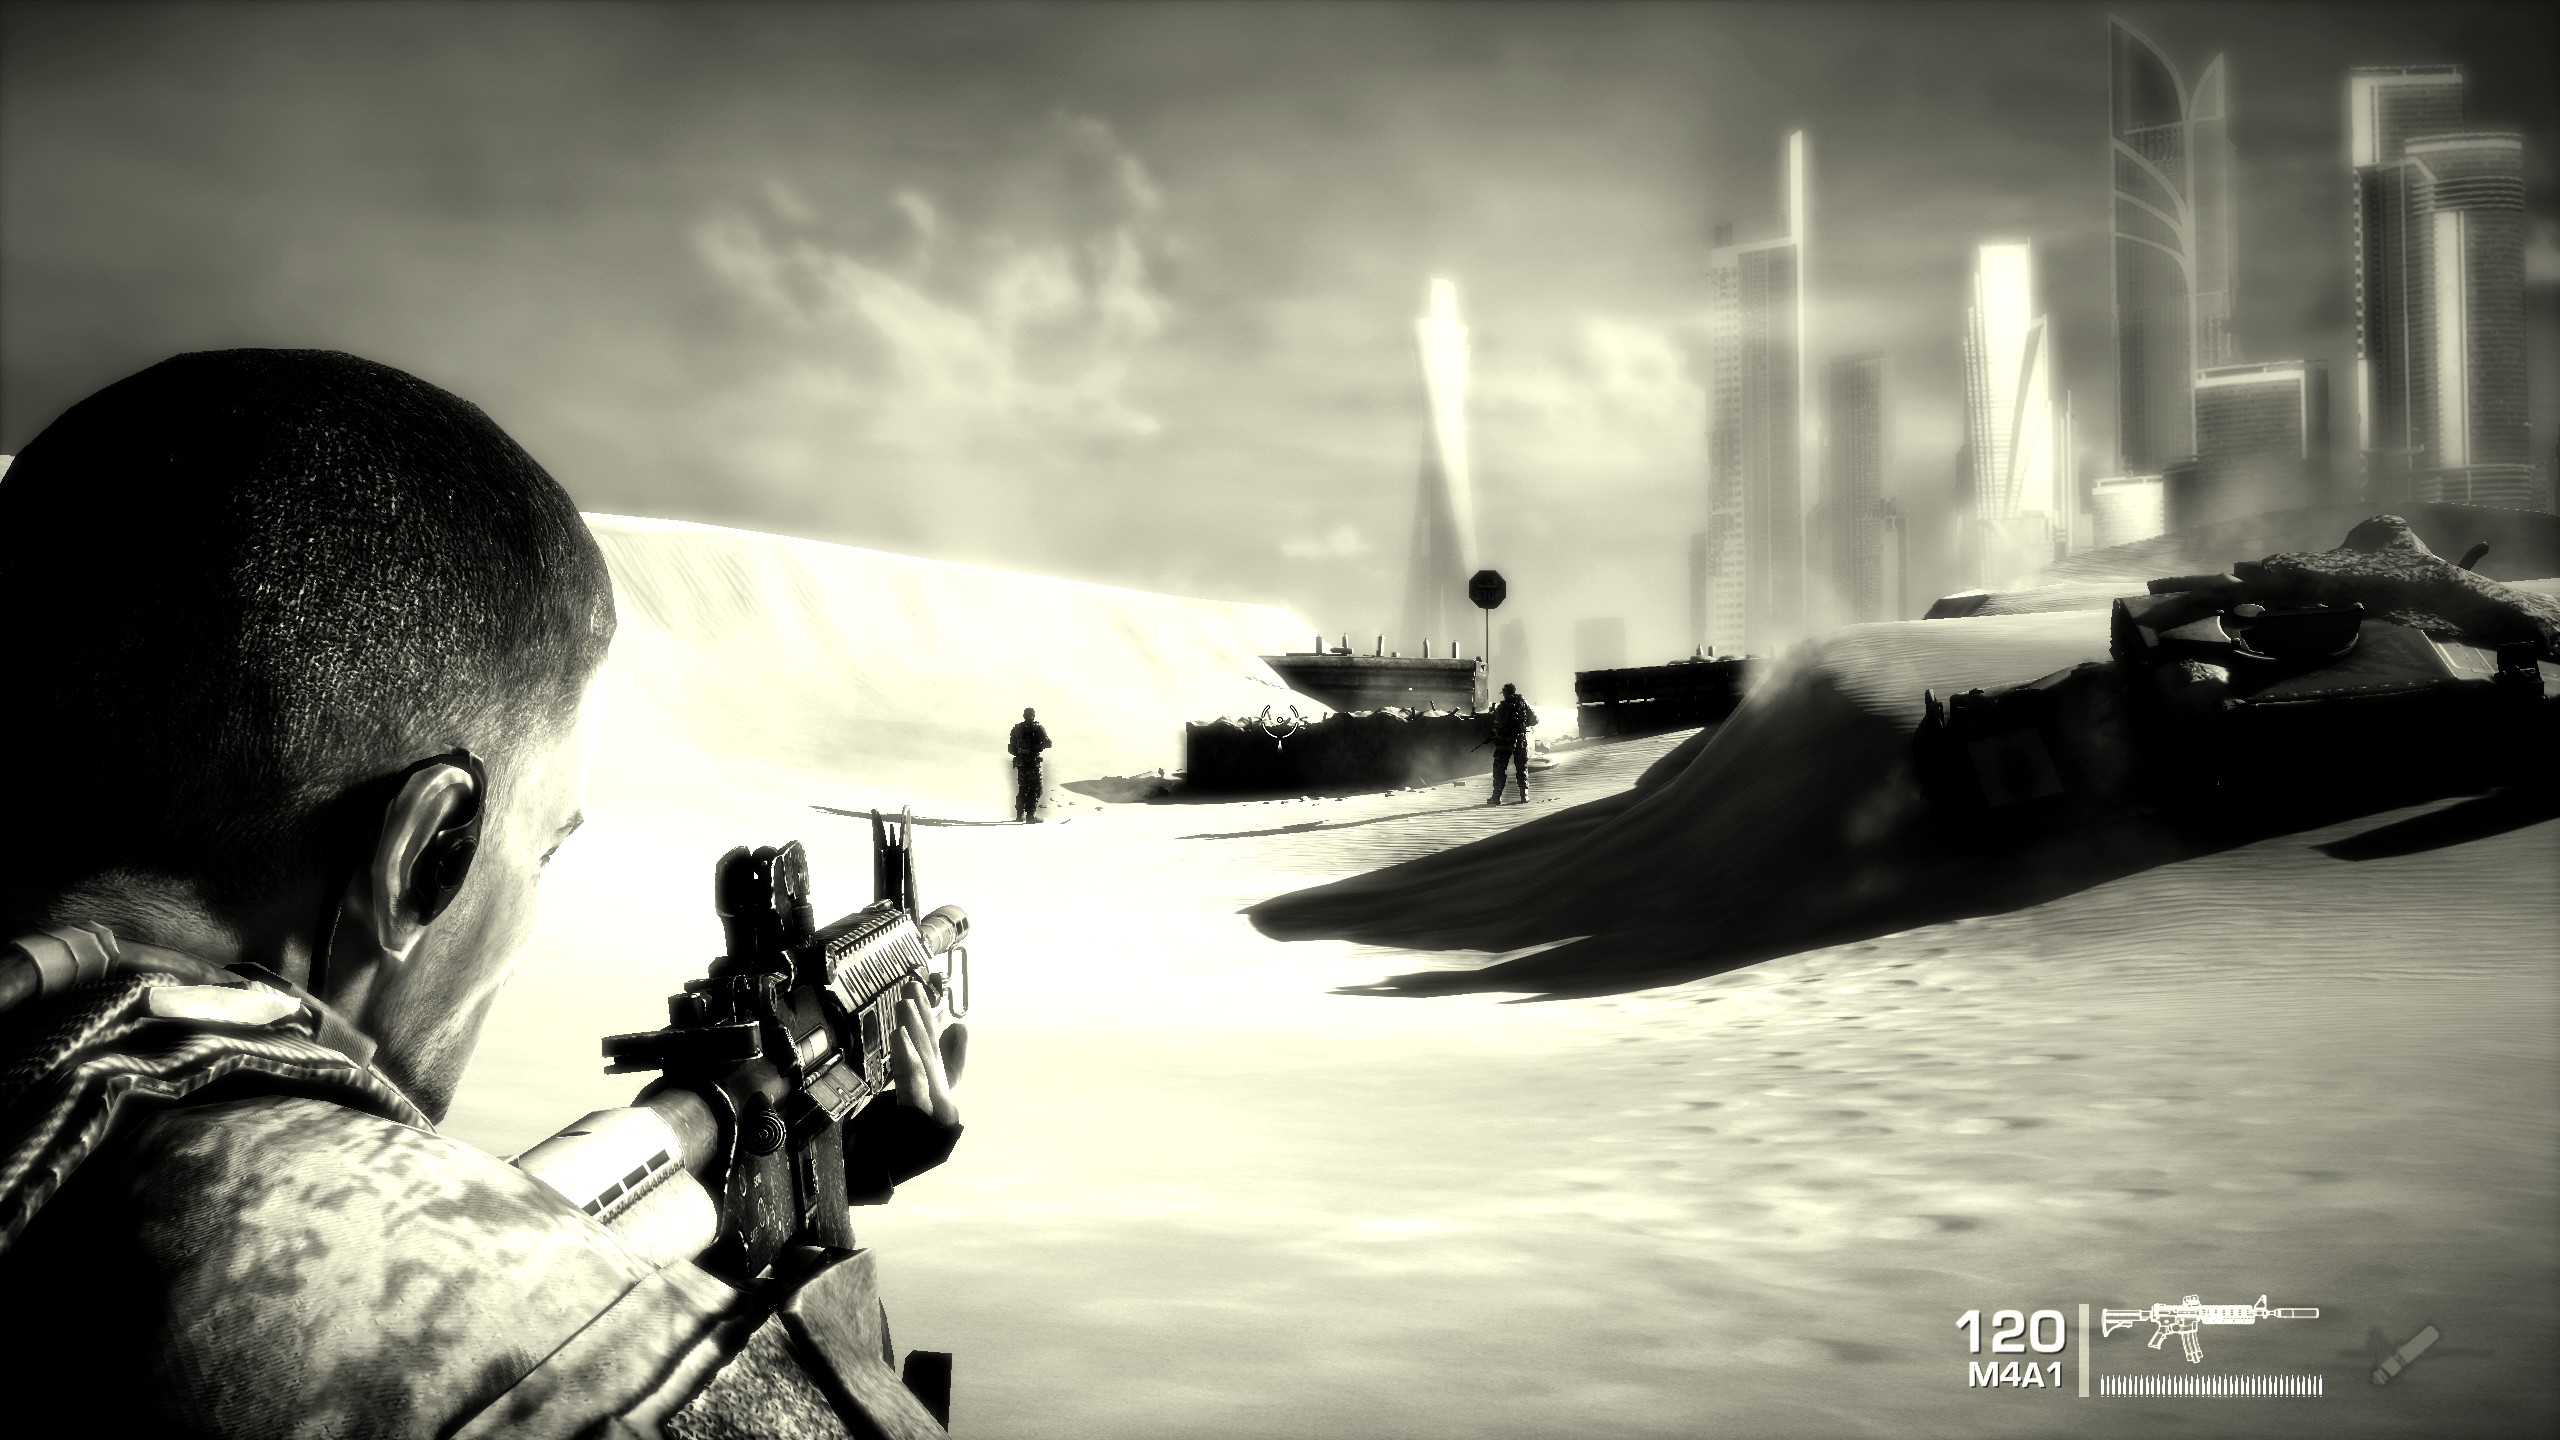
After ReShade:

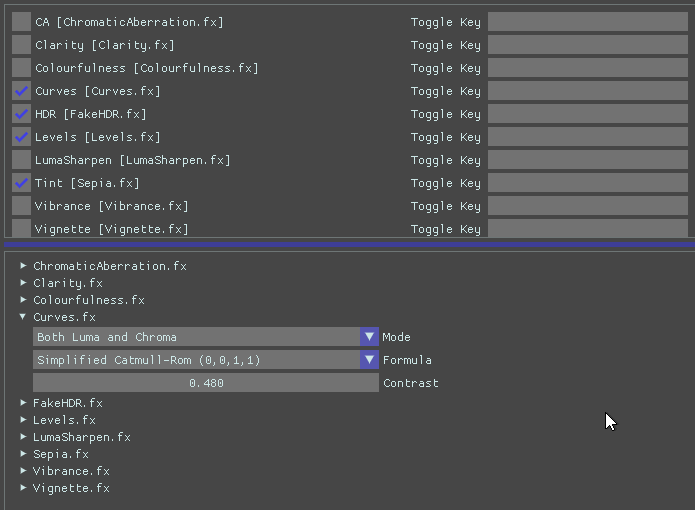
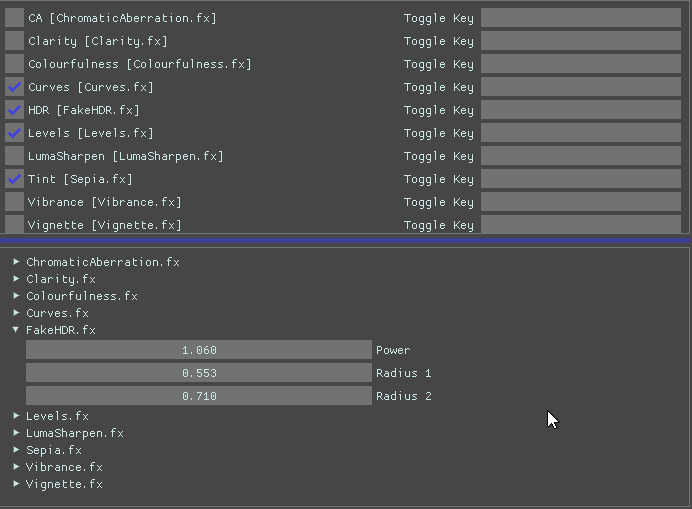
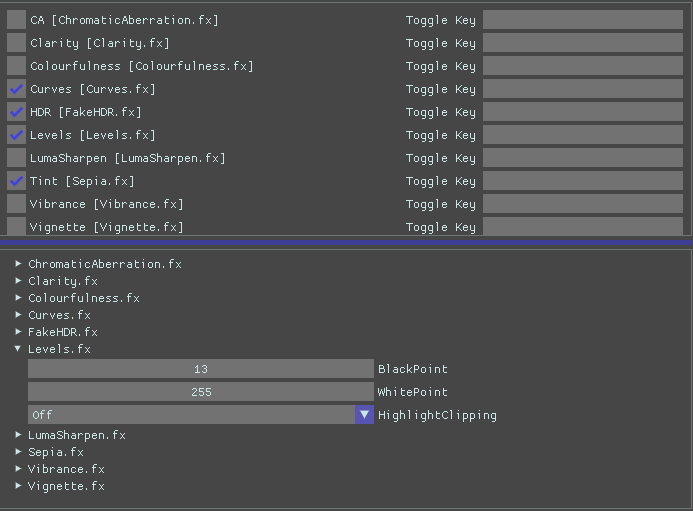
Tomb Raider 2013
wolflebenNote on this Preset even though I had Tint initial I don’t use it after seeing how it looked. So I didn’t include the settings for it. It is also not featured in the after ReShade Screenshot
-
Curves
-
FakeHDR
-
Levels
Before ReShade
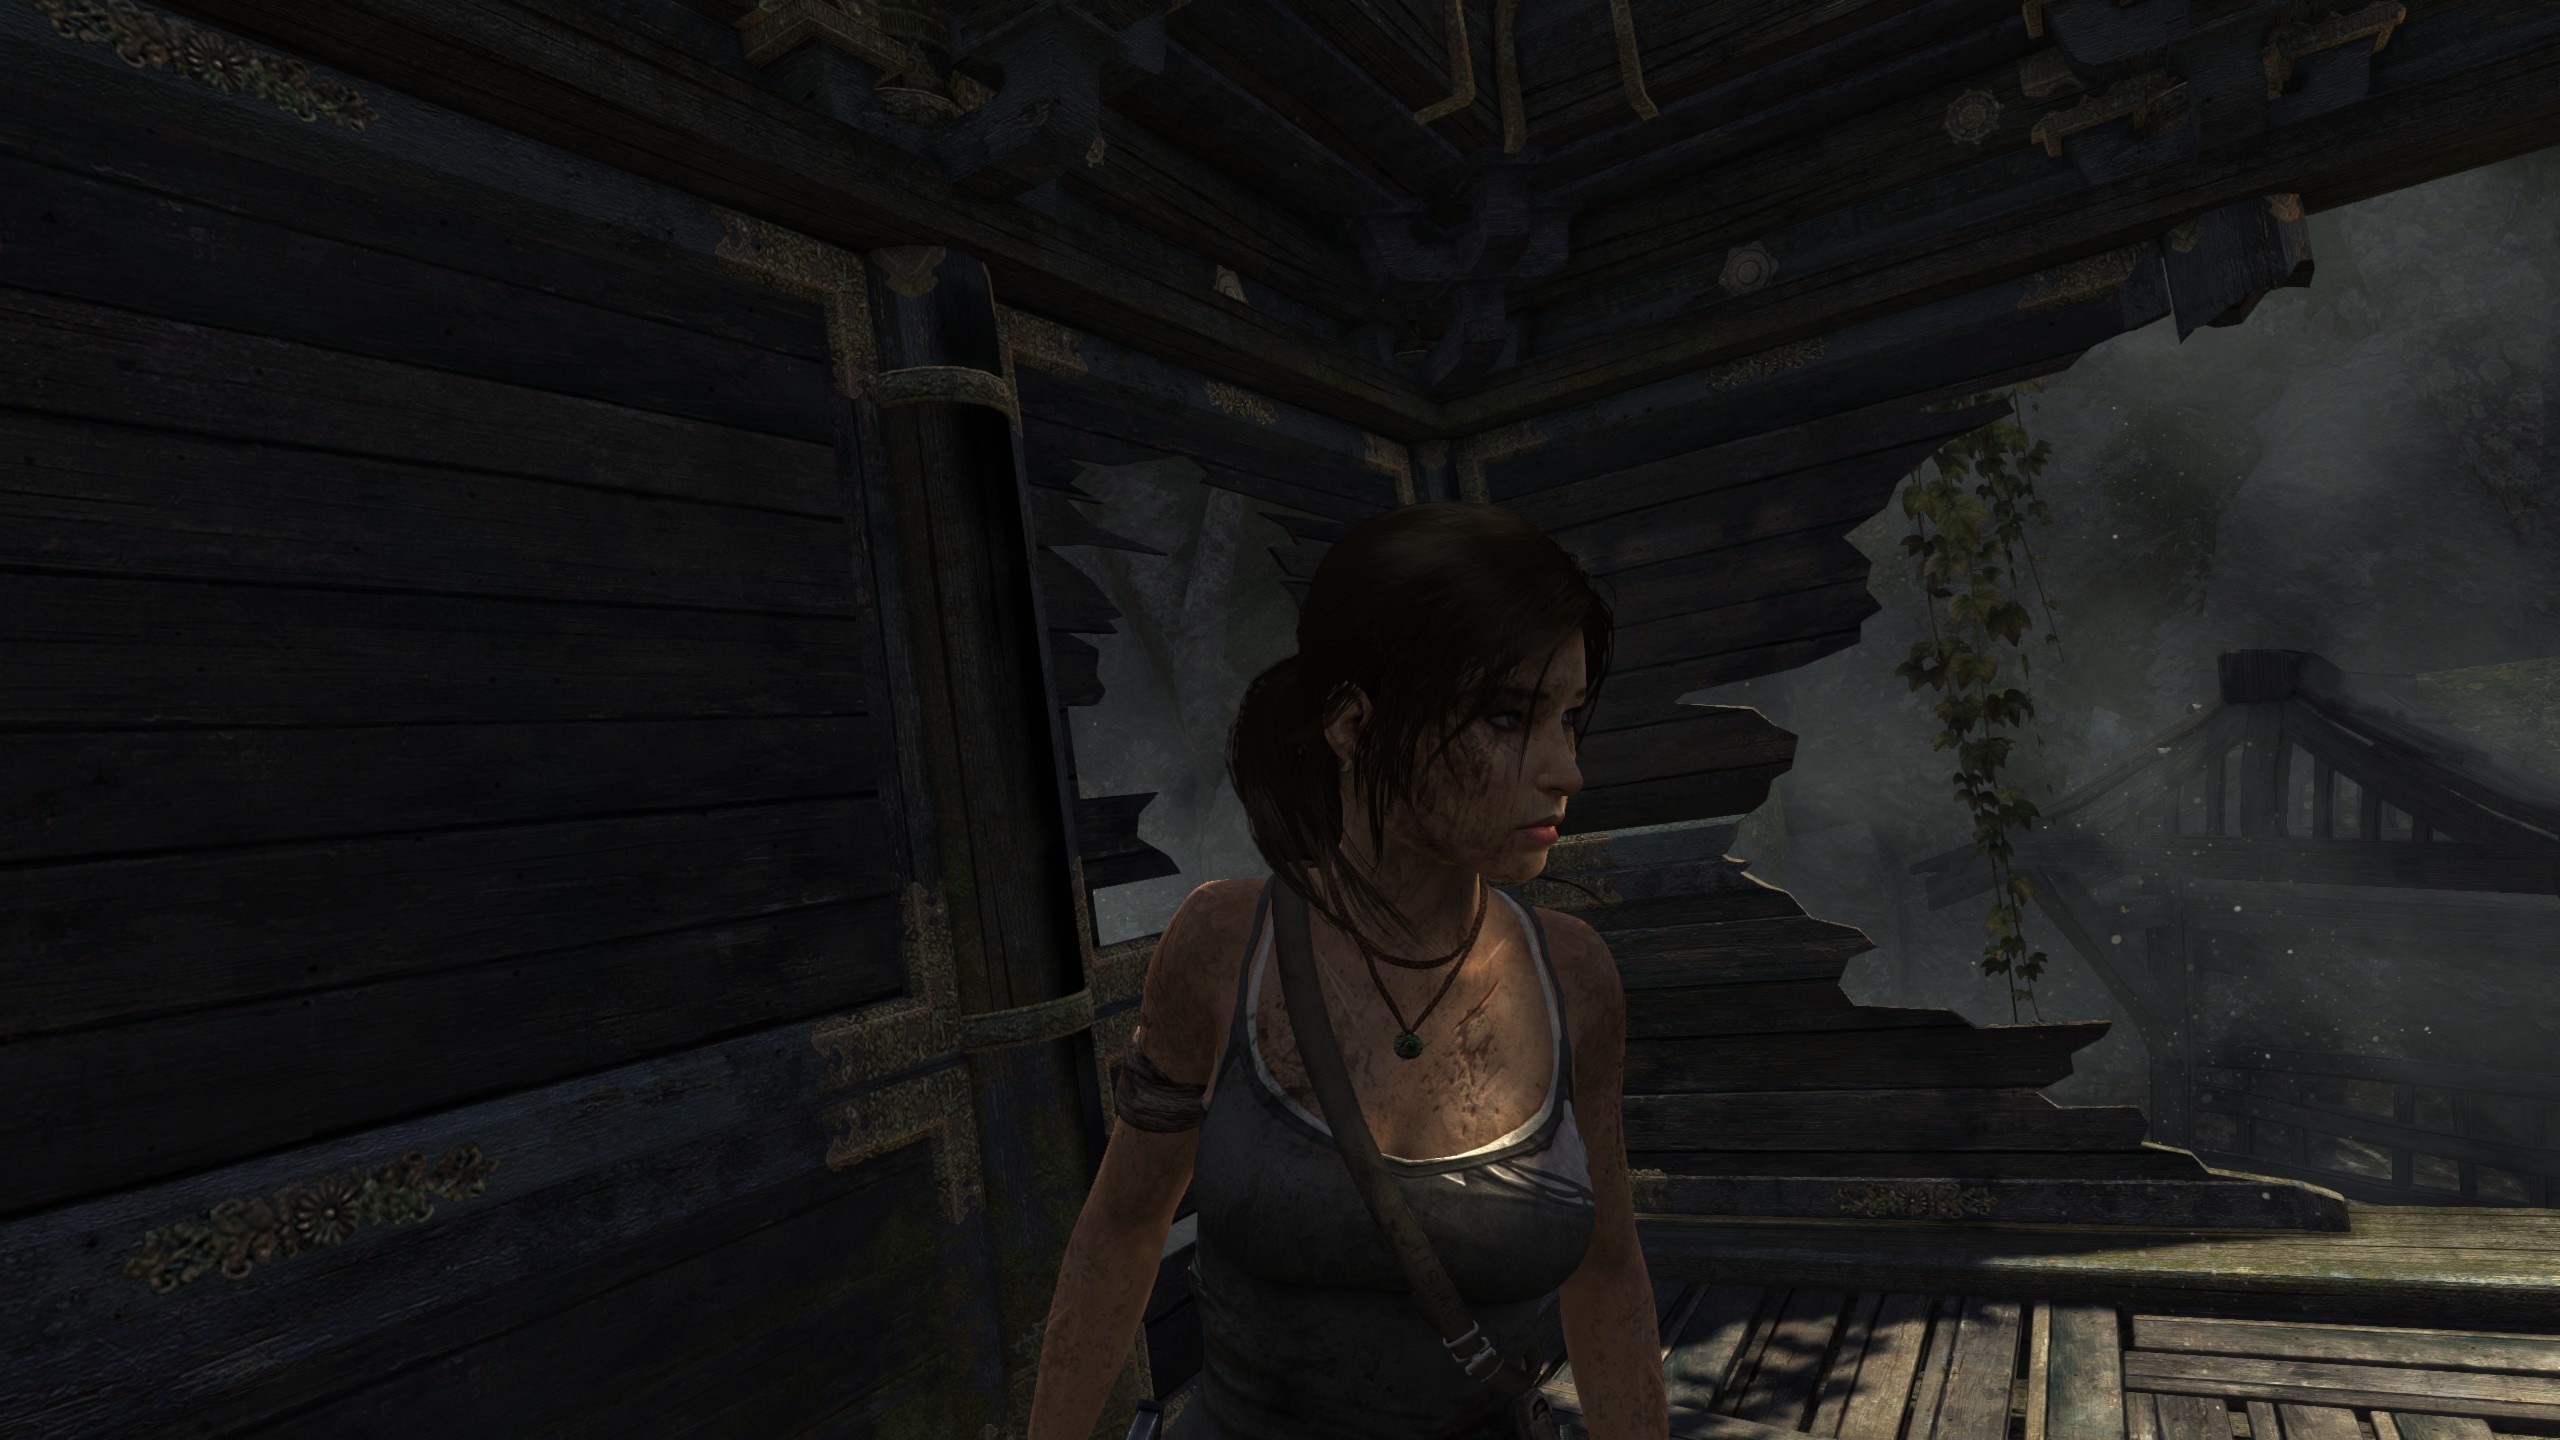
After ReShade
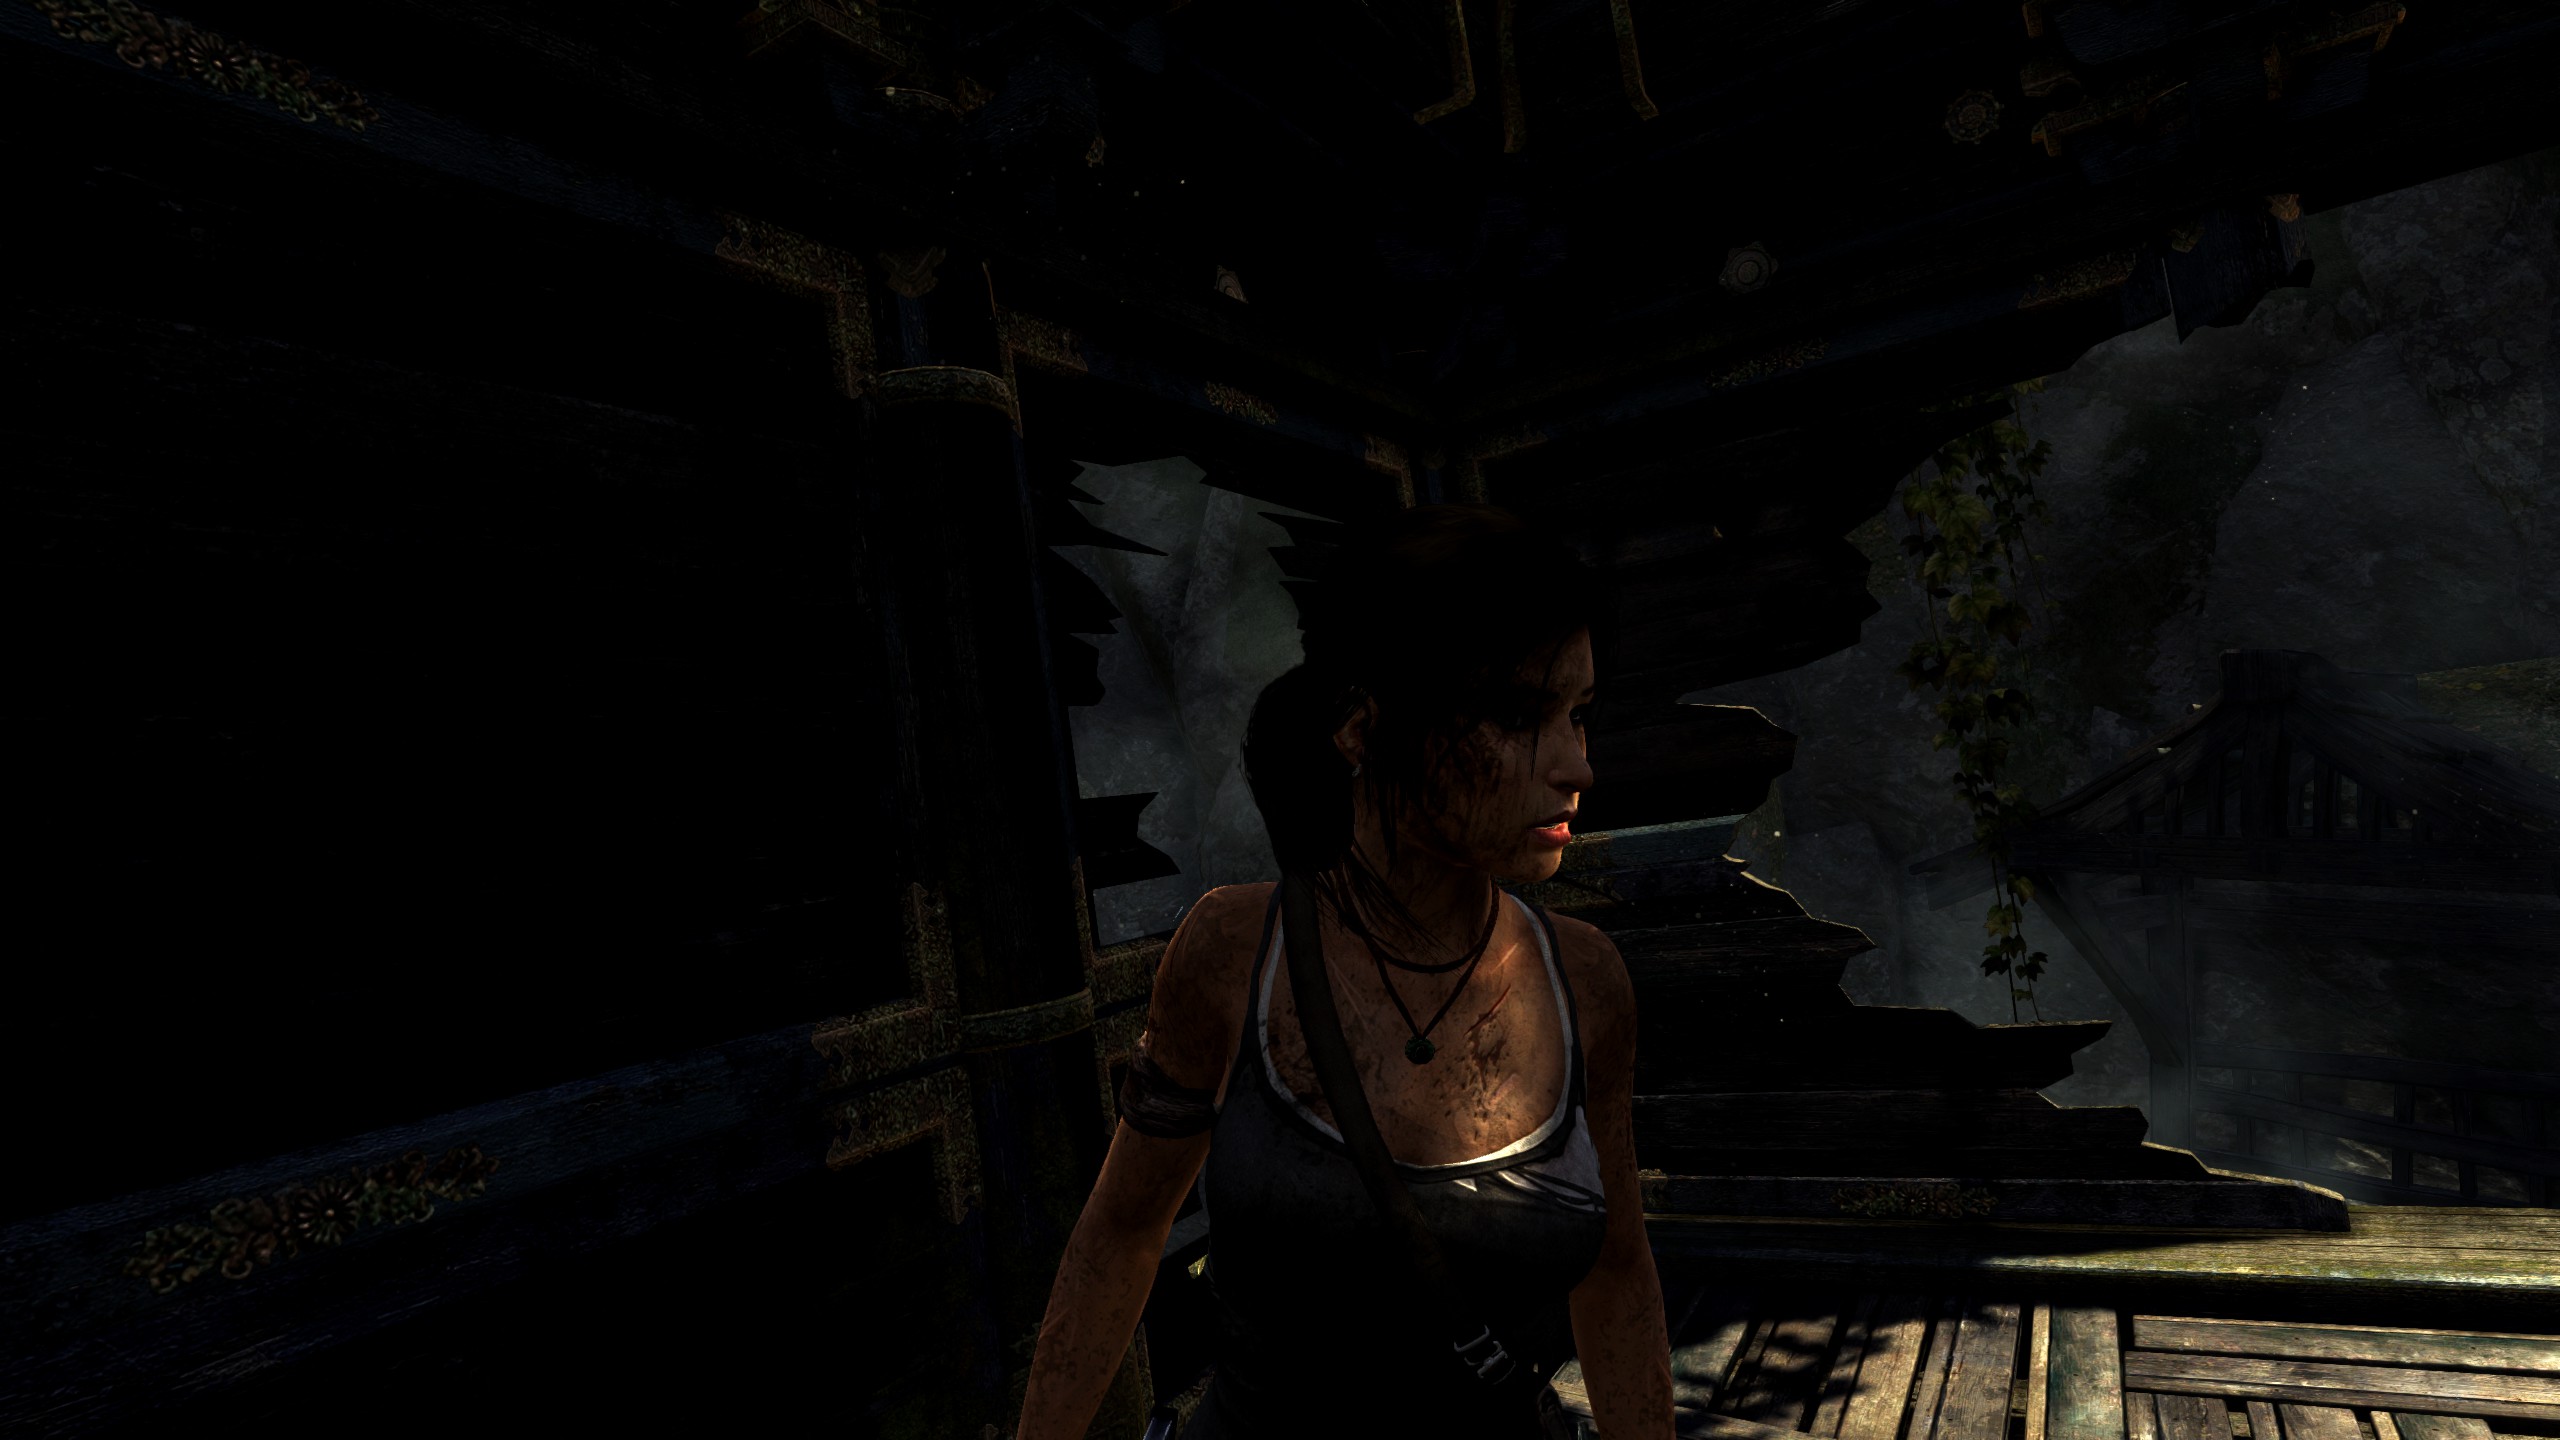
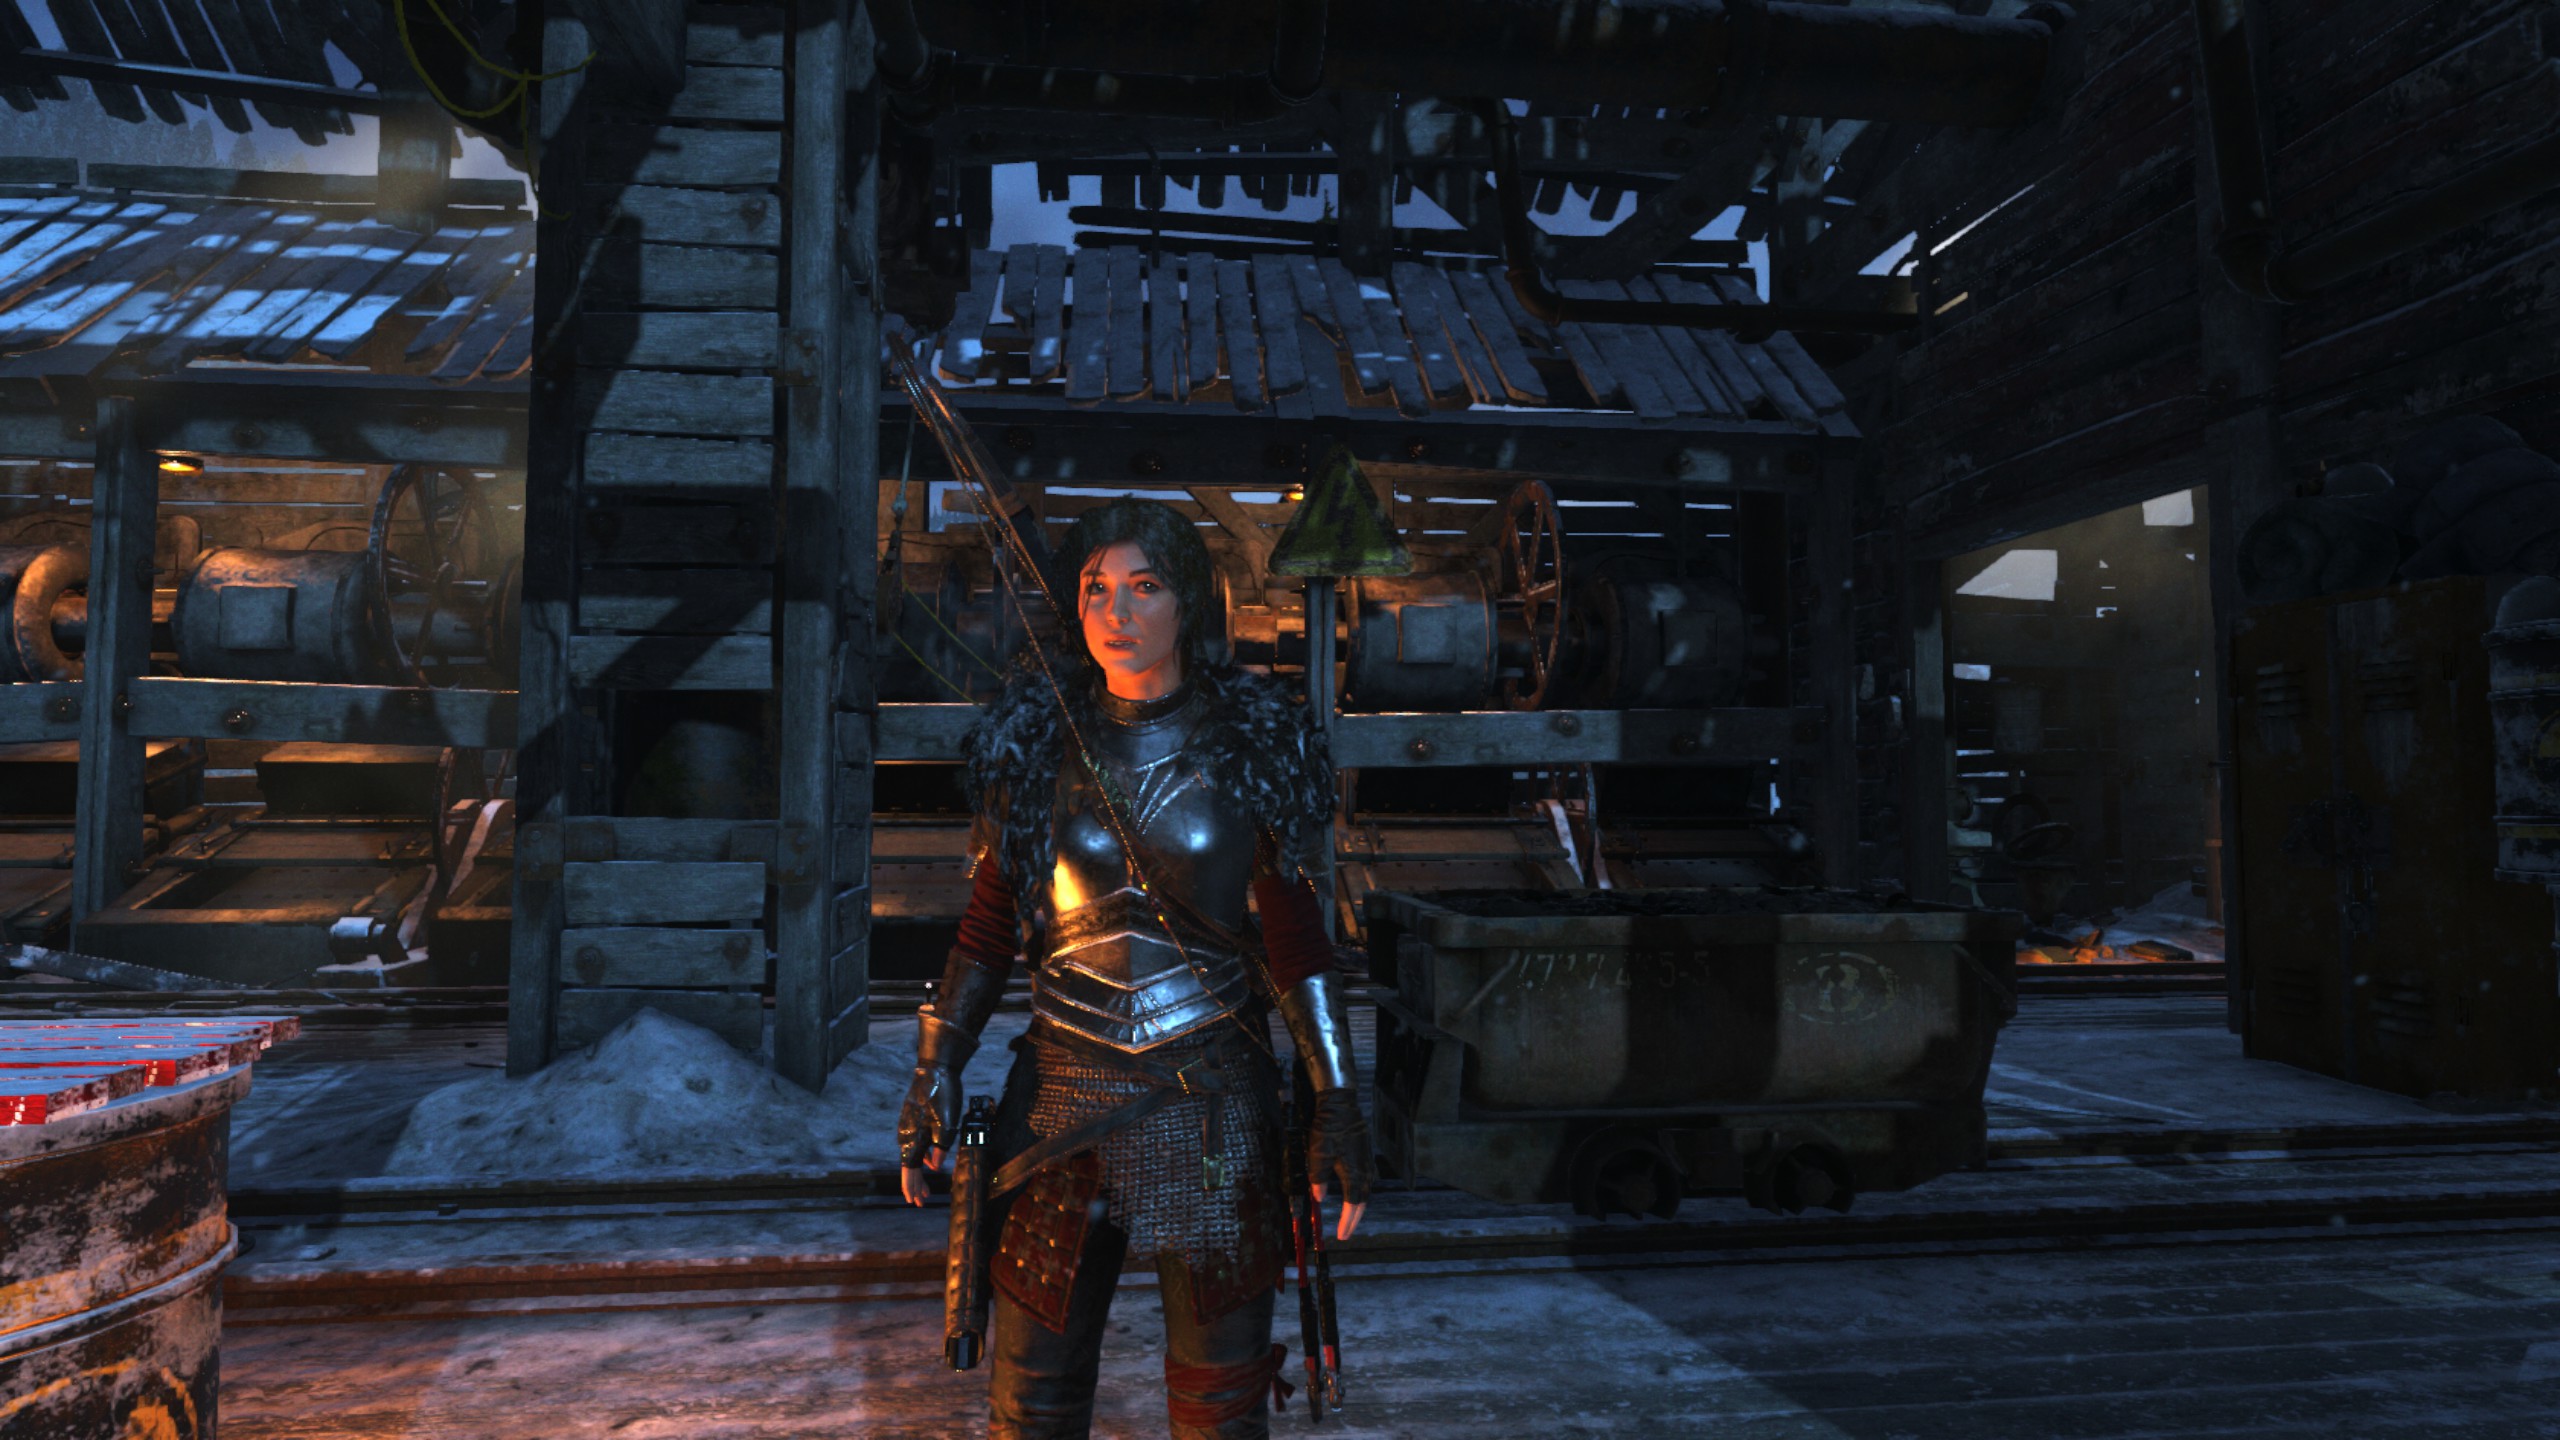
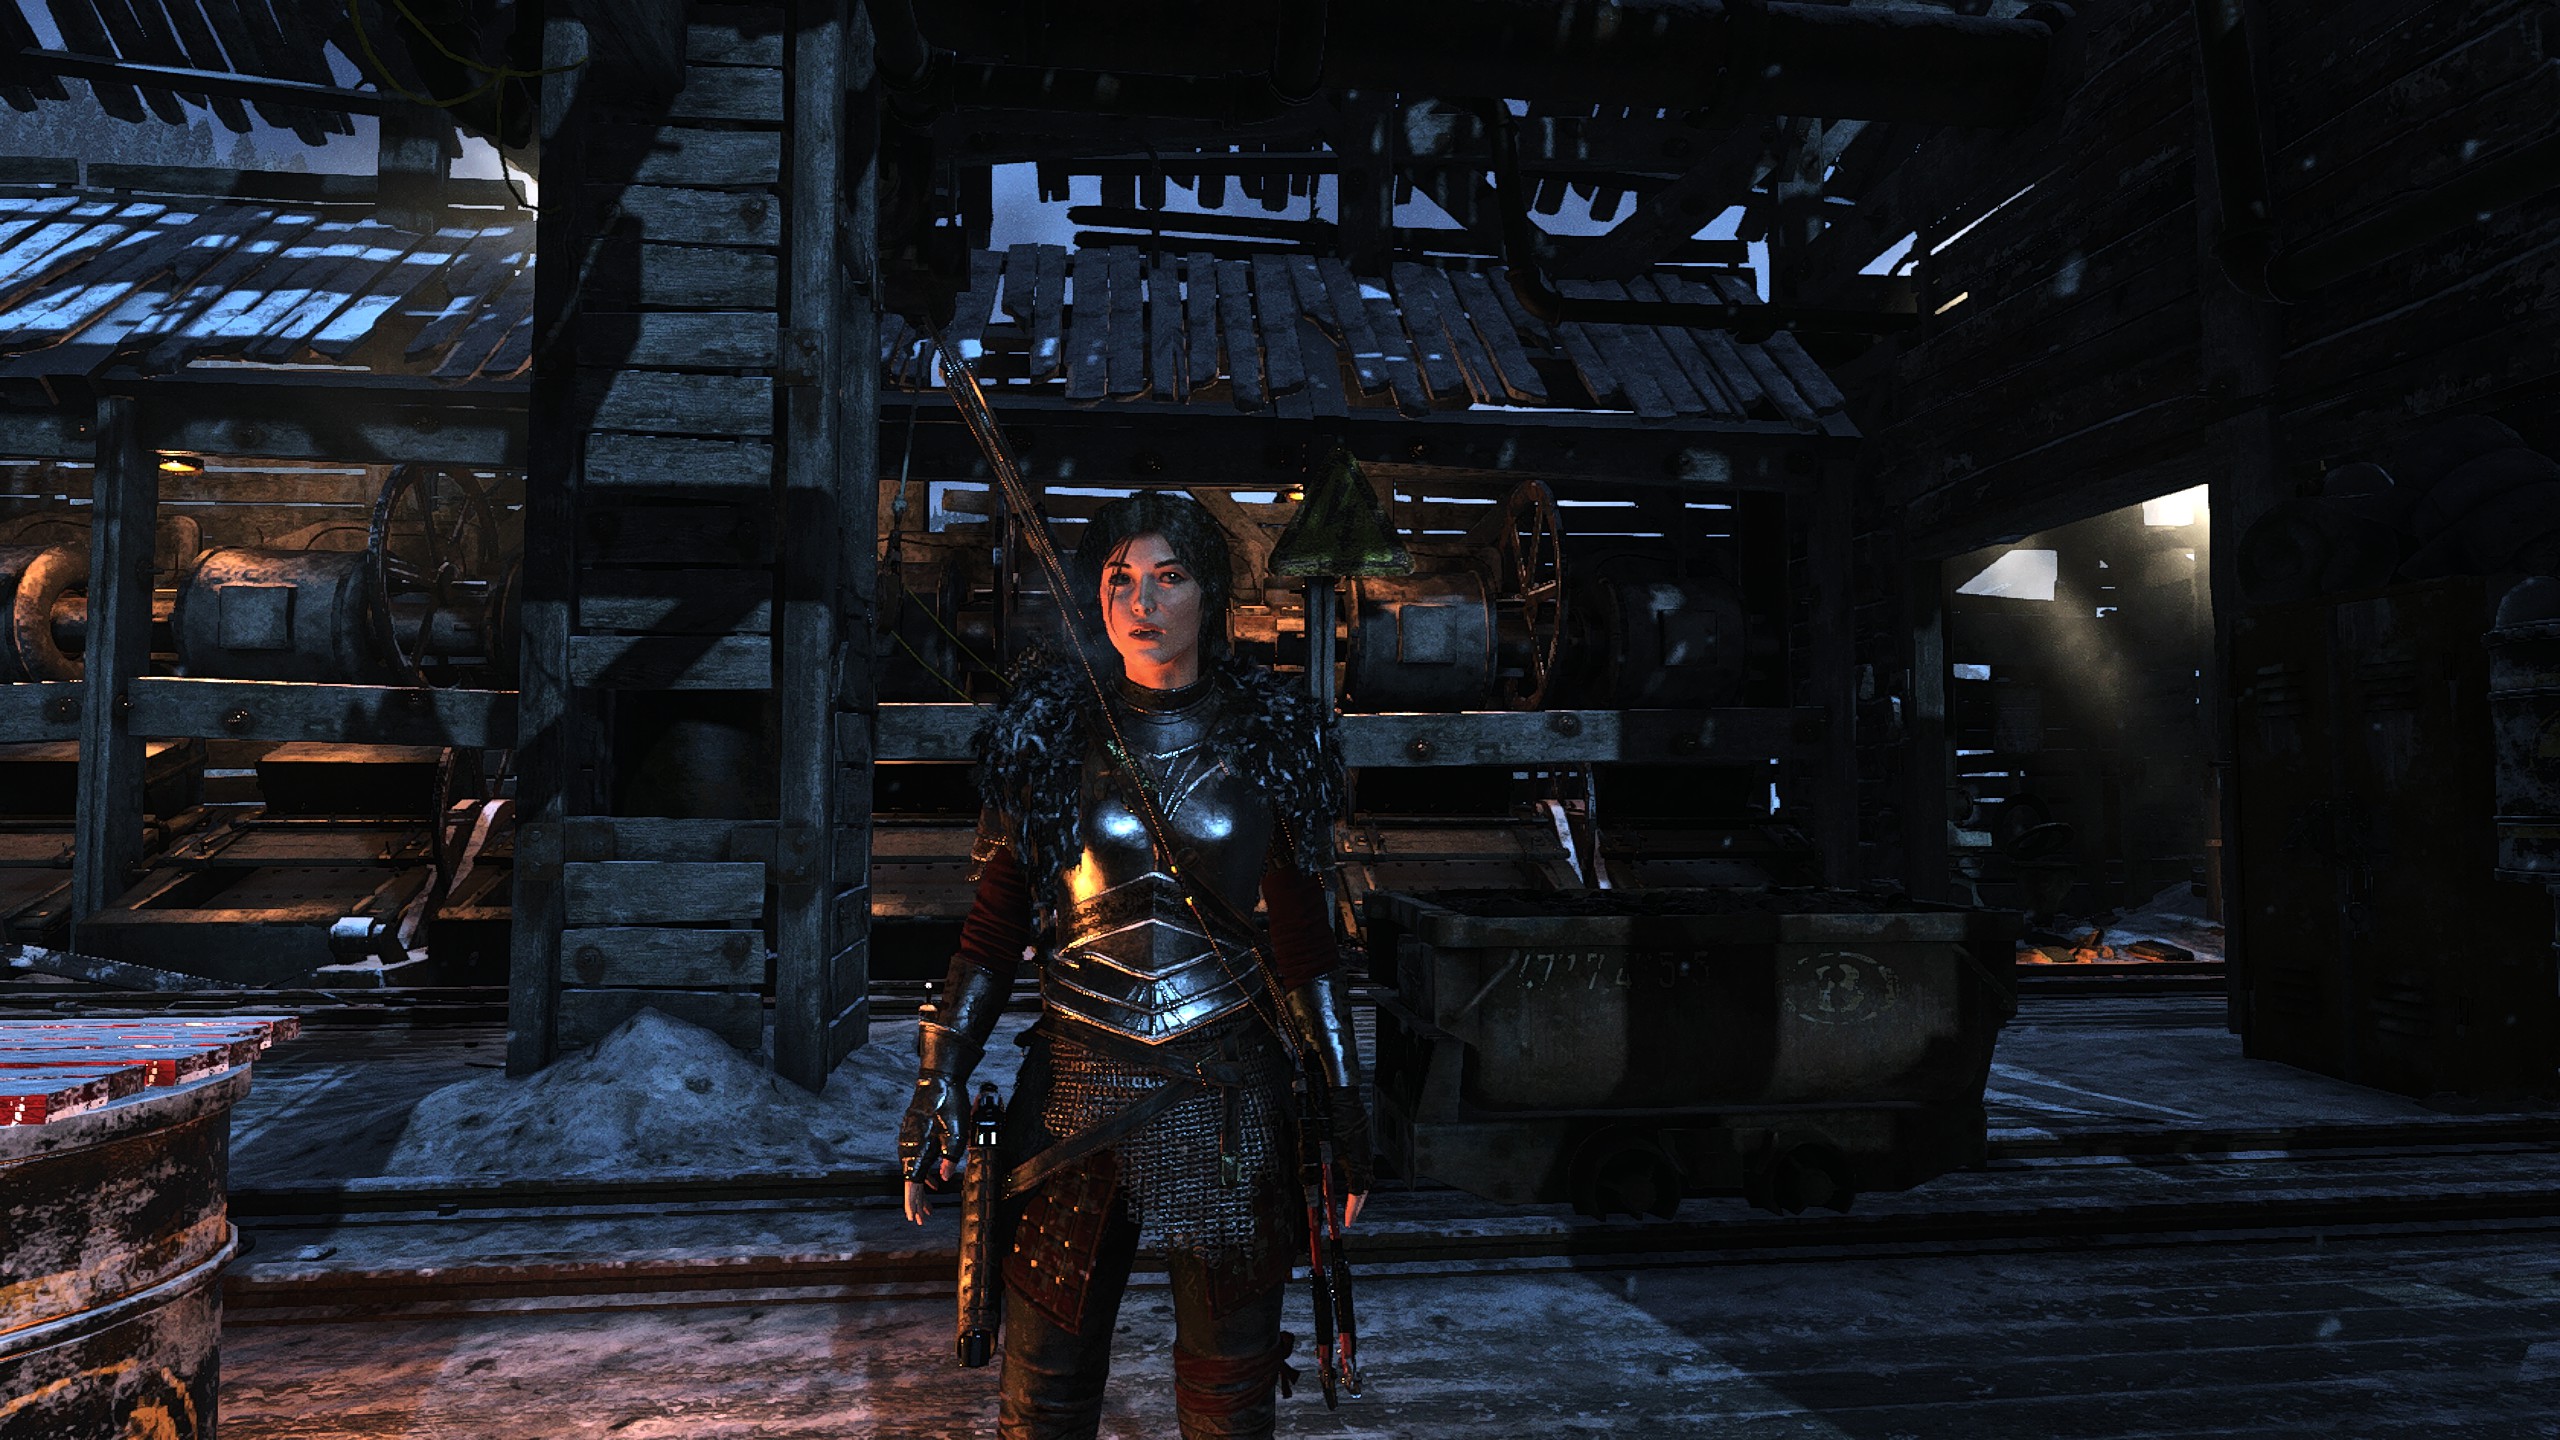
Rise of The Tomb Raider
-
Adaptive Sharpen
-
Clarity
-
Emphasize
-
FakeHDR/HDR
-
LumaSharpen
-
Tonemap
-
Vibrance


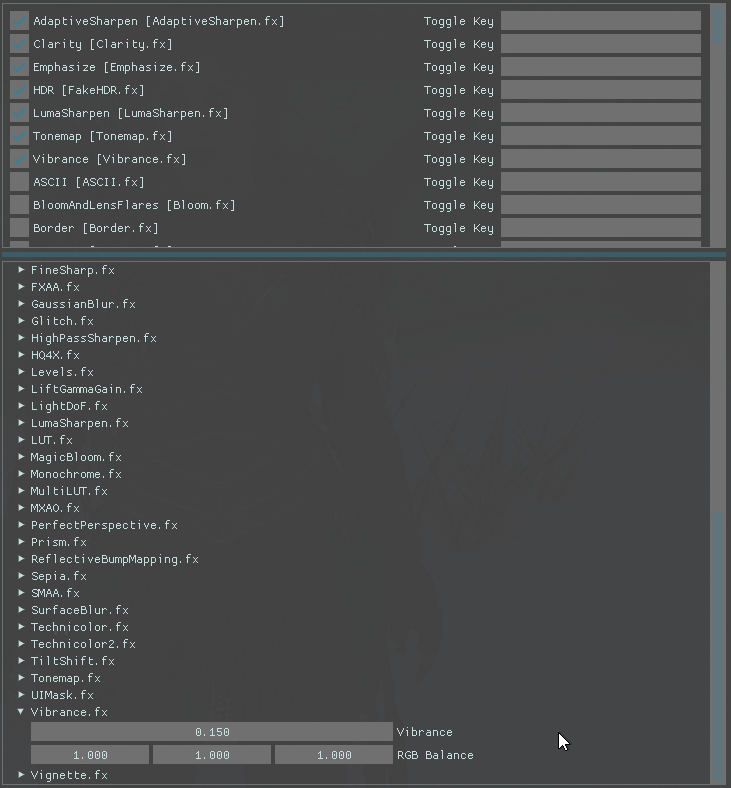
Before ReShade
After ReShade
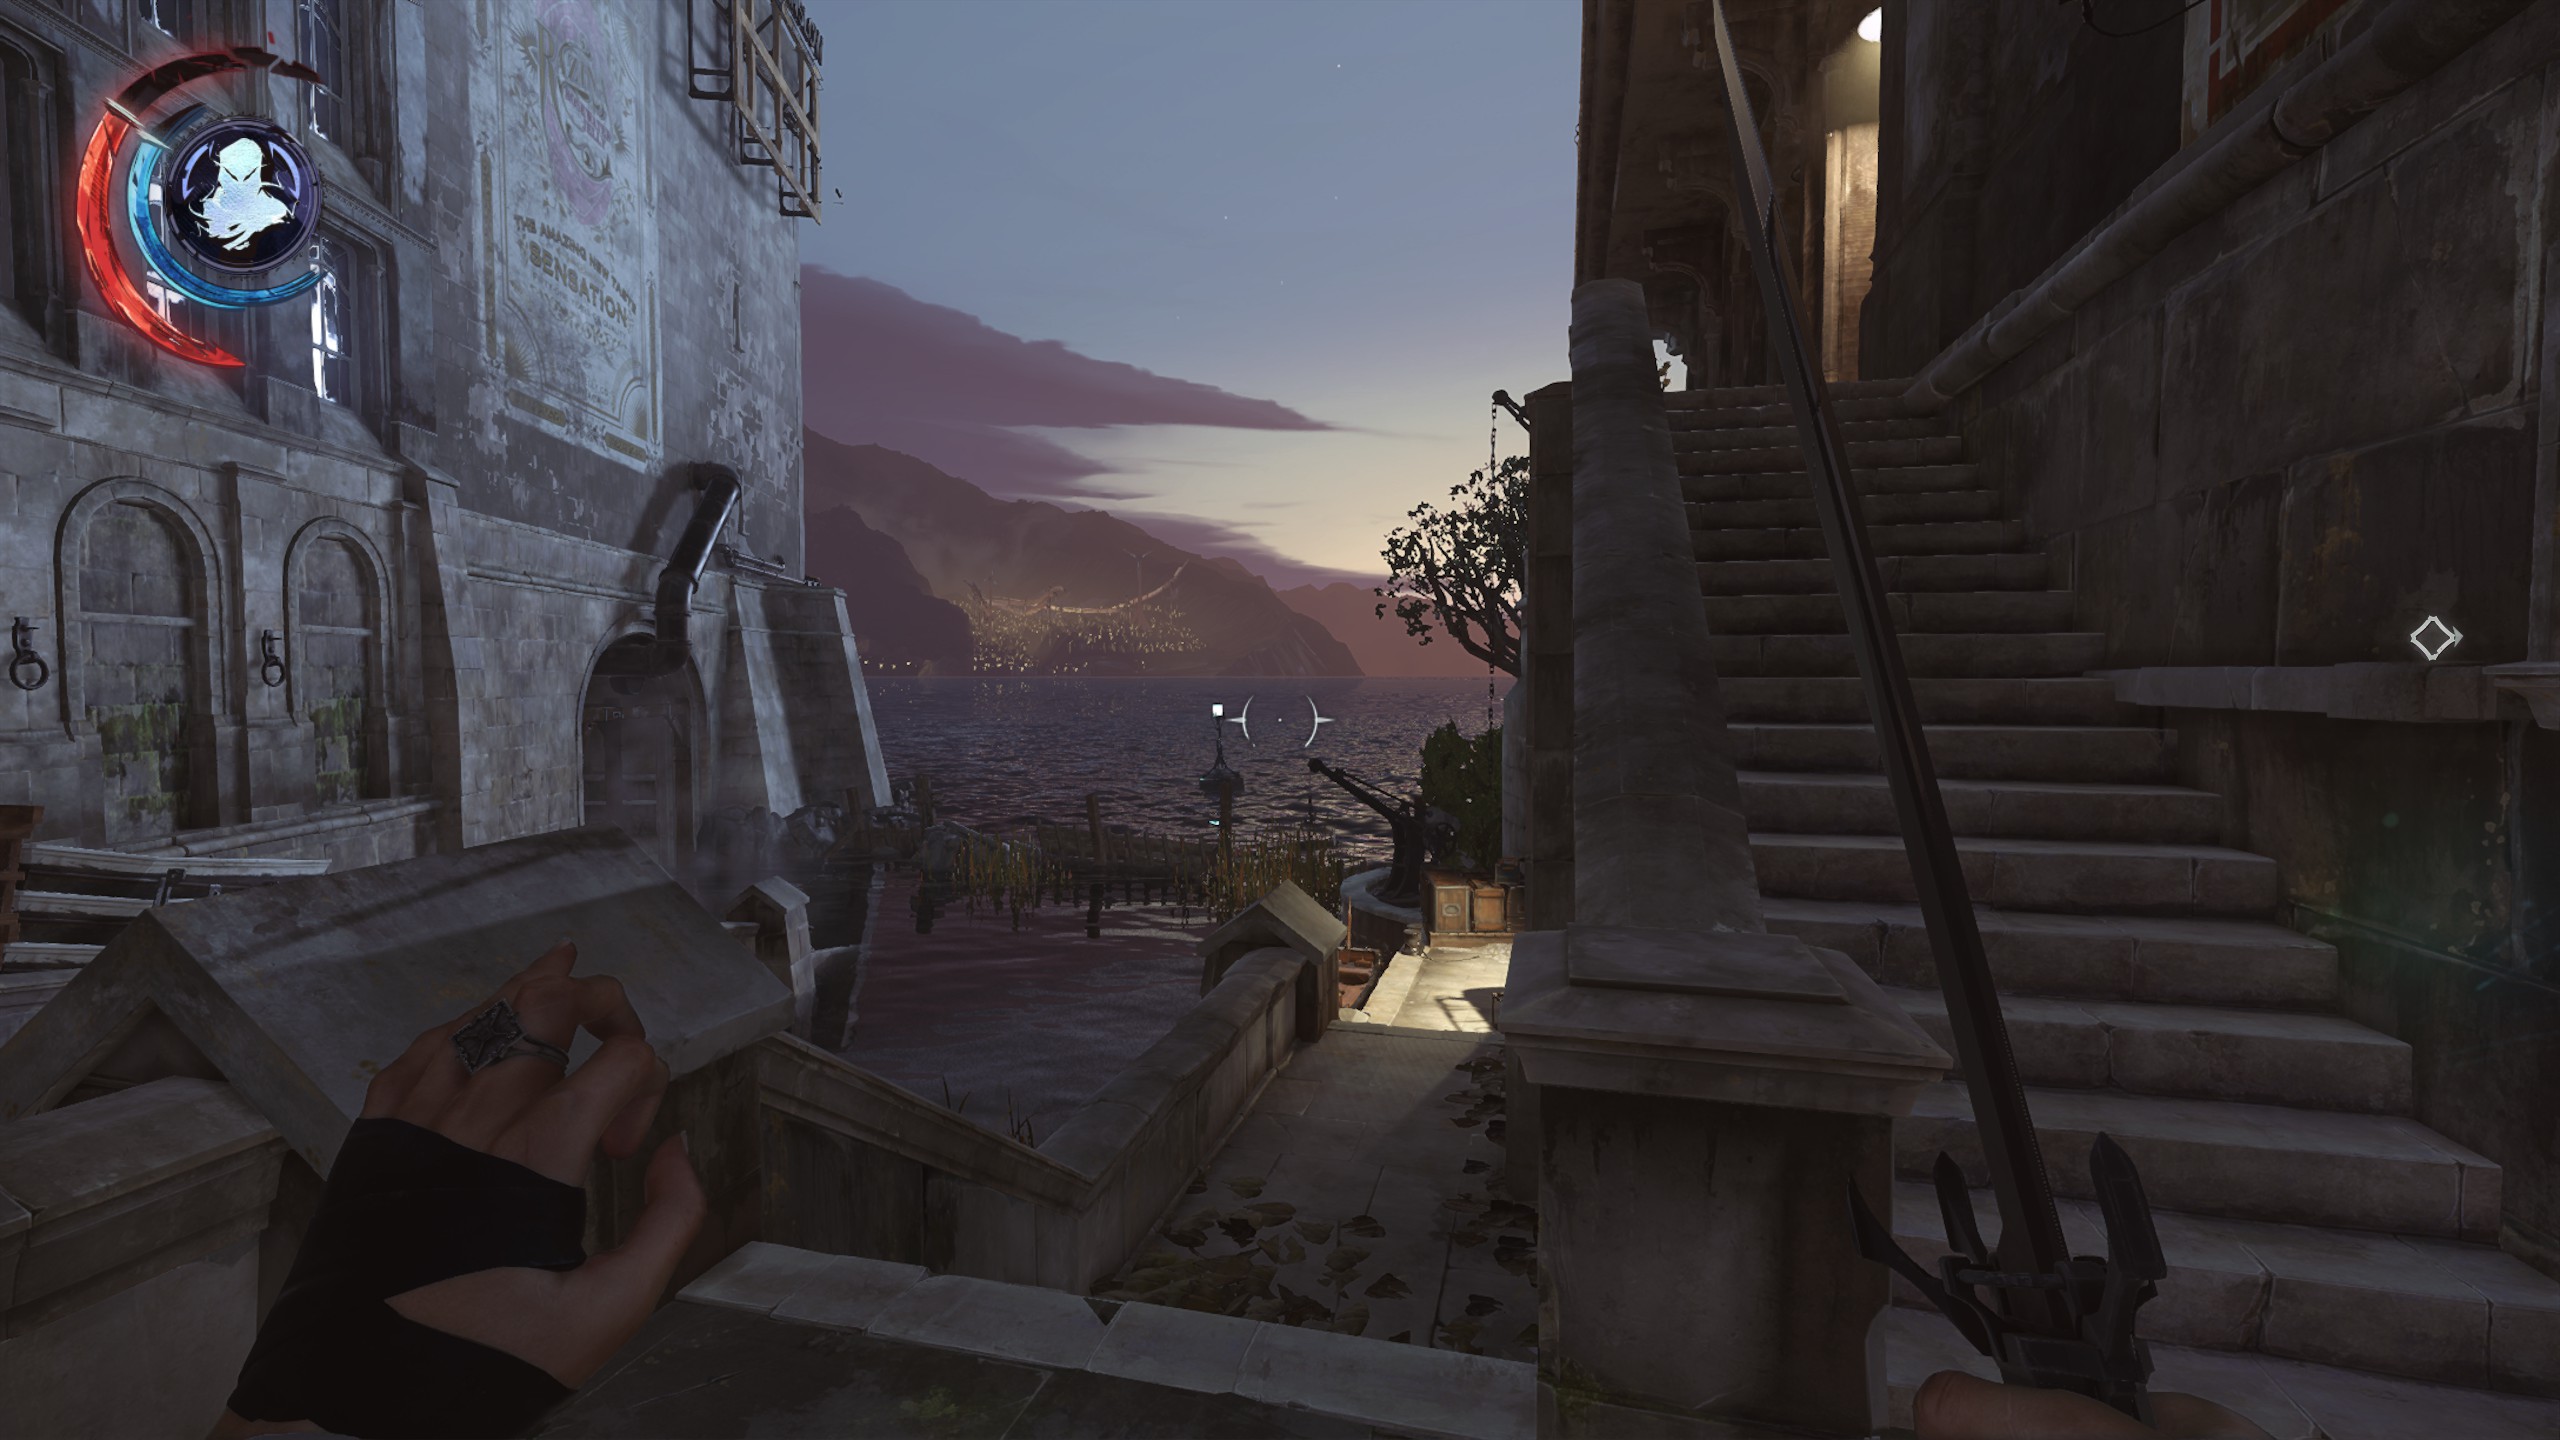
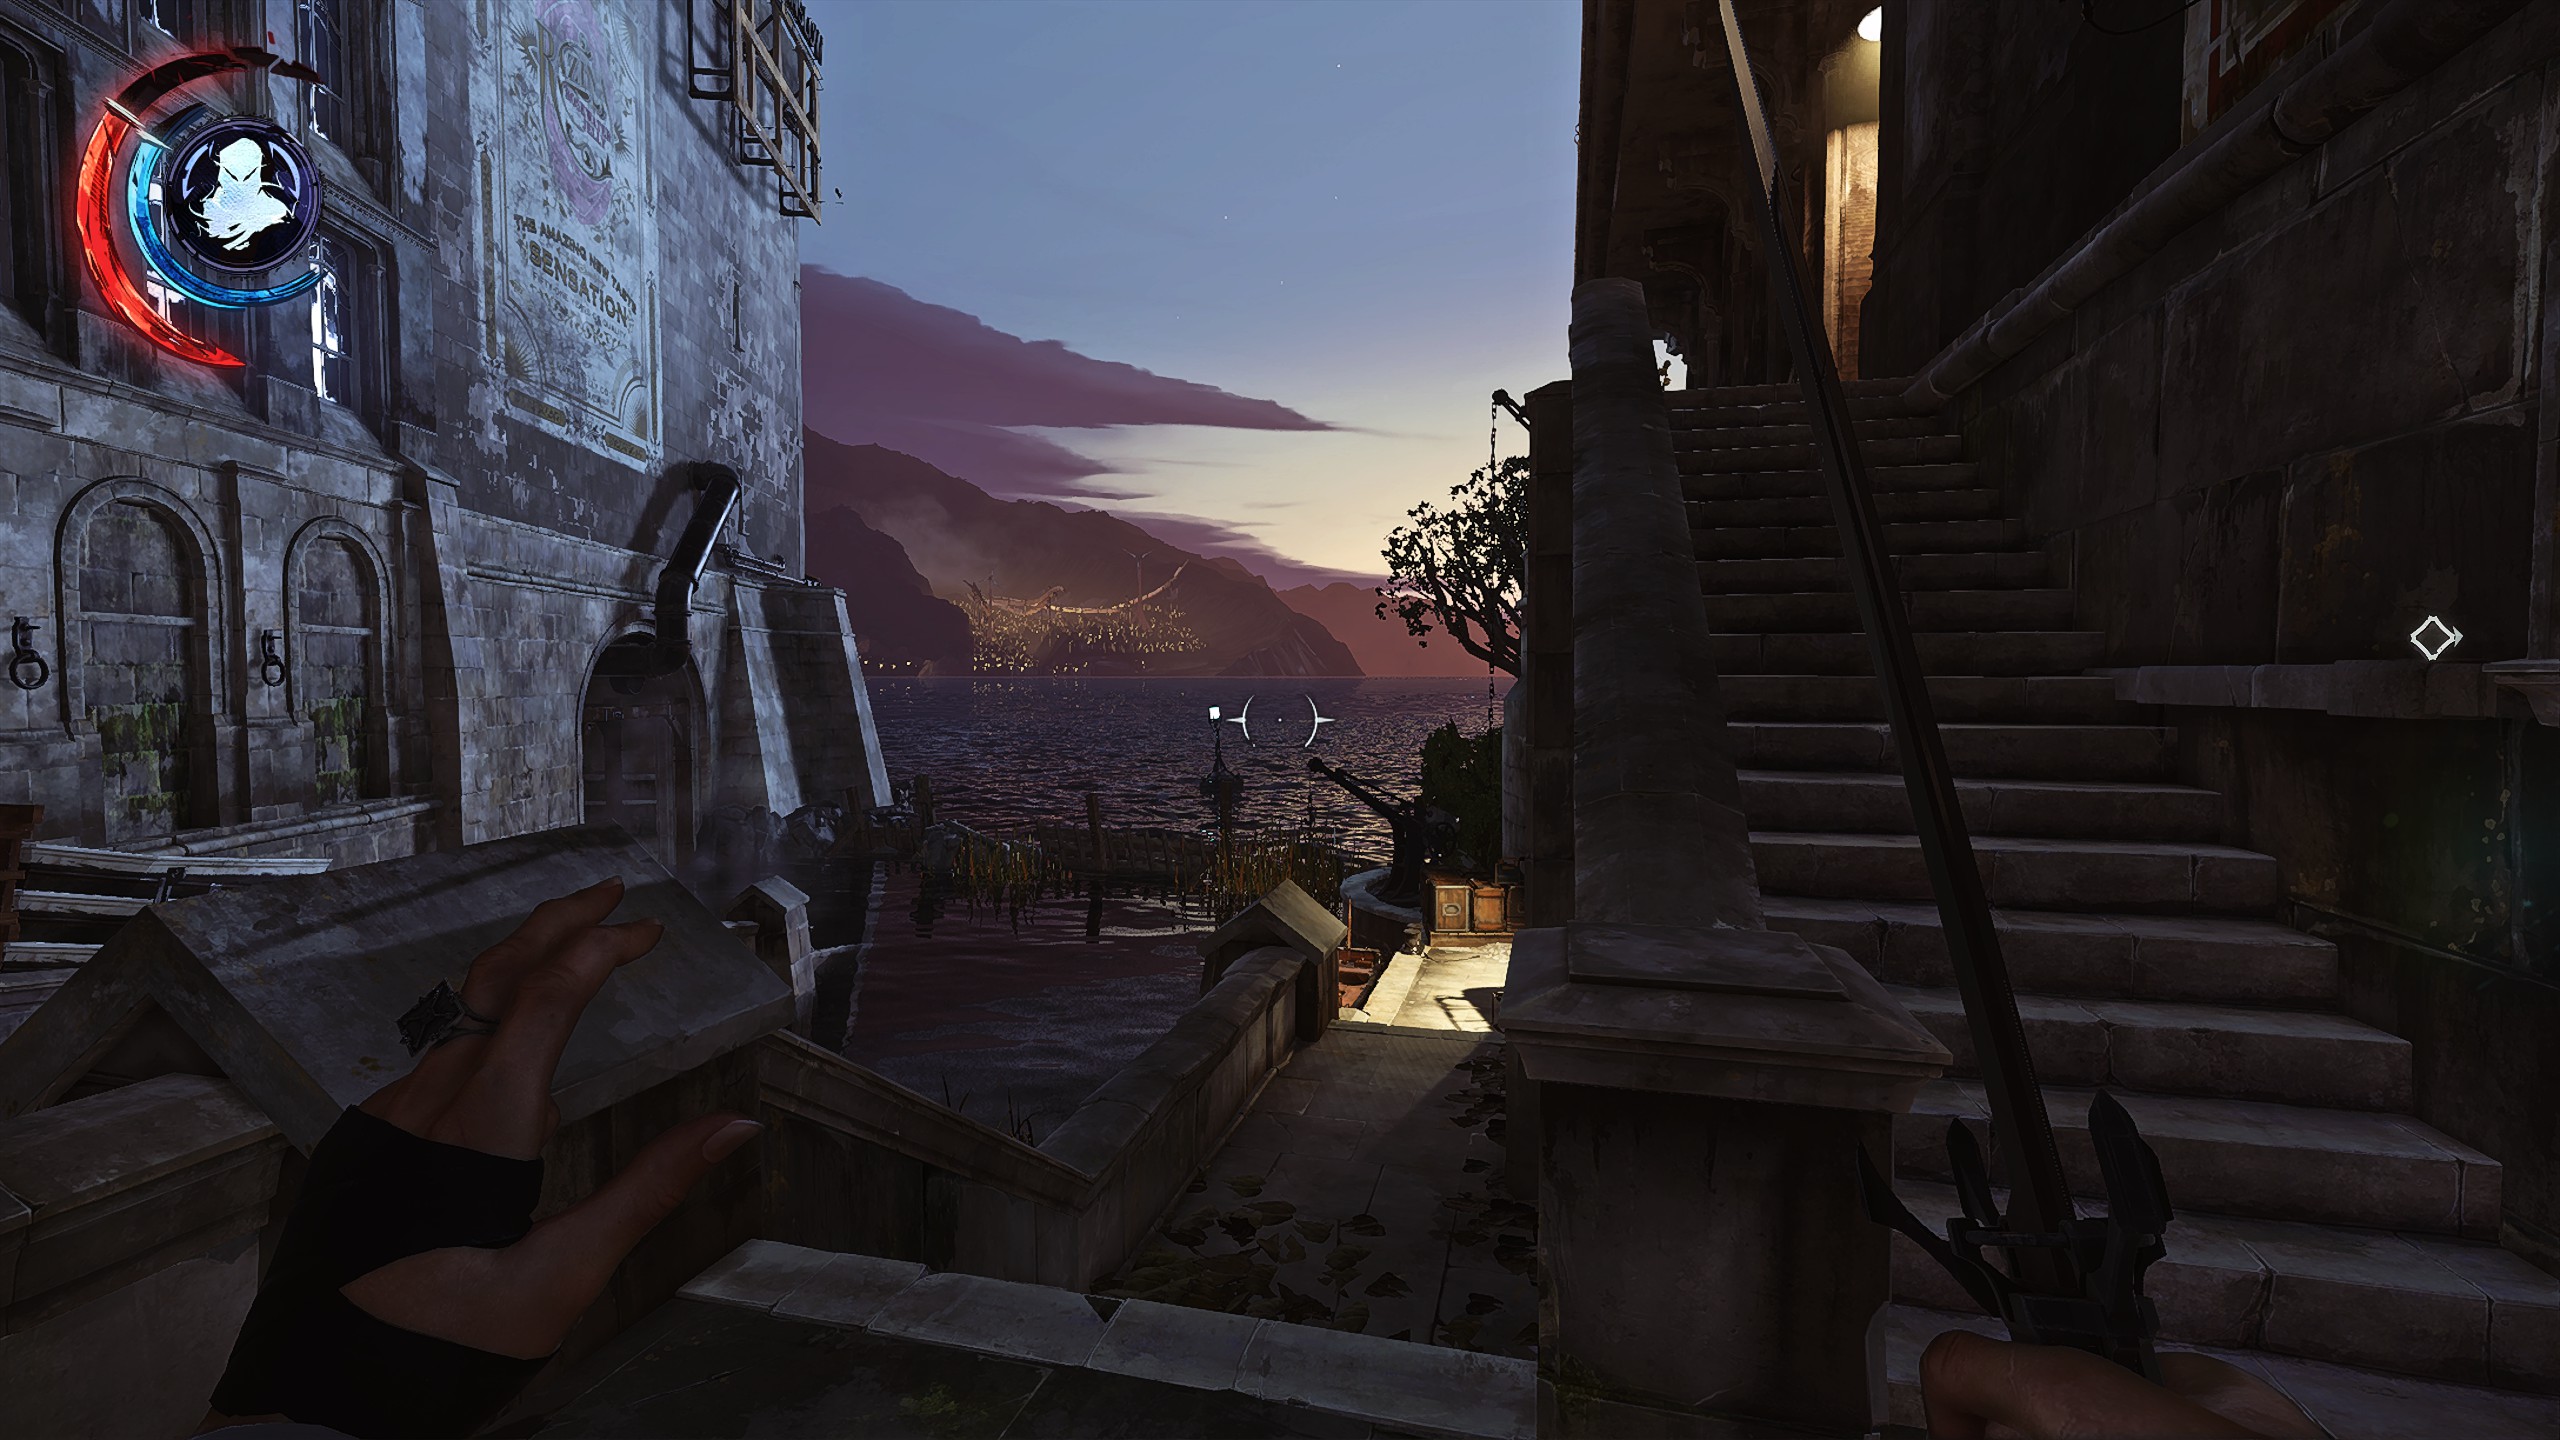
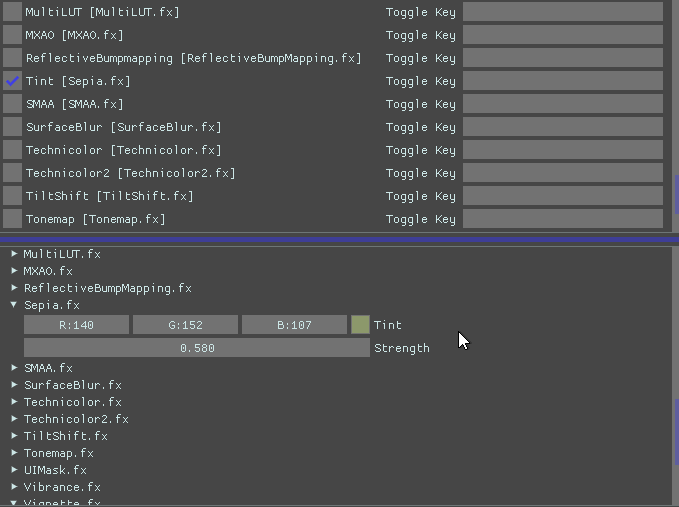
Hellblade Senua's Sacrifice
wolfleben-
ChromaticAberration
-
Clarity
-
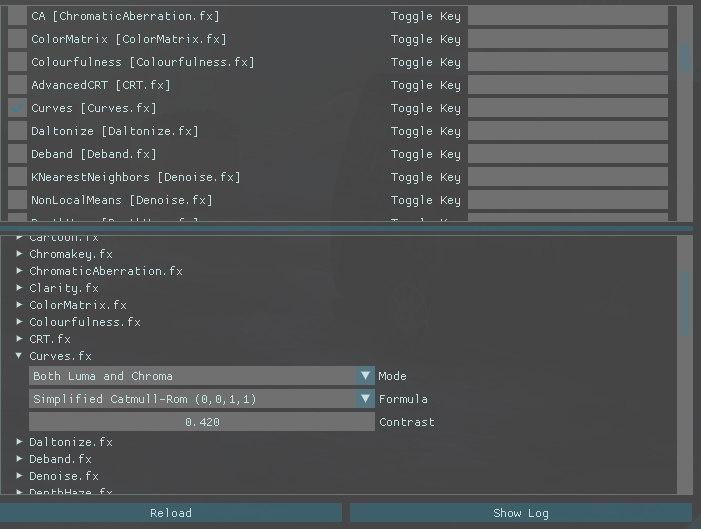
Curves
-
HDR/FakeHDR
-
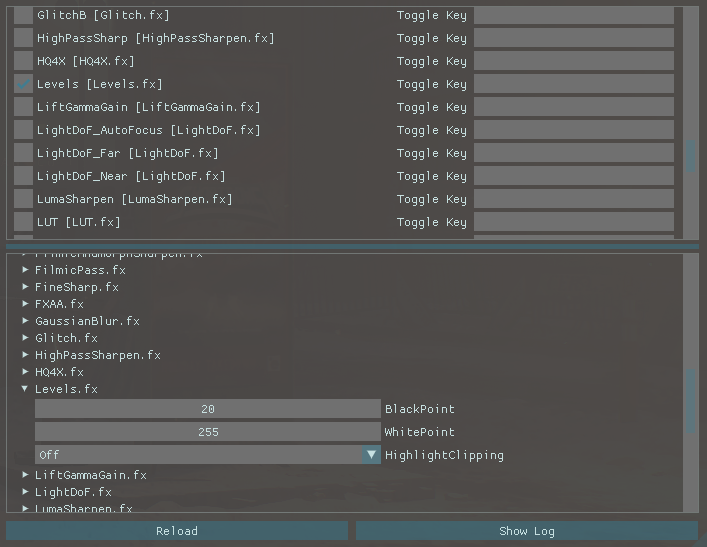
Levels
-
Tint/Sepia
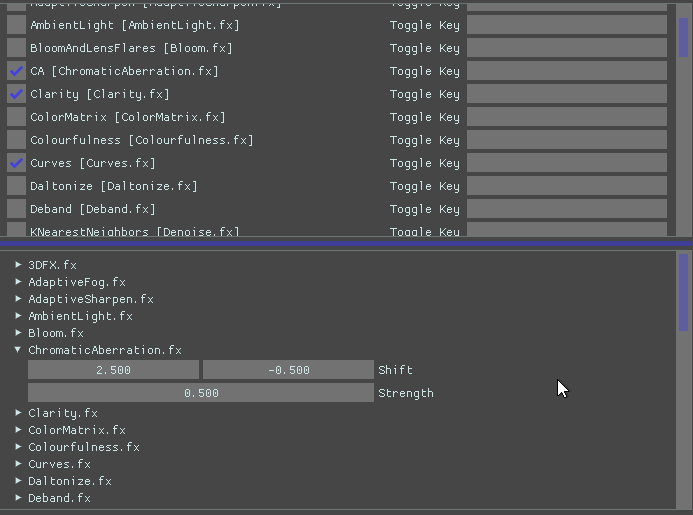
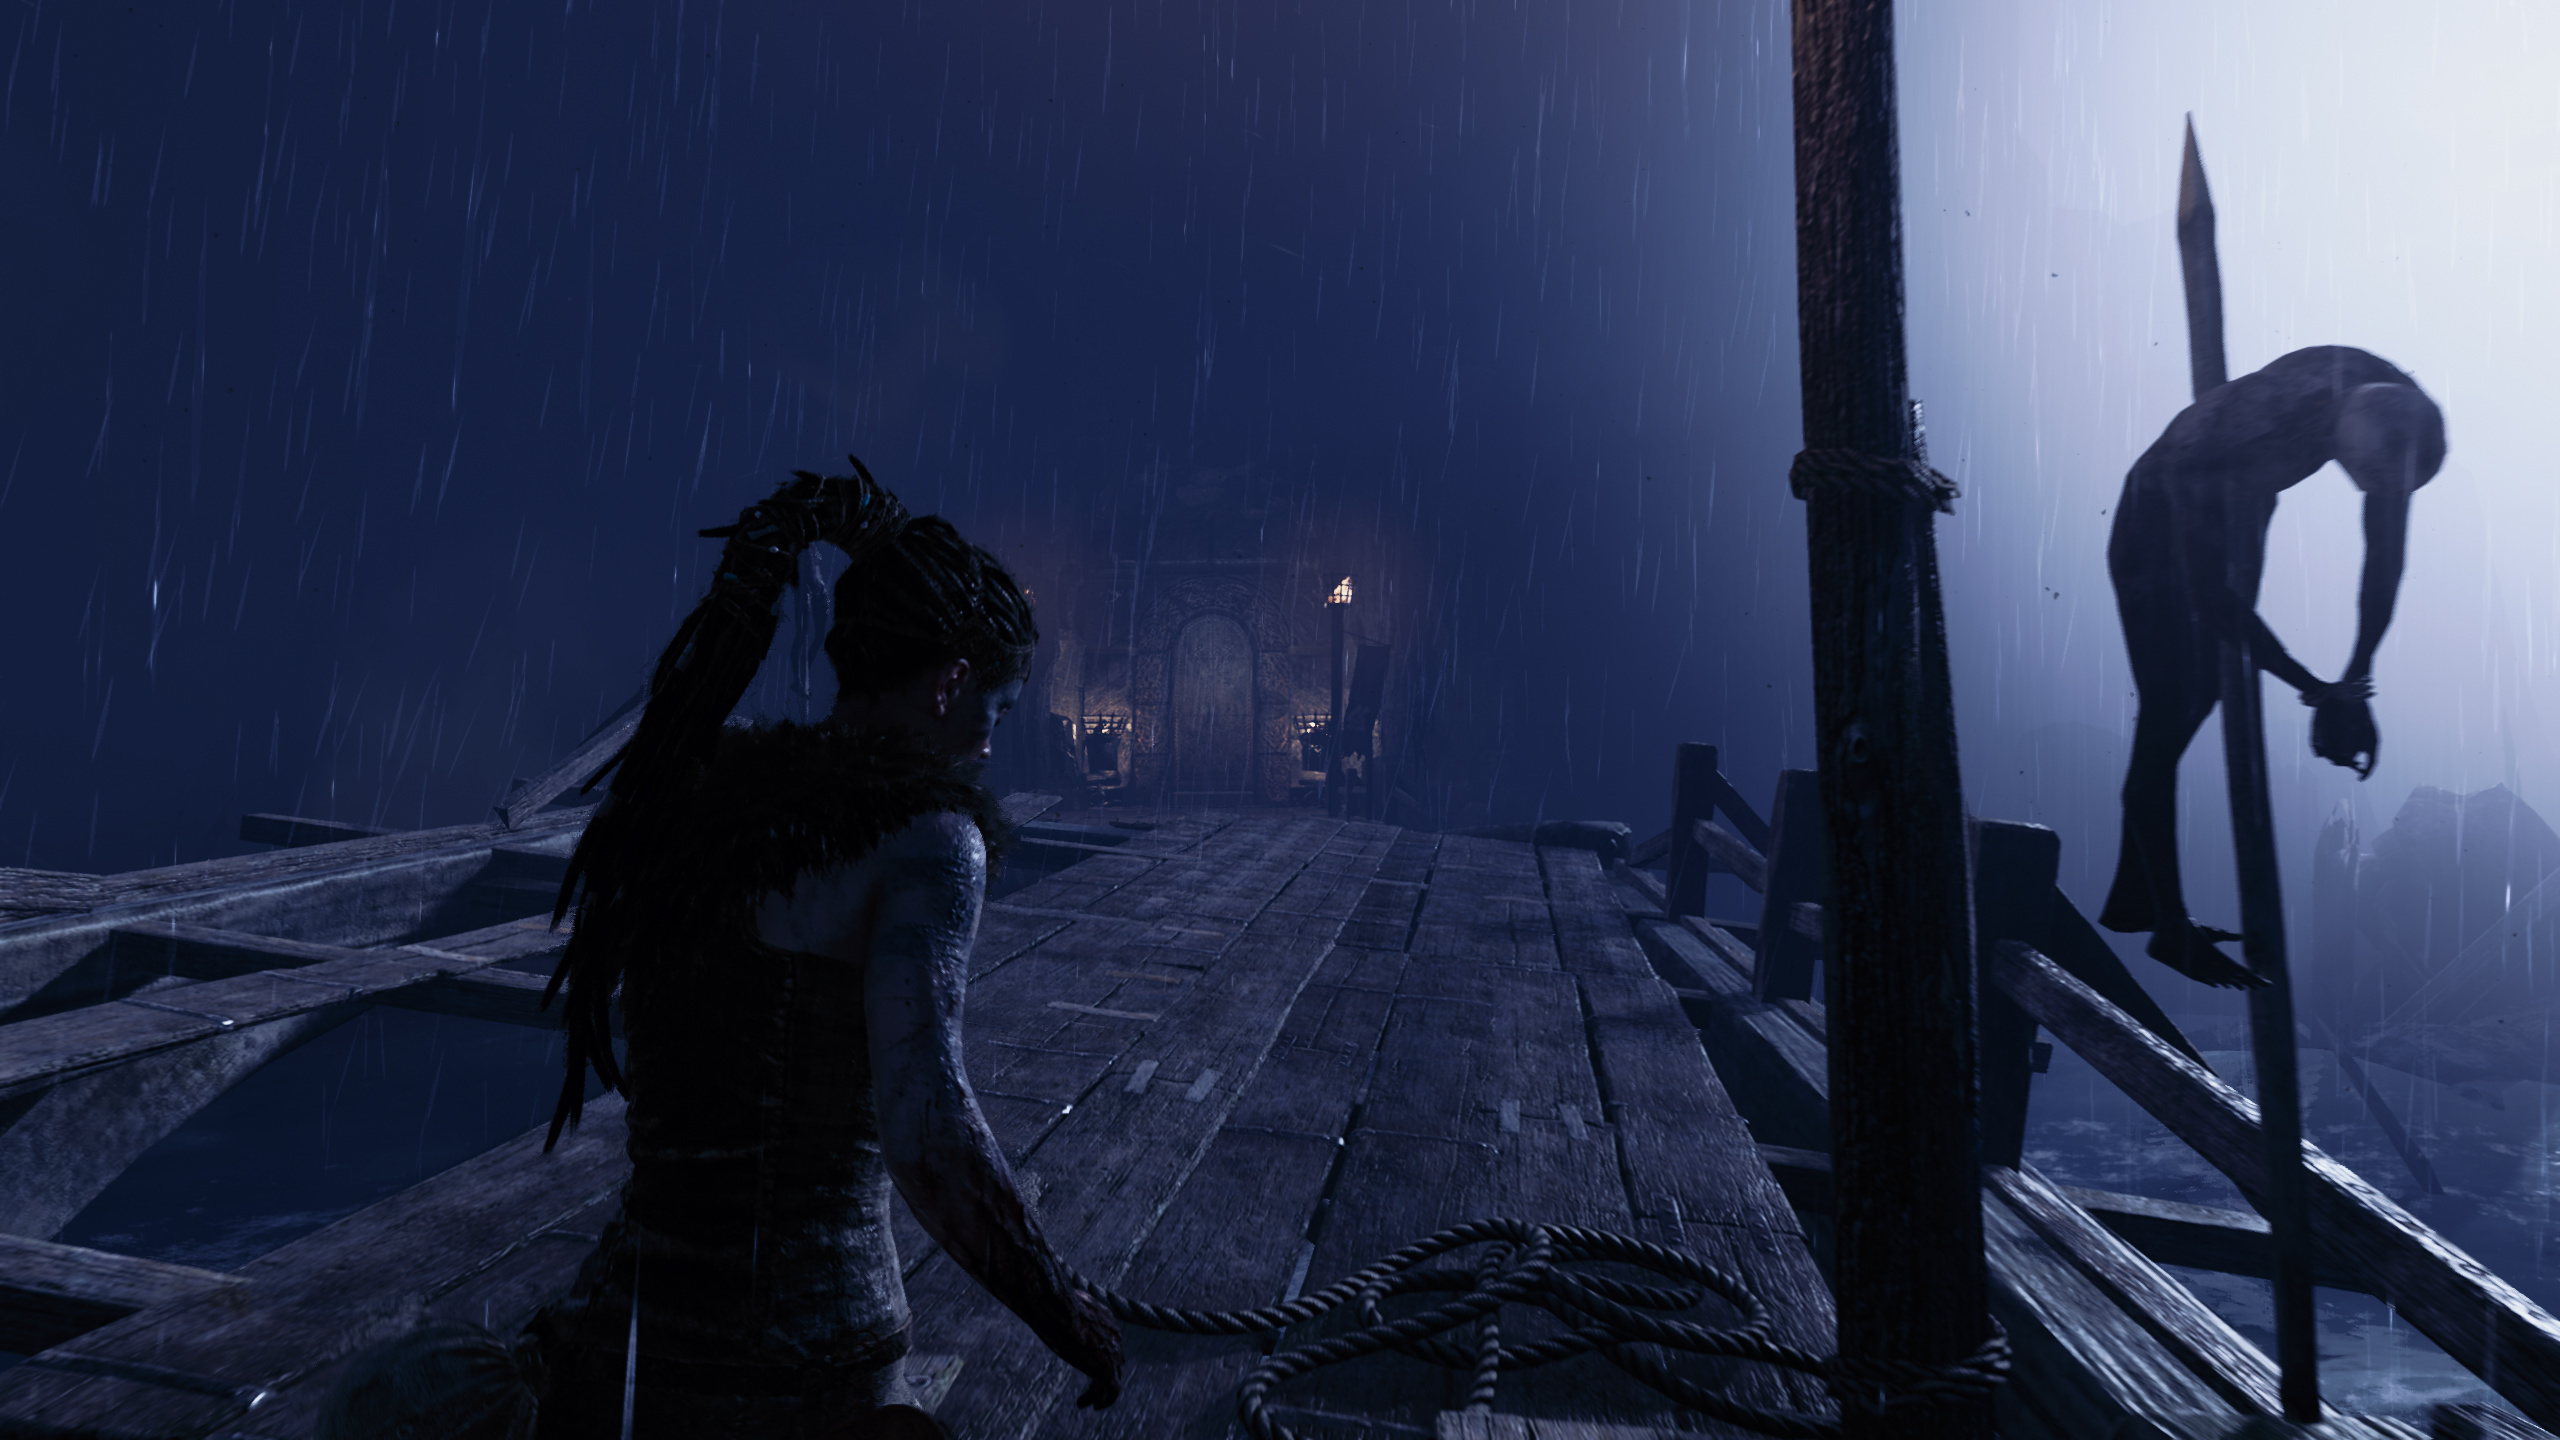
Before ReShade
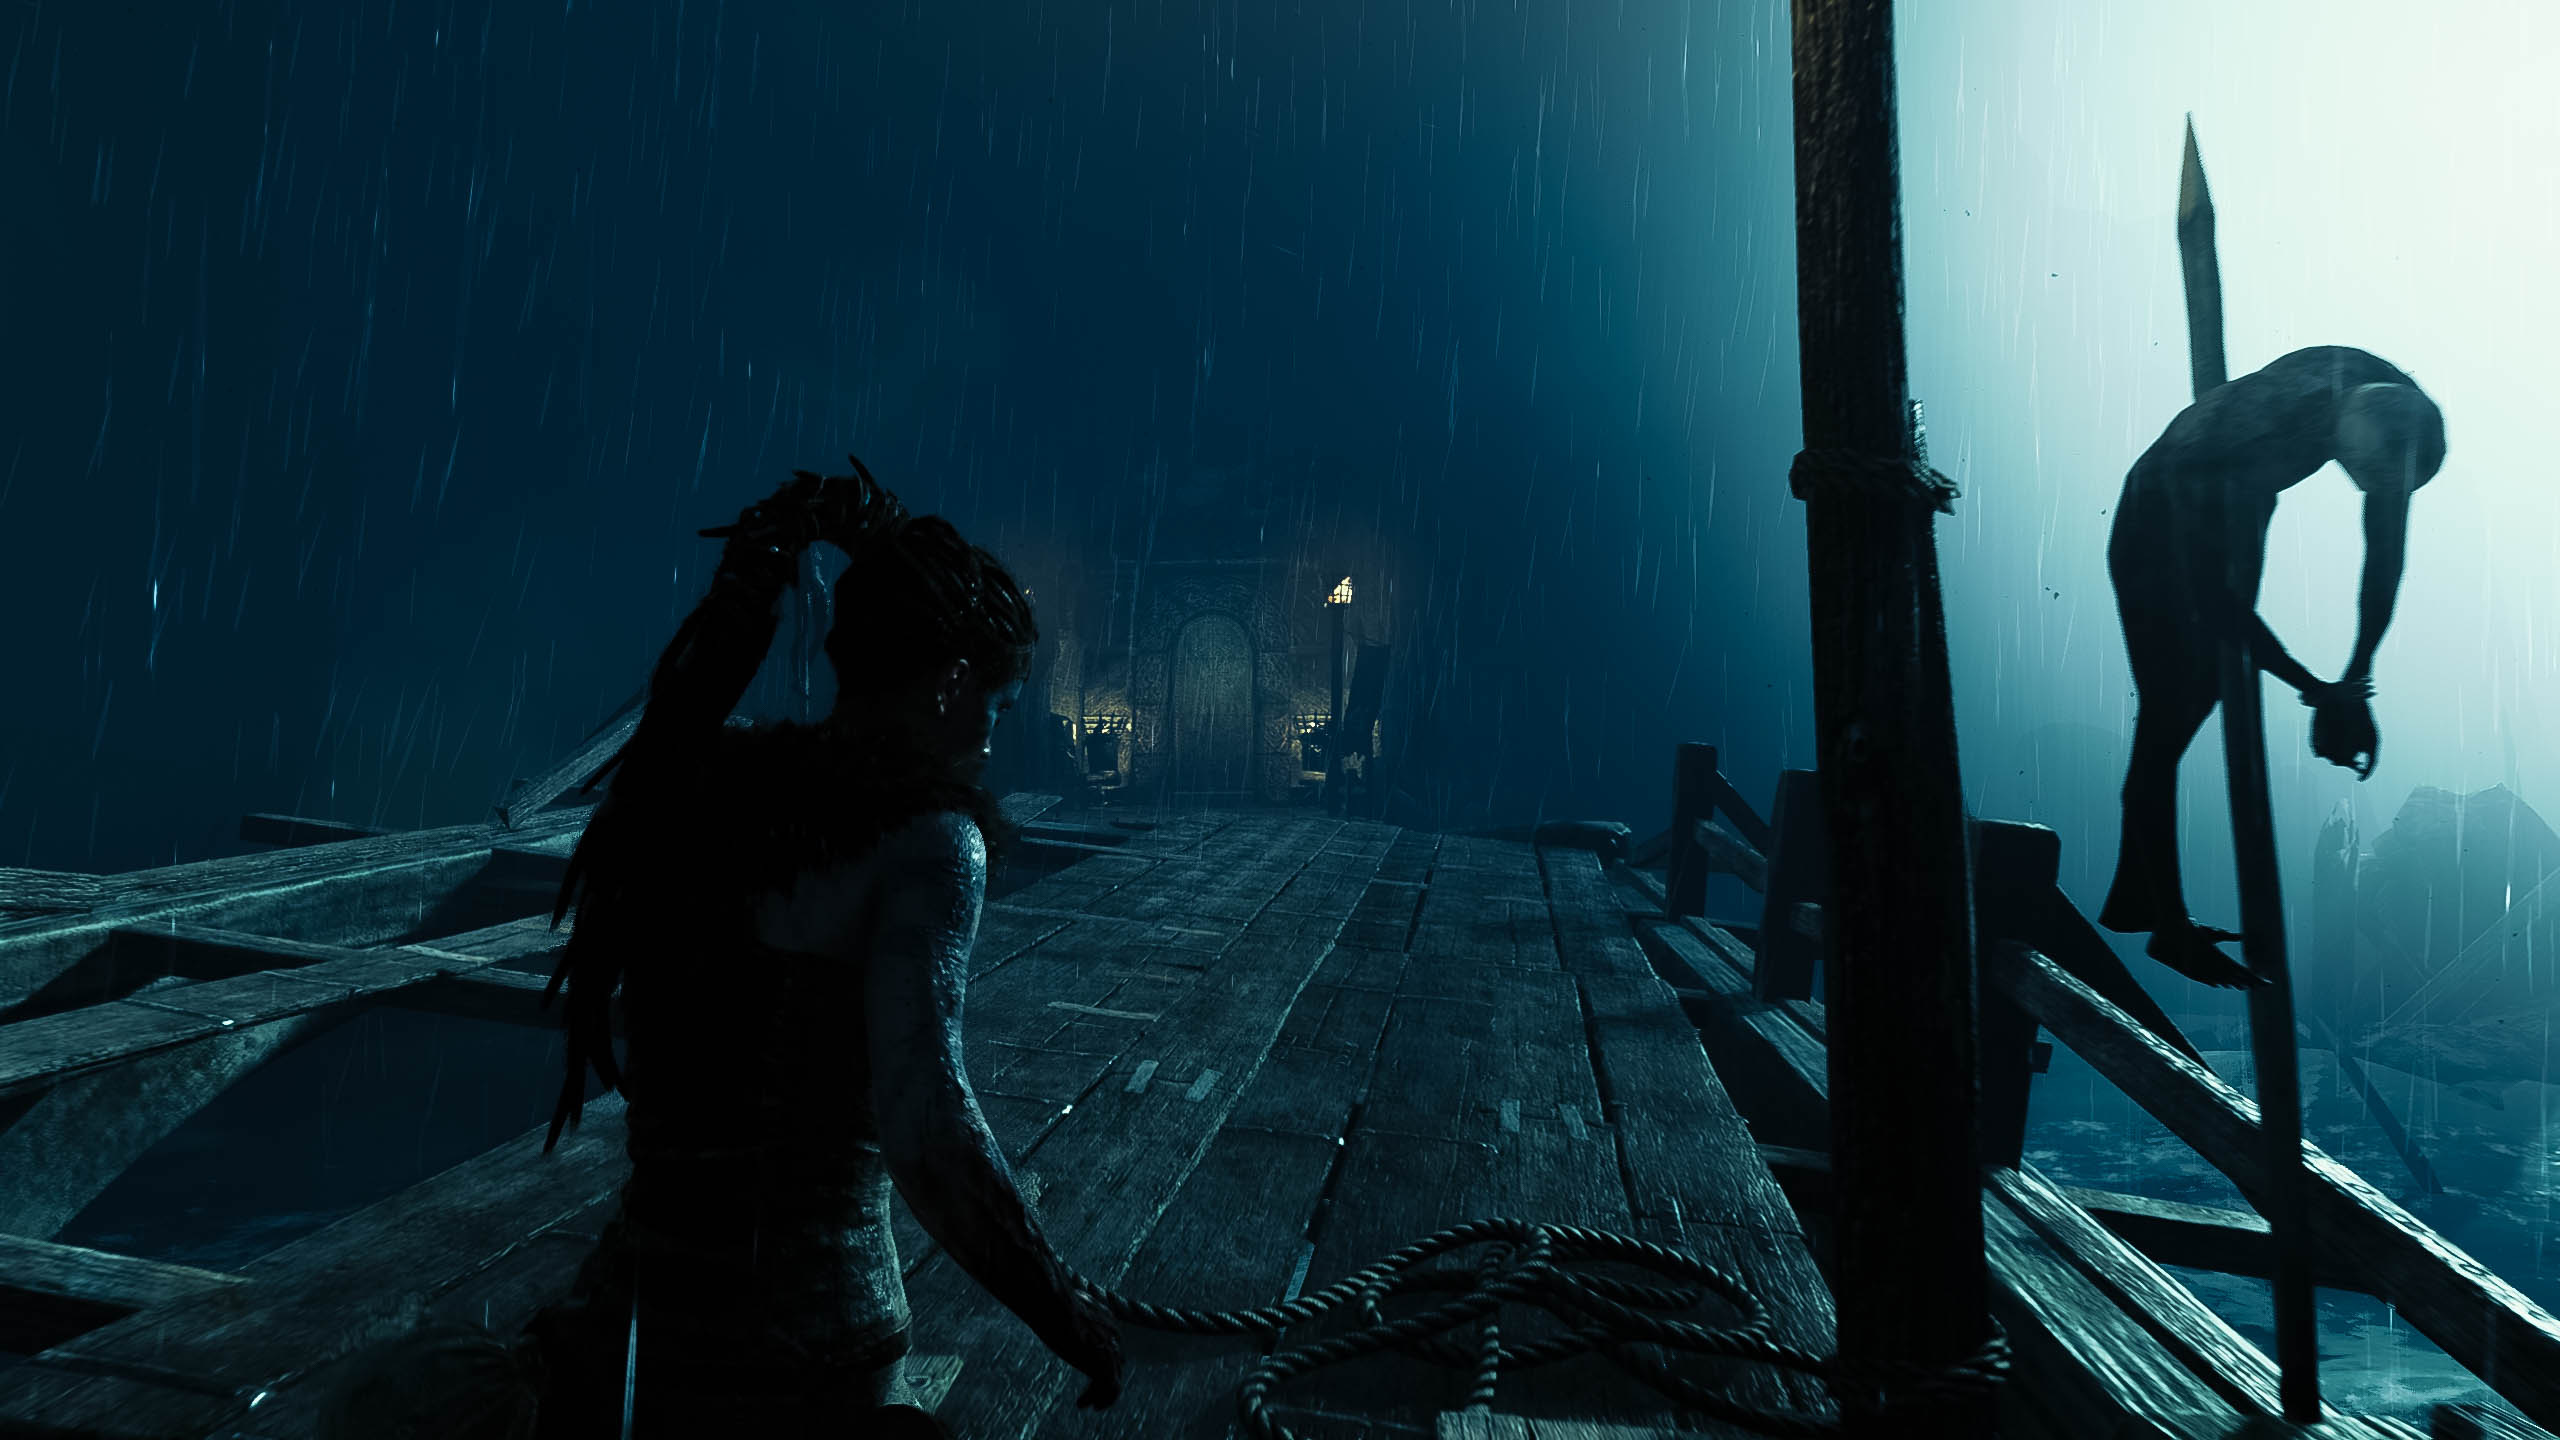
After ReShade
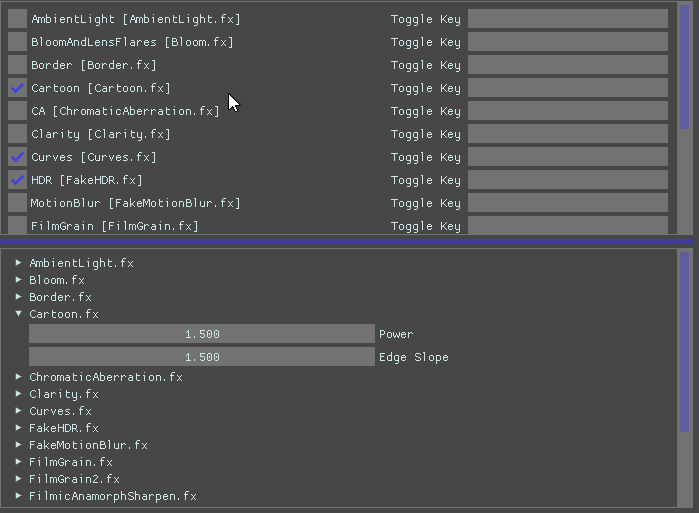
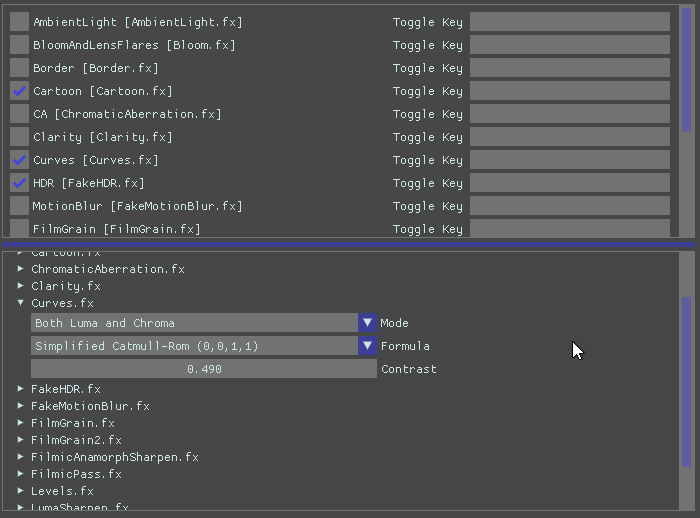
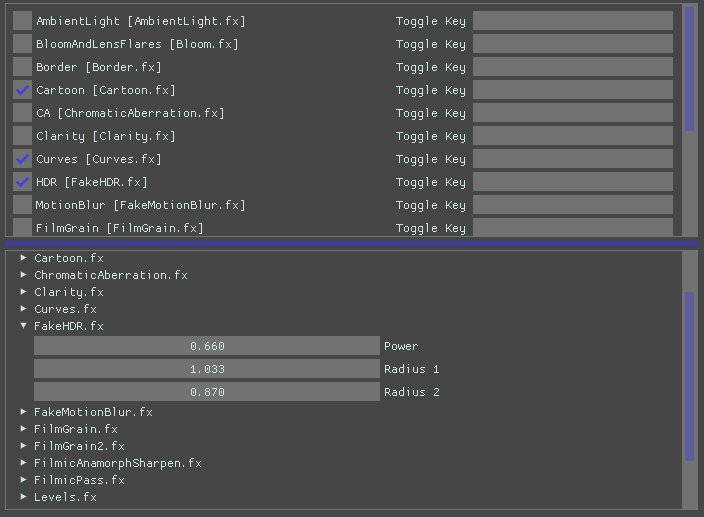
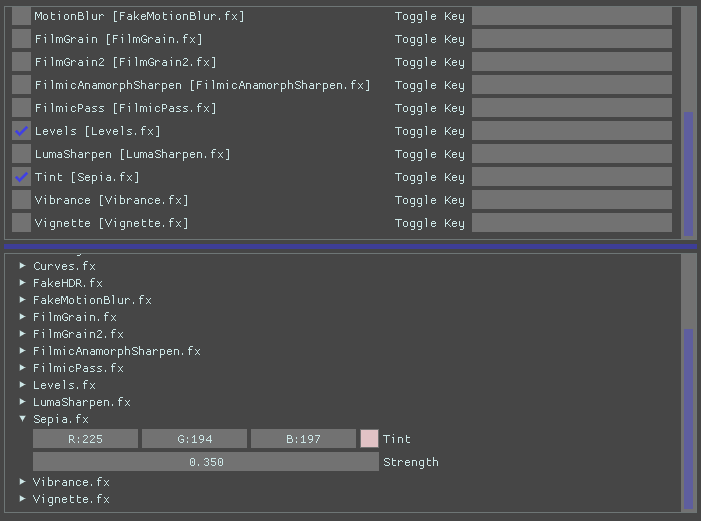
BioShock/BioShock Remastered
This Preset can be used for both the normal BioShock or the Remastered one. Select Direct X9 when installing ReShade.
Note 1 LOCATION of the BioShock .exe for the normal BioShock:

Note 2 LOCATION of the BioShockHD .exe for the Remastered BioShock:
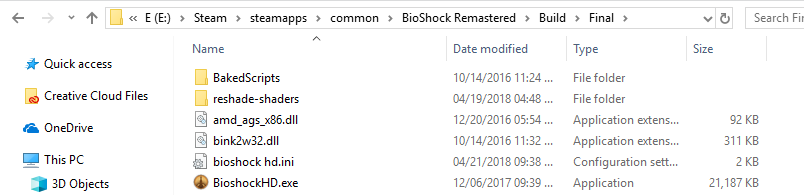
Note 3 You need to change the Overlay Key for ReShade because Shift brings up a menu in BioShock and BioShock Rematerd. I suggest Z cause it isn’t used at all:

-
Cartoon
-
Curves
-
FakeHDR
-
Levels
-
Tint

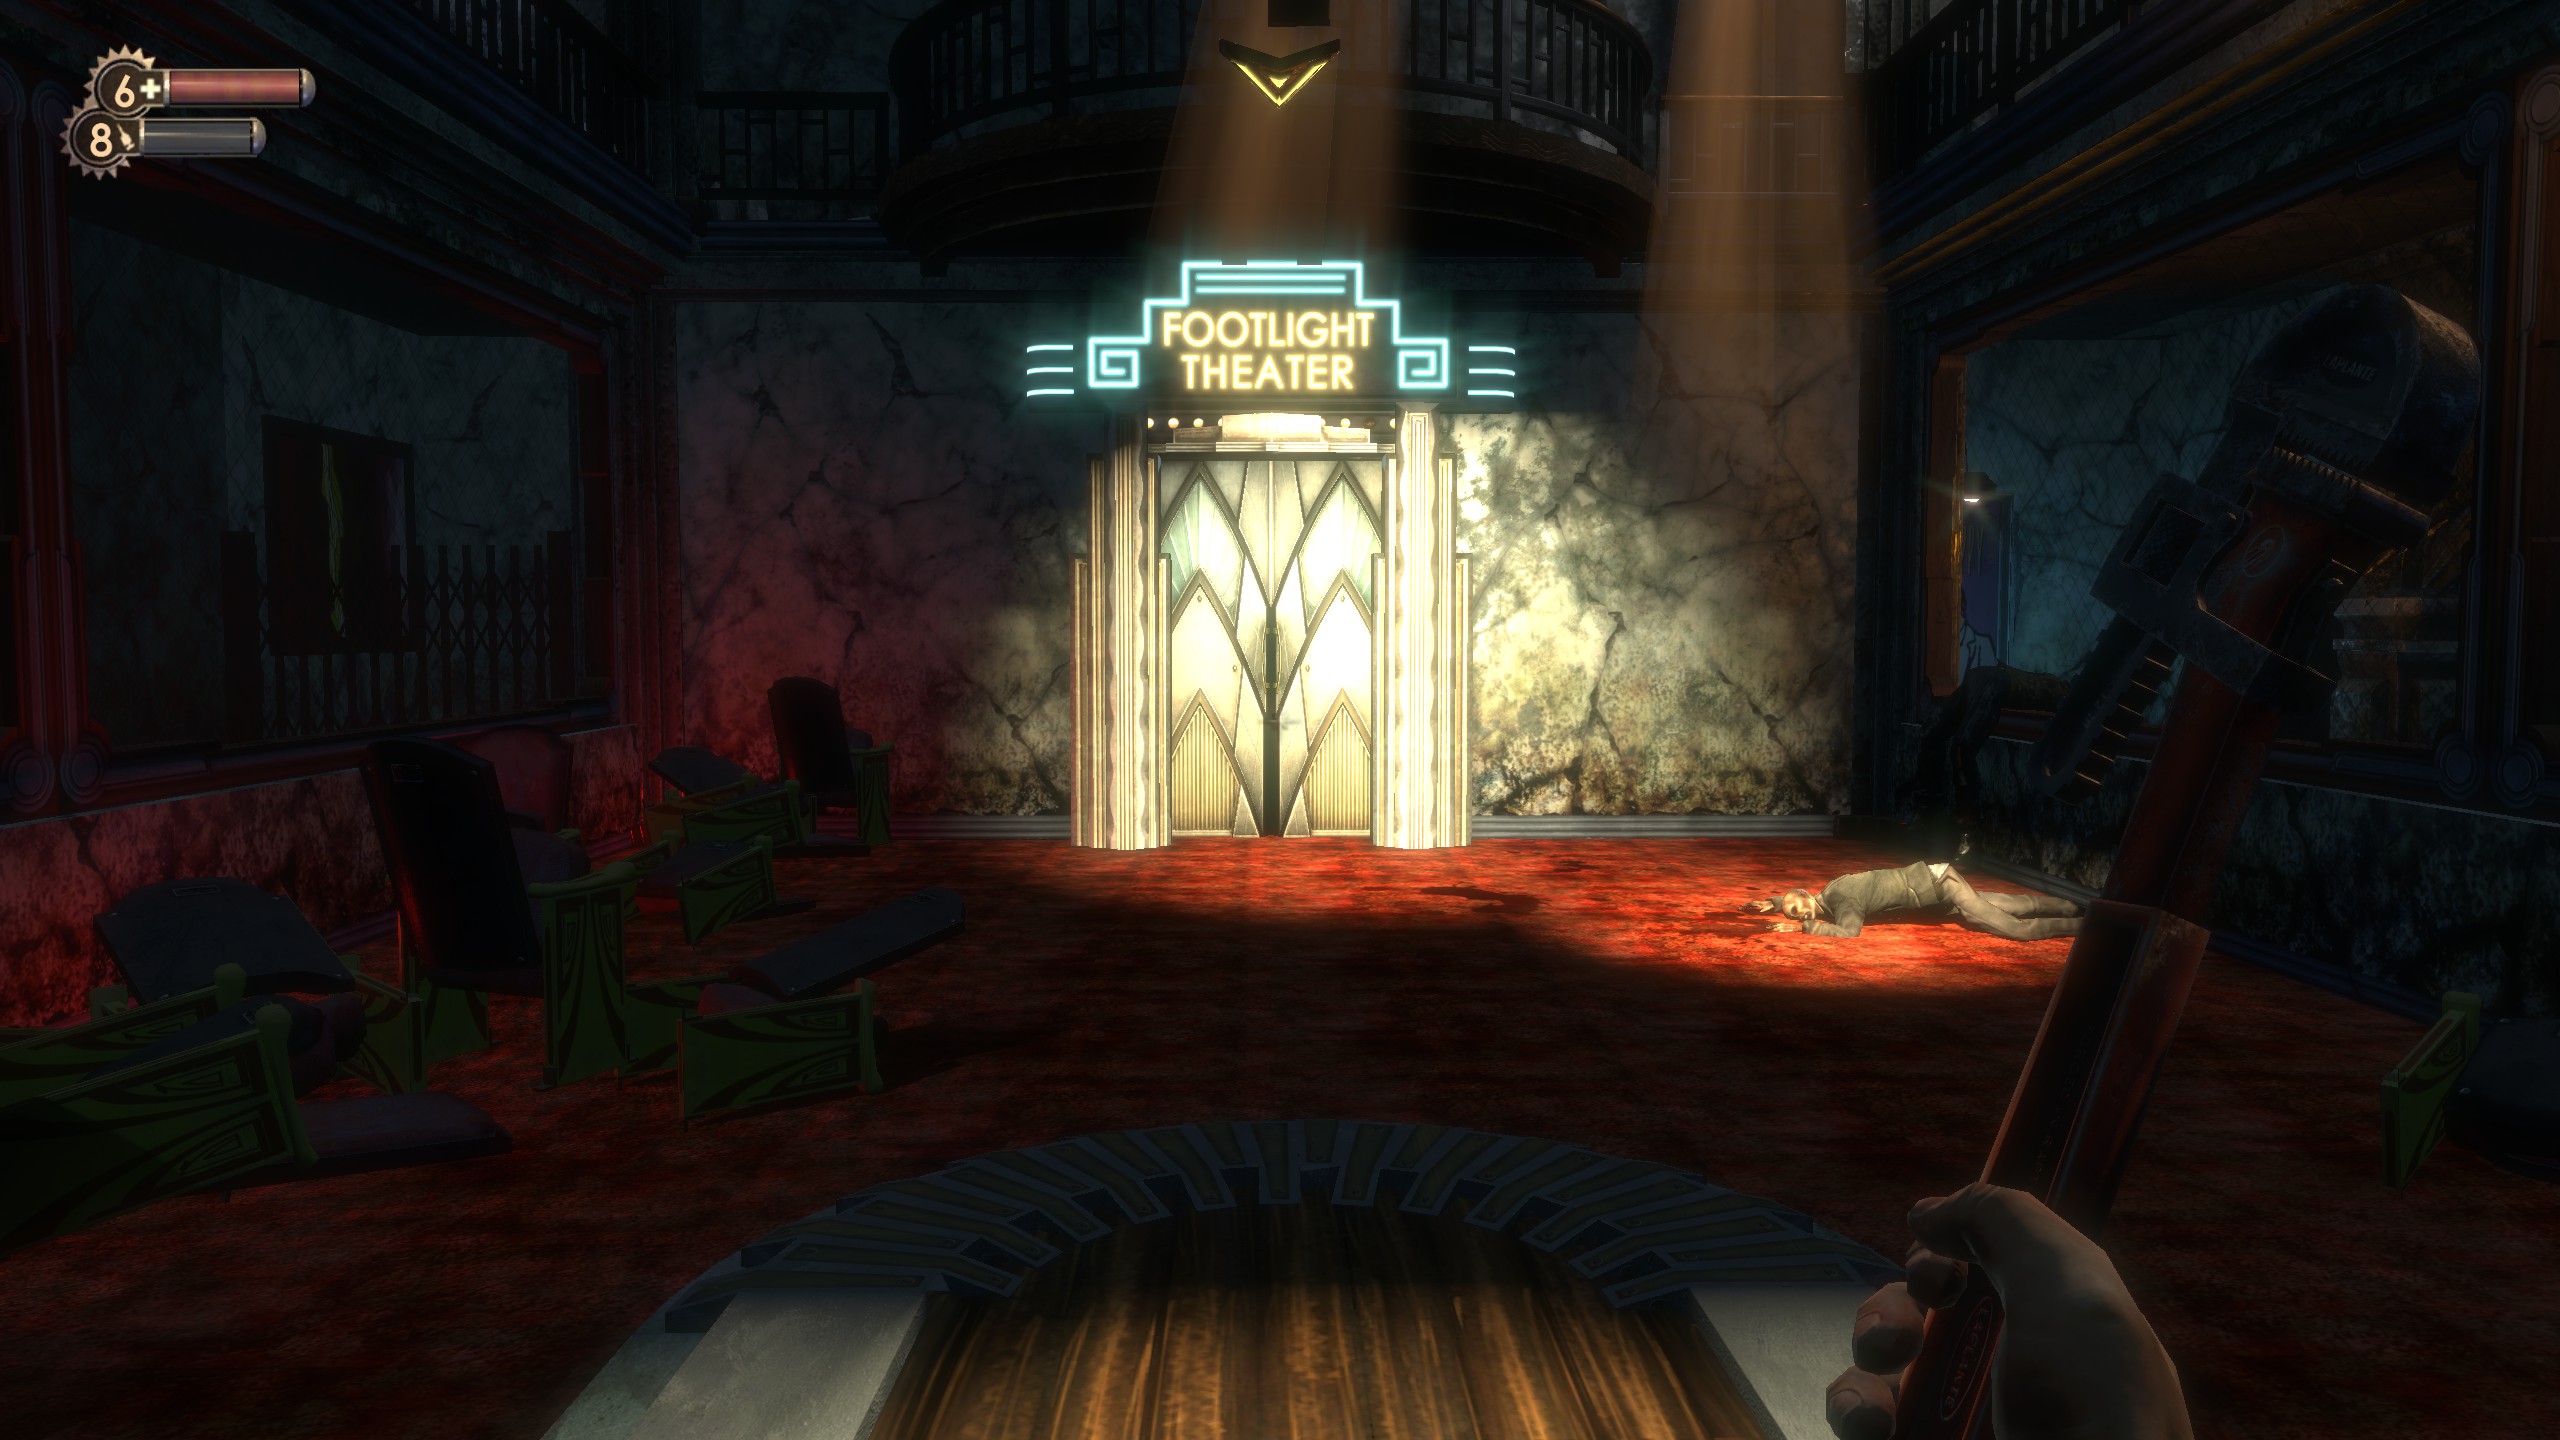
Before ReShade BioShock:
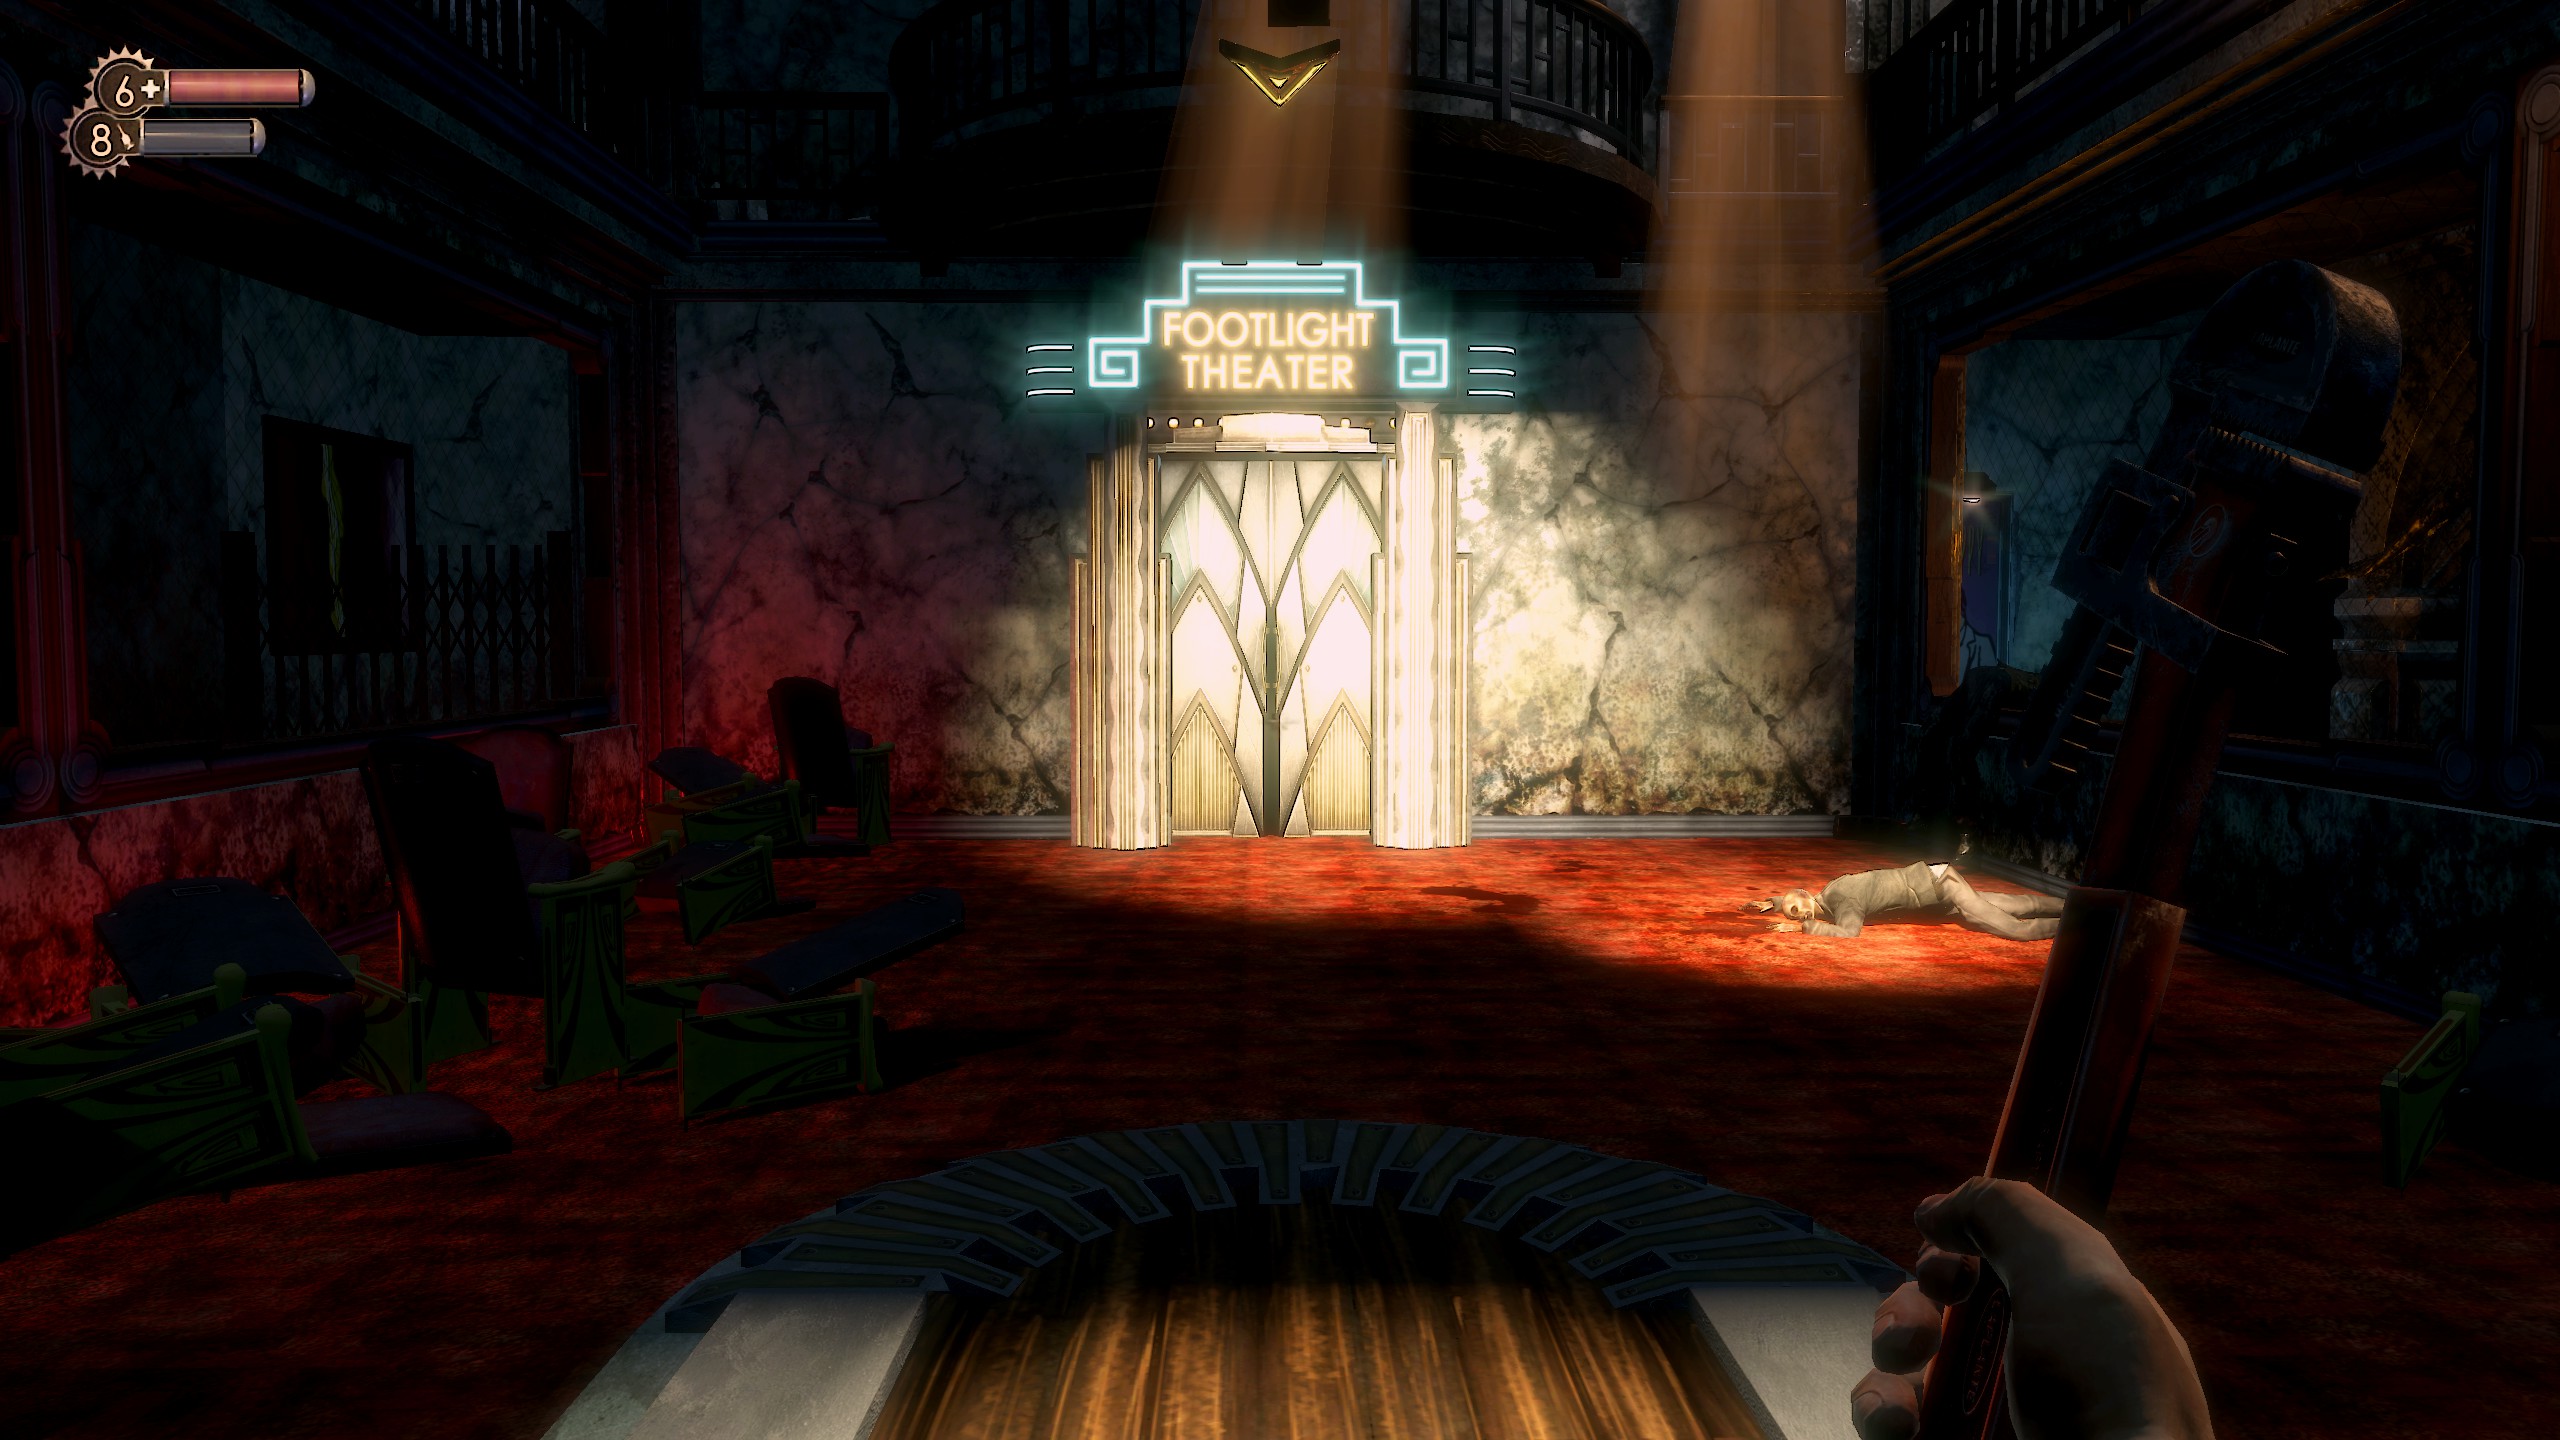
After ReShade BioShock:
Before ReShade BioShock Remastered:
After ReShade BioShock Remastered:
