Over the past little while I have been using NixOS as my daily driver Linux system. Nix takes a fairly unique approach to package management and configuration and is built using its own functional programming language. If you are interested in NixOS and want to know how it works @Dje4321 has a good write up as part of her Linux one year challenge that explains it in much more detail.
This guide goes into how to setup PCIe passthrough of a physical GPU to a virtual machine using NixOS and its functional programming language to configure the system and assumes you have a basic knowledge of NixOS and how to configure the system, if you are unsure please refer to the Nix manual on how to configure the system and of Libvirt/QEMU and how to setup a virtual machine.
Setting up IOMMU
Now in NixOS we need to modify our kernel parameters to enable IOMMU support on our system. In your /etc/nixos/configuration.nix add a boot line to your config to include the iommu flag. If you are on an AMD system this needs to be amd_iommu=on or similary intel_iommu=on on an Intel system:
boot.kernelParams = [ "amd_iommu=on" ];
If everything is good after a reboot we can now check if the iommu groups for the graphics cards are isolated by using this script:
#!/bin/bash
shopt -s nullglob
for d in /sys/kernel/iommu_groups/*/devices/*; do
    n=${d#*/iommu_groups/*}; n=${n%%/*}
    printf 'IOMMU Group %s ' "$n"
    lspci -nns "${d##*/}"
done;
The output should be similar to this with separate groups for either GPU:
IOMMU Group 31 0e:00.0 VGA compatible controller [0300]: NVIDIA Corporation GM204 [GeForce GTX 970] [10de:13c2] (rev a1)
IOMMU Group 32 0e:00.1 Audio device [0403]: NVIDIA Corporation GM204 High Definition Audio Controller [10de:0fbb] (rev a1)
IOMMU Group 33 0f:00.0 VGA compatible controller [0300]: NVIDIA Corporation GM204 [GeForce GTX 980] [10de:13c0] (rev a1)
IOMMU Group 34 0f:00.1 Audio device [0403]: NVIDIA Corporation GM204 High Definition Audio Controller [10de:0fbb] (rev a1)
We are looking to see if the graphics cards are in their own separate isolated IOMMU groups so we can freely pass the card to the virtual machine. Take note of the device ids of the card you are passing through e.g. 10de:13c0 and 10de:0fbb as we’ll need them later.
Note: that the VGA and Audio device on the same card can share a group. the important thing to remember is all devices in an IOMMU group must be passed to the virtual machine.
VFIO Configuration
With our GPUs isolated we can now configure NixOS to load the vfio-pci driver onto the second card by making some changes in the nix configuration file. One of the issues of vfio passthrough is the graphic drivers loading onto the card before we can attach the vfio-pci driver, to prevent this we can set a modules blacklist in our configuration:
# if you are using a Radeon card you can change this to amdgpu or radeon
boot.blacklistedKernelModules = [ "nvidia" "nouveau" ];
We can now also load the extra kernel modules that are needed for vfio:
boot.kernelModules = [ "vfio_virqfd" "vfio_pci" "vfio_iommu_type1" "vfio" ];
Now to attach the card to the vfio-pci driver. There are several ways of doing this depending on your setup, to standard approach is by adding the device ids we found earlier from the iommu list to the modprobe config:
boot.extraModprobeConfig = "options vfio-pci ids=10de:13c0,10de:0fbb";
If the above doesn’t work for whatever reason or you are using the same graphics card for both the host and guest OSes we can override the driver to the device on a specific PCIe slot during bootup. Again we can take note of the slot id from the iommu list earlier e,g, 0f:00.0 and 0f:00.1 and add them to the DEVS line in the postBootCommands configuration below:
postBootCommands = ''
  DEVS="0000:0f:00.0 0000:0f:00.1"

  for DEV in $DEVS; do
    echo "vfio-pci" > /sys/bus/pci/devices/$DEV/driver_override
  done
  modprobe -i vfio-pci
'';
Example vfio configuration
boot = {
  loader = {
    # Use the systemd-boot EFI boot loader.
    systemd-boot.enable = true;
    efi.canTouchEfiVariables = true;
  };

  kernelParams = [ "amd_iommu=on" ];
  blacklistedKernelModules = [ "nvidia" "nouveau" ];
  kernelModules = [ "kvm-amd" "vfio_virqfd" "vfio_pci" "vfio_iommu_type1" "vfio" ];

  postBootCommands = ''
    DEVS="0000:0f:00.0 0000:0f:00.1"

    for DEV in $DEVS; do
      echo "vfio-pci" > /sys/bus/pci/devices/$DEV/driver_override
    done
    modprobe -i vfio-pci
 '';
};
Booting the system
With all the needed configuration setup rebuild NixOS and reboot the system.
If everything was well and you booted into your system we can check if everything was loaded successfully by running dmesg | grep -i vfio to see if vfio has bound to the card, depending on the method you used you should see something like this:
[    4.335689] VFIO - User Level meta-driver version: 0.3
[    4.355254] vfio-pci 0000:0f:00.0: vgaarb: changed VGA decodes: olddecodes=io+mem,decodes=i
[    5.908695] vfio-pci 0000:0f:00.0: vgaarb: changed VGA decodes: olddecodes=io+mem,decodes=i
and that the vfio-pci driver has loaded onto the card with lspci -nnk -d 10de:13c0
0f:00.0 VGA compatible controller [0300]: NVIDIA Corporation GM204 [GeForce GTX 980] [10de:13c0] (rev a1)
        Subsystem: Gigabyte Technology Co., Ltd Device [1458:367c]
        Kernel driver in use: vfio-pci
        Kernel modules: nvidiafb, nouveau, nvidia_drm, nvidia
Libvirt Virtualisation Setup
Now you should be able to attach the second graphics card to a virtual machine but first If you haven’t already we need to setup libvirt. This can be done by adding the visualisation configuration to enable the libvirtd service and qemuOvmf firmware:
virtualisation = {
  libvirtd = {
    enable = true;
    qemuOvmf = true;
};
You can also install virt-manager by either adding it to your packages list in the configuration or to your local user with nix-env -i virt-manager which we will use to configure the virtual machines.
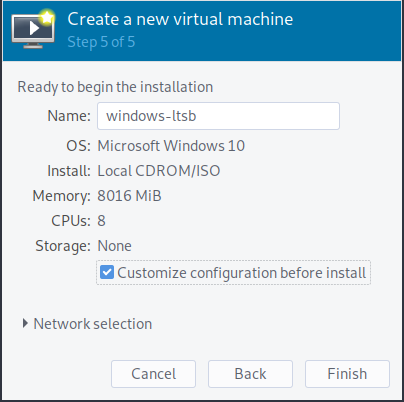
Using virt manager go through the wizard to setup a virtual machine and on step 5 check Customize configuration before install as we need to change some things to make our virtual machine bootable.
Virt Manager stage 5

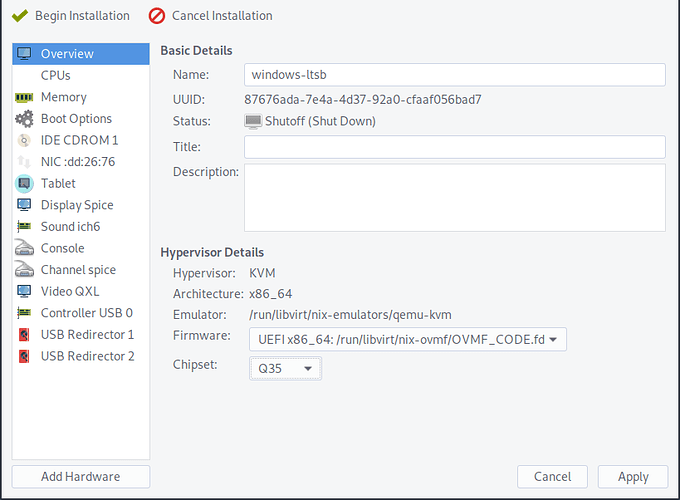
From here we want to change the firmware from BIOS to using the OVMF firmware and the chipset from the older i440FX to Q35 which will give us fully PCIe support.
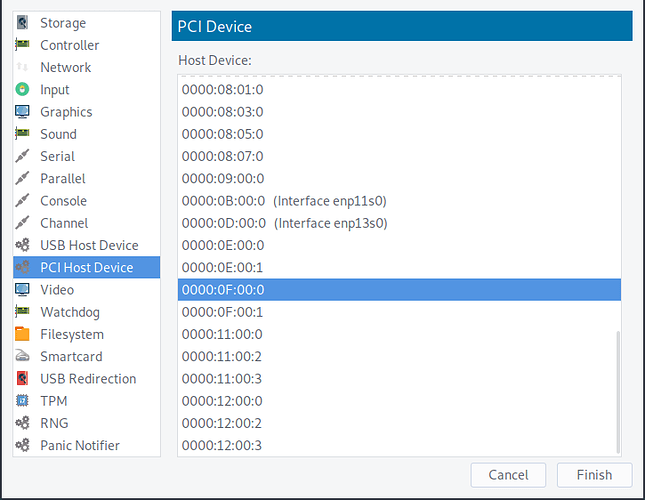
Now we can finally add the graphics card to the virtual machine. Go to Add Hardware > PCI Host Device and select host device for both the vga and audio adapter for your card.
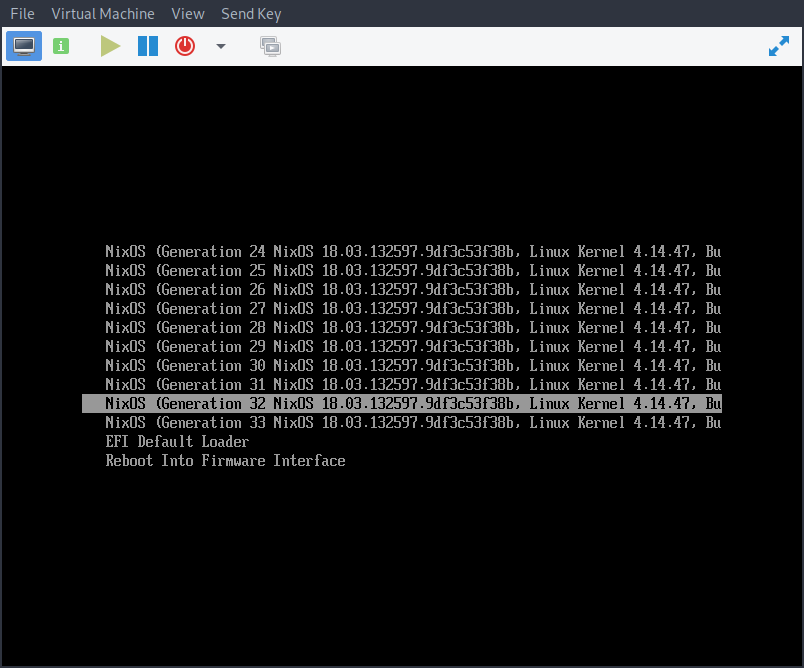
if everything worked start the virtual machine and it will attach to your graphics card and boot into the system ![]()
Modifying kernel (Optional)
If you have more PCIe devices you want to pass through but your iommu rules are not favourable we can patch the NixOS kernel to include the ACS patch which will loosen up the groups and allow us to pass through more devices.
boot.kernelPackages = pkgs.linuxPackages_latest;
nixpkgs.config.packageOverrides = pkgs: {
    linux_latest = pkgs.linux_latest.override {
      kernelPatches = pkgs.linux_latest.kernelPatches ++ [
        { name = "acs";
          patch = pkgs.fetchurl {
            url = "https://aur.archlinux.org/cgit/aur.git/plain/add-acs-overrides.patch?h=linux-vfio";
            sha256 = "b90be7b79652be61f7d50691000f6a8c75a240dc2eee2667b68d984f67583f77";
          };
        }
      ];
    };
  };
and add the pcie_acs_override to your kernel parameters:
kernelParams = [ "amd_iommu=on" "pcie_acs_override=downstream,multifunction" ];
Note: When rebuilding the configuration to compile the new kernel it is recommended to run the rebuild command with the optional --cores flag set to the number of threads on your CPU, otherwise it will compile with a single core such as nixos-rebuild boot --cores 16.


